Results 1 to 9 of 9

Thread: Show us ya jig !

  1. #1

    Show us ya jig !

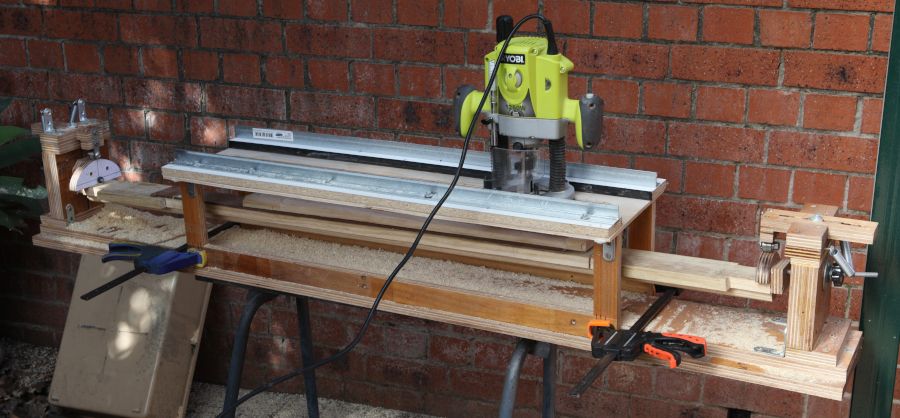
    Since I can't get to any of my instrament kits or scatch biult materials due to the lockdown, I have been working on some jigs both before the lockdown and during.

    I wanted to make a fret board radius sanding block. the first jig I did wasn't great:


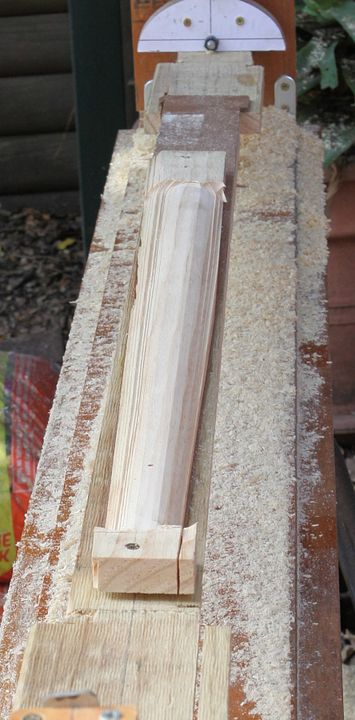
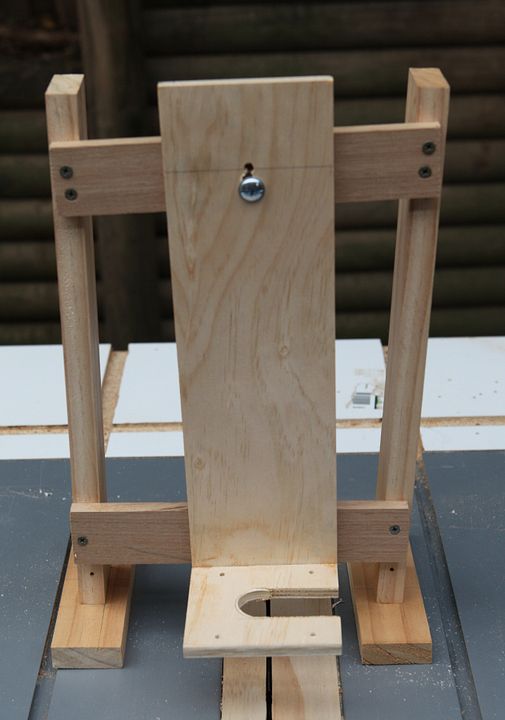
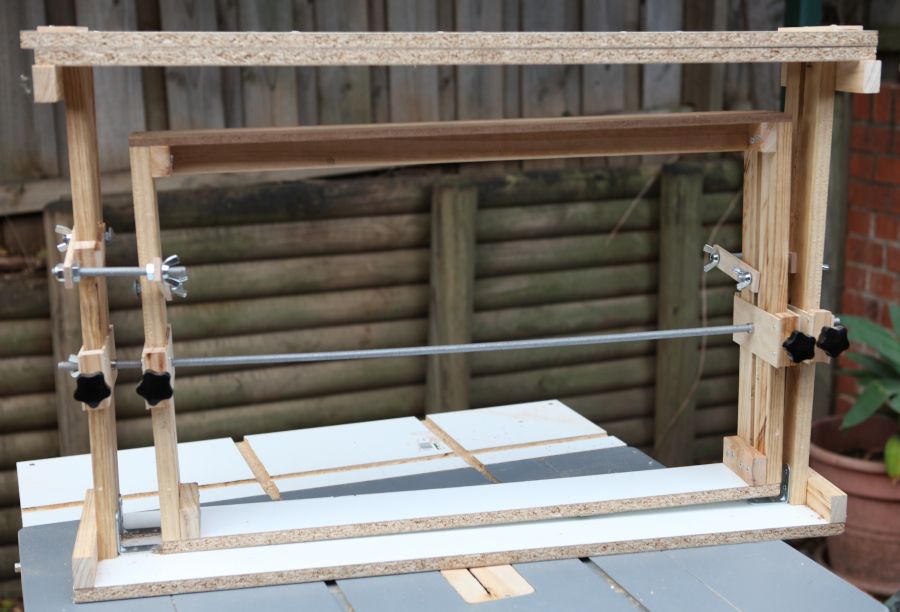
    It didn't end up with the radius in the center of the block, it was a bit wobbly and the bit I used was a round nose bit. I ended up with a series of gouges instead of a nice smooth surface. So, I had another crack. Sometimes to make a jig you first have to....... make a jig! :


    to end up with:


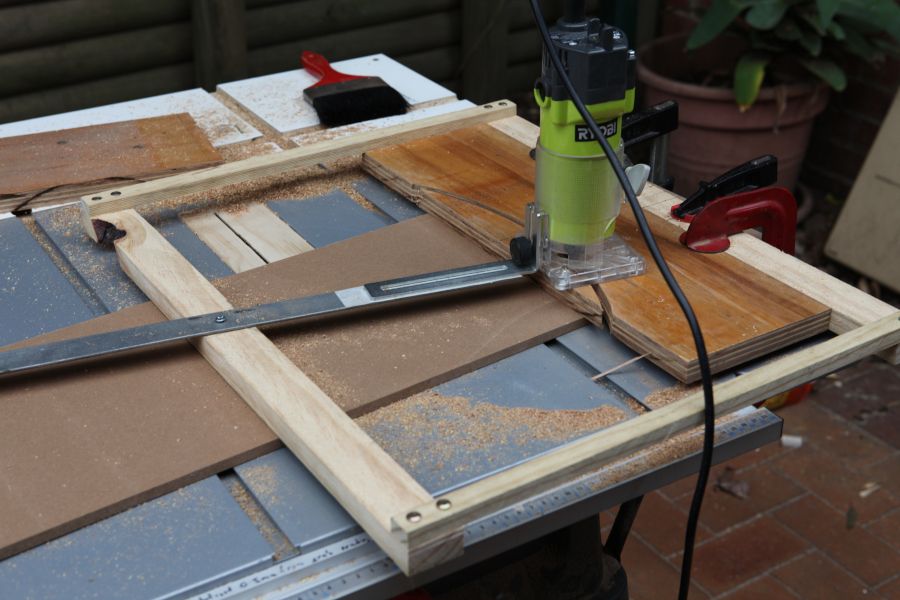
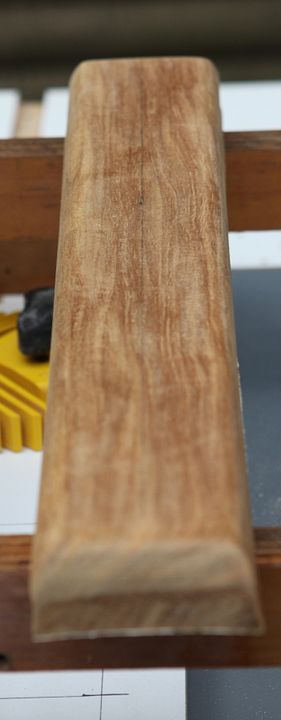
    which was used to make:


    The shaping block has 60 grit which will soon become obsolete because of this:


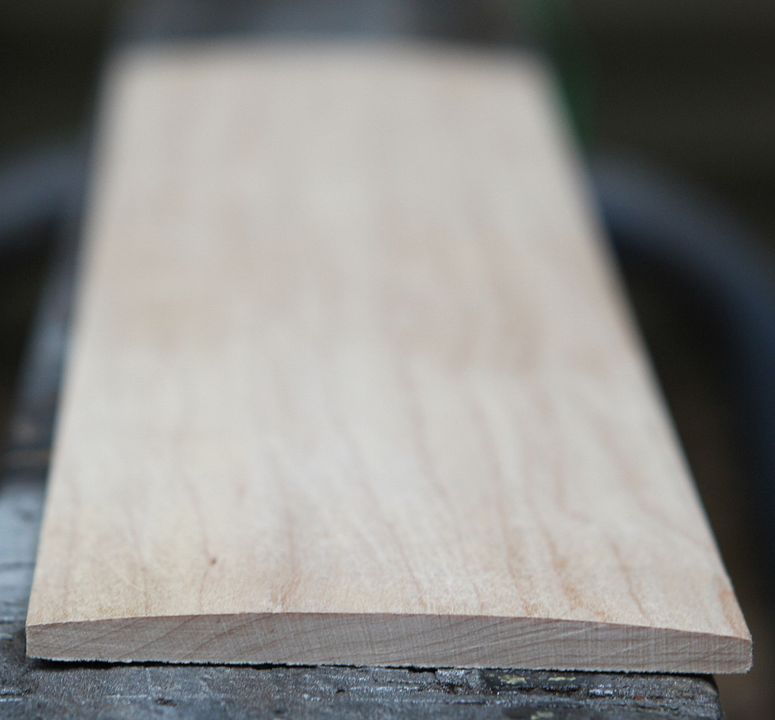
    which can be used to do this:


    I got the plans from the Kappi Guitars website. I'm in the process of making a smaller block with velcro so that I can use round pads to smooth the fretboard after radiusing.

    The jig can also do fretboards with changing radiuses. This soon will be an obsolete jig as you will see when I get to try out the next jig I've just about done .
    Last edited by Rabbit; 27-08-2021 at 07:15 PM.

  2. #2
    Mentor Trevor Davies's Avatar
    Join Date
    May 2020
    Location
    Perth
    Posts
    1,378
    Great use of your lockdown! Love it.
    PitBull Builds: FVB-4, LP-1SS, FBM-1, AG-2, TB-4, SSCM-1, TLA-1, TL-1TB, STA-1HT, DSCM-1 Truckster, ST-1, STA-1, MBM-1.

    Scratch Builds: Pine Explorer, Axe Bass, Mr Scary, Scratchy Tele's.

    The little voices in my head keep telling me "build more guitars"

  3. #3
    Member ross.pearson's Avatar
    Join Date
    May 2021
    Location
    Lower Upper Woop Woop, WA
    Posts
    211
    Jigs out for the boys!

    Huge fan of all jigs, big and small. Personally, I always do things the most needlessly difficult of ways, but I love seeing other peoples ingenuity!

  4. #4
    Mentor DarkMark's Avatar
    Join Date
    Sep 2017
    Location
    Perth, WA
    Posts
    1,531
    Whatever you have done it beyond me, but I like the end result!

  5. #5
    Overlord of Music McCreed's Avatar
    Join Date
    Oct 2018
    Location
    AUS
    Posts
    3,552
    I don't have any jigs to display (at least nothing worth posting) but your second photo in post #1 is the same principle I used with router to cut the circle in my baffle board for my recent speaker cabinet build.

    So much neater and more precise than a freehand jigsaw, and I just didn't have 11-1/2" hole saw!
    Making the world a better place; one guitar at a time...

  6. #6
    Quote Originally Posted by McCreed View Post
    I don't have any jigs to display (at least nothing worth posting) but your second photo in post #1 is the same principle I used with router to cut the circle in my baffle board for my recent speaker cabinet build.

    So much neater and more precise than a freehand jigsaw, and I just didn't have 11-1/2" hole saw!
    I'll be using something similar I expect to make jigs to do the truss rod channels in the cliffenbacker (which has curved routes) and the Unicorn which I'll be doing a Warwick style truss rod which also has a curved route.

  7. #7
    Ok, so first go at using my neck shaping jig. It's a heavily modified version of the plans from Kappi Guitars.


    Since I'll be doing neck through basses rather than short guitar necks, I had ro make everything longer. What I hadn't taken into account was that the router bit I wanted to use wasn't long enough. Then I realised I also hadn't made the router part of the jig high enough to cope with a neck through blank (50mm+ thick) instead of my 20mm thick test blanks.

    to work out how big to make the rear cam I drew out the front and side view of the rotating bed, put in 200% the height and width at the first fret 18mm from the front stop, extrapolated lines from the width of the neck at the first fret and height (the taper will be less than this measurements by time they get to where the headstock cam would be). I measured the distance between the extrapolated lines and the front cam width and height, and marked that distance on the drawing at the end of the fret board and neck taper and drew lines thus giving me lines that matched the taper of the fret board and neck thickness from the head cam all the way back to where the back cam would be. This gave me width and height measurements for the rear cam . This could have all been done with trig, but it's been decades since I last did any trigonometry....use it or loose it <shrug>

    Here's what I ended up with:


    I had to get a strait two fluted bit to reach. I'm still not quite sure why there steps on one side of the neck and not the other. I was using the same increments to move the blank between each cut.

    Some observations. The springs at the neck end are way too stiff, it made it difficult to rotate as the cam got wider. as a result the cam bearing plate moved.

    The neck measurements were almost correct at the 12th fret but too small at the 1st. I'm not sure why since I set the stop on the router to be no thinner than the neck at the 1st fret. The ration it was off by was about right for height to width. I have a choice of making a sligtly larger head cam, or I have about 120mm to play with between the current cam position and where the headstock starts. Moving it closer to the headstock would increase the thickness and width at the 1st fret.

  8. #8
    GAStronomist Simon Barden's Avatar
    Join Date
    Oct 2016
    Location
    Reading, UK
    Posts
    10,547
    It!s hard to see from the photos but do both ends have the spindles moving up and down in slots?

  9. #9
    Quote Originally Posted by Simon Barden View Post
    It!s hard to see from the photos but do both ends have the spindles moving up and down in slots?
    Yes Simon, so the bed the blank is on can move up and down as the thickness of the neck profile cams changes as the bed rotates. Springs put pressure up to hold the cams against stateboard bearings.

Posting Permissions

  • You may not post new threads
  • You may not post replies
  • You may not post attachments
  • You may not edit your posts
  •