I play bass in an 80s band and I've really wanted to try a Precision bass, just as an alternative to my EBMM Stingray. Id found a mid 80s Japanese Fender with a rosewood neck that looked and sounded great. I was just about to buy it, but that was literally a week before the whole world shutdown. So I thought one of these Pitbull kits might be a good option.
I had planned to paint it in a totally OTT red glitter sparkle finish (because 80s) from Rustoleum. Unfortunately, by the time I was ready to go, stock of that paint disappeared along with so many other items from overseas. So, I eventually went for a apple green mica from Duplicolor. I had actually chosen an electric metallic green, but they only had one can of that colour at SuperCheapAuto. I used that as a base colour. The apple green actually matches a suit I wear on stage, so in the end it all worked out.
Mistakes were made. Lessons were learnt.
The main things I learnt were :
Use decent clamps
Be careful with the screws ( or maybe source some stronger ones for the important places)
Be careful when youre spray painting. So many errors with what was intended to be the last spray of a coat.
Make sure you have a finishing method worked from start to finish. There are soooo many videos out there that its really easy get a bit lost.
As soon as I opened the kit, I was really impressed with the body and the neck. The timber in the body had a nice grain and seemed really solid. The neck looked good and straight.
The neck pocket was very snug. In fact, that was the first thing I planned to address. It had a gap of maybe half a cm between the end of the neck and the top of the neck pocket. This was due to a slightly high left corner. I initially hand sanded it little by little and then tried a dremel with a drum sander on it. Eventually I got that gap down to a more passable width. Its one of those points thats easy to take too much if youre not careful.
Once I had the neck pocket sorted, I loose fitted the scratch plate and worked out where to mount the bridge. Ive seen other kits that have holes pre-drilled for the neck and sometimes the bridge, too. This kit didnt have any of those, so there was lots of measuring and clamping and pencil marks. This is where decent clamps are really helpful. I ended up buying a few from Bunnings. If I do another build, Id probably get more, or even better ones. Having someone around to help at this point is another option. Haha.
I used the neck plate as a template and drilled the holes for the neck in the body and into the neck. That was really difficult angling the drill around the clamps and keeping everything in position. Either way, the neck was now set in place. The neck bolts really struggled and the Phillips heads started rounding. I added a set to my list of parts to order. I had used a bar of soap to grease the screws but, I worked out later, you really need to coat them well for it to work. I ended up pushing them as far as I could into the soap and trying to keep all the flakes on as I put them in.
Looking back, I think the routing of the pickup and controls may have been out slightly as the scratch plate didnt quite match up with neck or the cavity. I ended up grinding a little from the top inside edge of the scratch plate, along the neck so I could rotate it slightly to cover the neck pocket at the top and the control cavity at the bottom.
I actually ordered a white pearloid pickguard from Pitbull, at a later point and it didnt quite fit the control cavity fully in either direction. So thats what twigged me that it may have been out slightly to begin with.
I spent several days, a few hours at a time, sanding the body and back for the neck. Grease and dust remover is really helpful when youre trying to work out how far youve actually gone under all the dust. I bought a big bottle from SCA and its great stuff. It gets rid of the dust and brings up the grain for a few minutes.
Once I had the bridge measured and marked, I drilled the holes. I had almost all the screws in when I busted two (or was it three) screws. I think it may have even happened bringing them back out. I then had to track down a screw remover kit and some wood fill putty. I had varying degrees of success with the screw remover, so I essentially had to fill in most of the bridge holes and offset it by a mm or two and try again. To check that it was still going to work I then fit the tuners and strings.
I drilled the holes for the tuner backing plates. Its a tiny screw size so the pilot hole drill bit actually got stuck. I tracked down a hand drill with a smaller chuck. That was actually easier to deal with and allowed me to back out the drill bit.
As luck would have it, I broke the head of one of the mounting screws in the G string machine head. No matter what I did it was not budging. I just resigned myself that Id only have three screws in that tuner. Ive seen old basses with worse, so its not the end of the world. Also, the face mounts for the tuners were reeeeeally snug. So that was a job for later.
Once I had the bass looking like an actual working instrument, I mounted the string tree. I used my stingray for reference and checked a few headstock images. That made the strings fit more securely in the nut.
I looked at the wiring diagram and worked out that the pickguard and pickups were already soldered in. Score! So I plugged it in and had a test play. It sounded great. The only thing missing was the hole for the earth wire. I needed to put a hole under the middle of the bridge. Someone on the forum here suggested marking a pencil line and using a long 4 mm drill bit. Makes the job a lot easier. I had thought I might need to go in from both the cavity side and the top. I started from the cavity side and basically only really took a few small notches out of the cavity lip. The long drill bit made it through from the bridge in one go and gave me a small hole not dissimilar to the truss rod opening in the neck. I drilled down a few mm first, then at an angle.
At this point I ordered the tru-oil for the neck, replacement neck screws and the different pickguard.
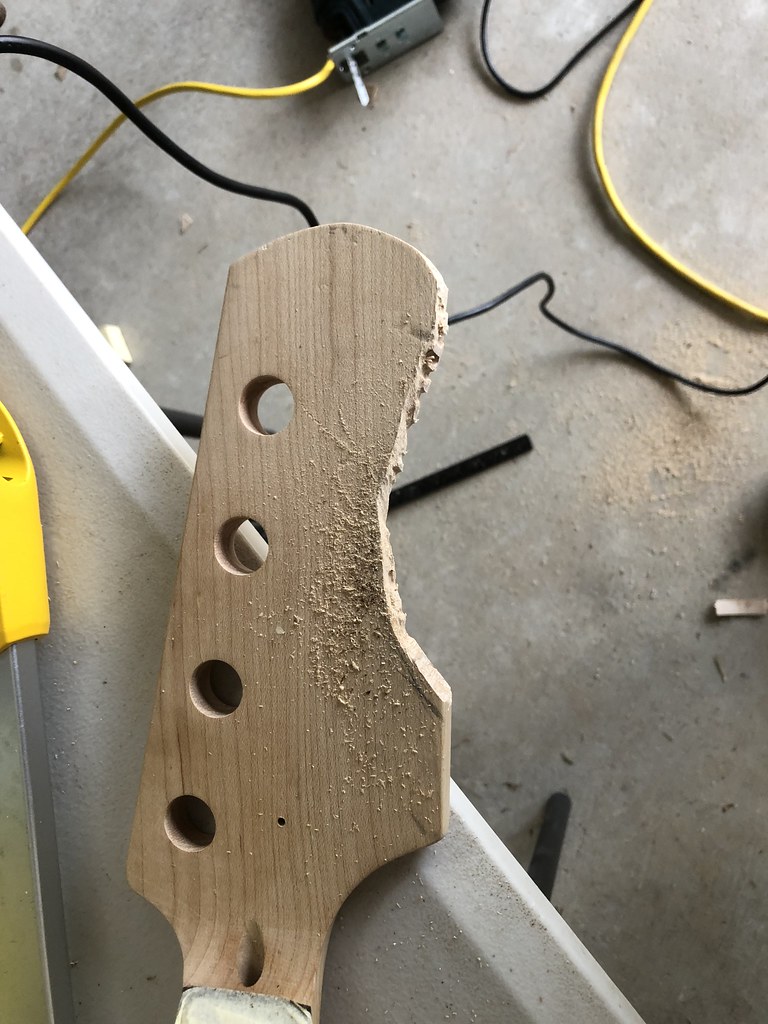
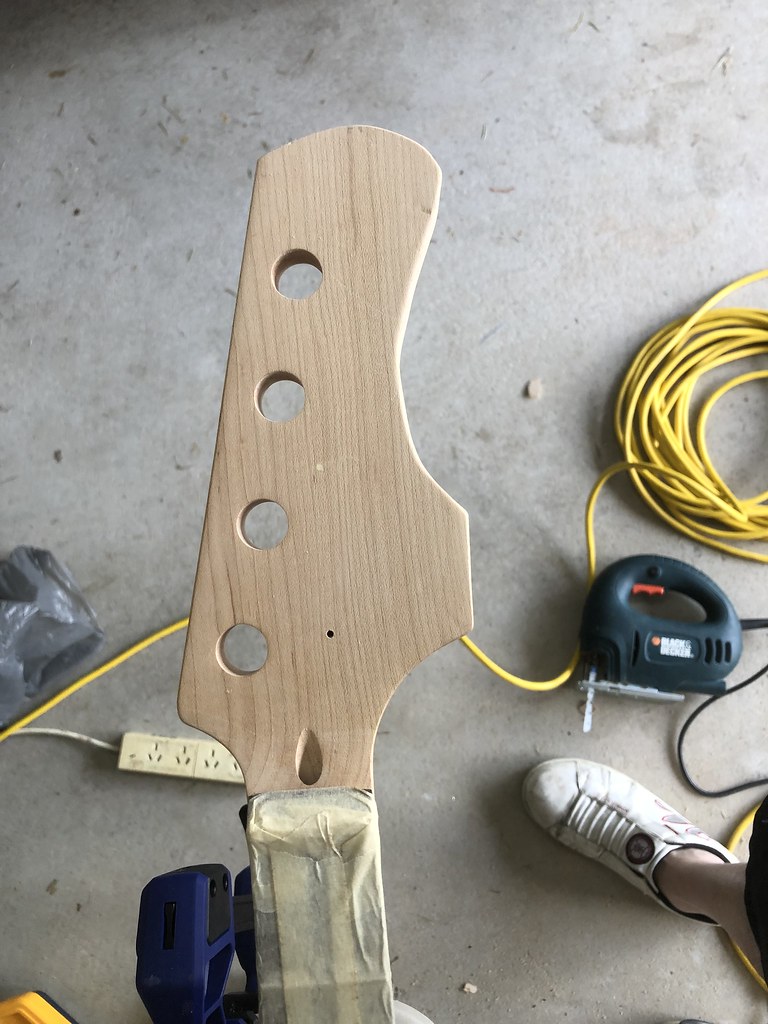
My next job was cutting the headstock. I didnt want to just make a Fender headstock, mainly because I didnt want to mislead anyone. Haha. So I came up with a pencil design using some tracing paper and marking out the existing one, then marking what I was planning on cutting off. I used a coke can, a bigger bottle and a protractor to shape some curves. Cutting it was not as easy. Is it ever, though? I tried a jig saw and got through from both ends but that kept vibrating the neck out of the clamp I had it in. I ended up using the dremel to drill several holes along the line until I had it separated. It looked pretty rough but once Id sanded it and shaved the square edges off the whole headstock, I was pretty happy with it.
Once Id given the neck another sanding, I started the tru-oil layers on the maple. I ended up doing 9 or 10 layers sanding between every 2 really lightly with 0000 steel wool. You have to be careful for drips around the edges and tuner holes. Every time it was looking sweet, Id notice another drip. Ugh. It came up looking really nice, though. Not perfect but not bad.
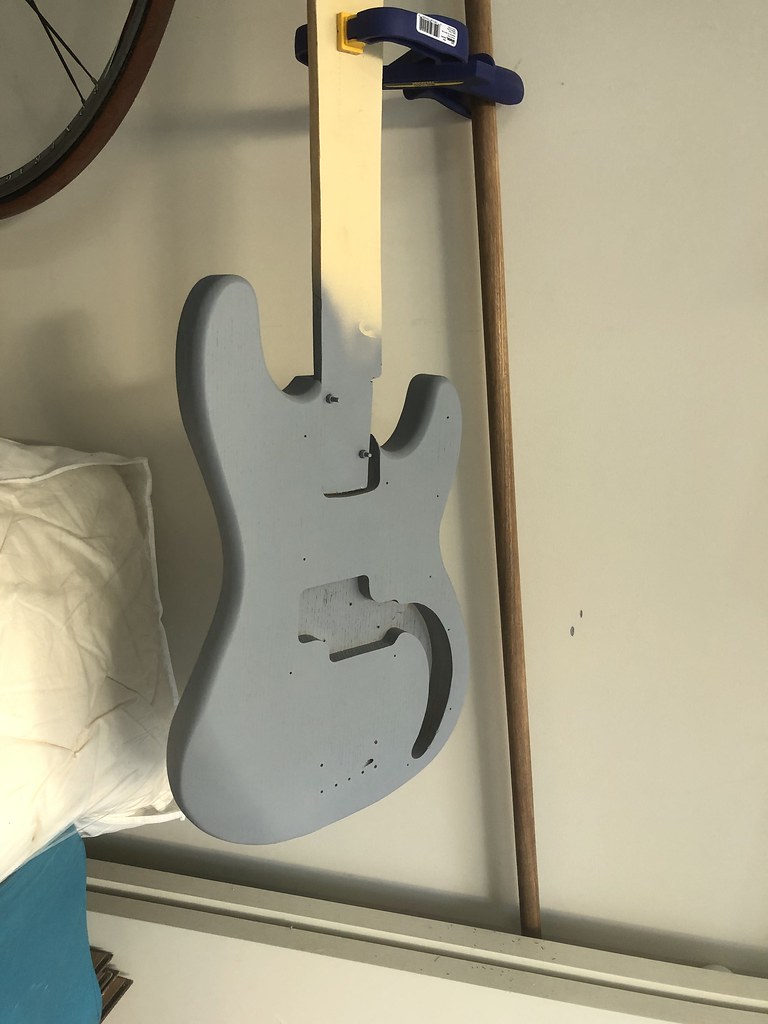
I then moved on to painting. If I was to do another one of these kits and wanted that super smooth finish, I would have used grain filler before the primer. I actually quite liked the grain, so I was ok with the grain giving texture to the paint. I was aiming for a bass that looked like one of those 80s vinyl couches at this point. I applied two coats of primer and from what Id read, I needed to paint within an hour or after two days.
I then applied a few light coats of the paint and really shouldve practiced a bit first.
The first coat was bit tiger stripey. Every time I had a coat looking good I get a splatter right at the end or a big drip. So frustrating. A lot of this was because I was trying to hold it while I was painting it. Something else to add to the list for next time.
I let it dry for a day or two. It looked slightly better when it was dry. I then sanded it back a bit and applied more coats. In hindsight, I should have sanded a bit heavier and just got it back closer to the primer and rid of more of the paint runs. I was presuming that the later coats would fill it in a bit more. That didnt really happen.
It did look a little more uniform, though.
Next was the clear coat layers. Again, it was splotchier and orange peelier than Id like. I just had to let this gas off for a few weeks before I could sand and polish it.


Timbah First Bass by Tim Gill, on Flickr


 Reply With Quote