Page 3 of 5 FirstFirst 1 2 3 4 5 LastLast
Results 21 to 30 of 50

Thread: Greg's #4 - Scratch SG

  1. #21
    Mentor Trevor Davies's Avatar
    Join Date
    May 2020
    Location
    Perth
    Posts
    1,378
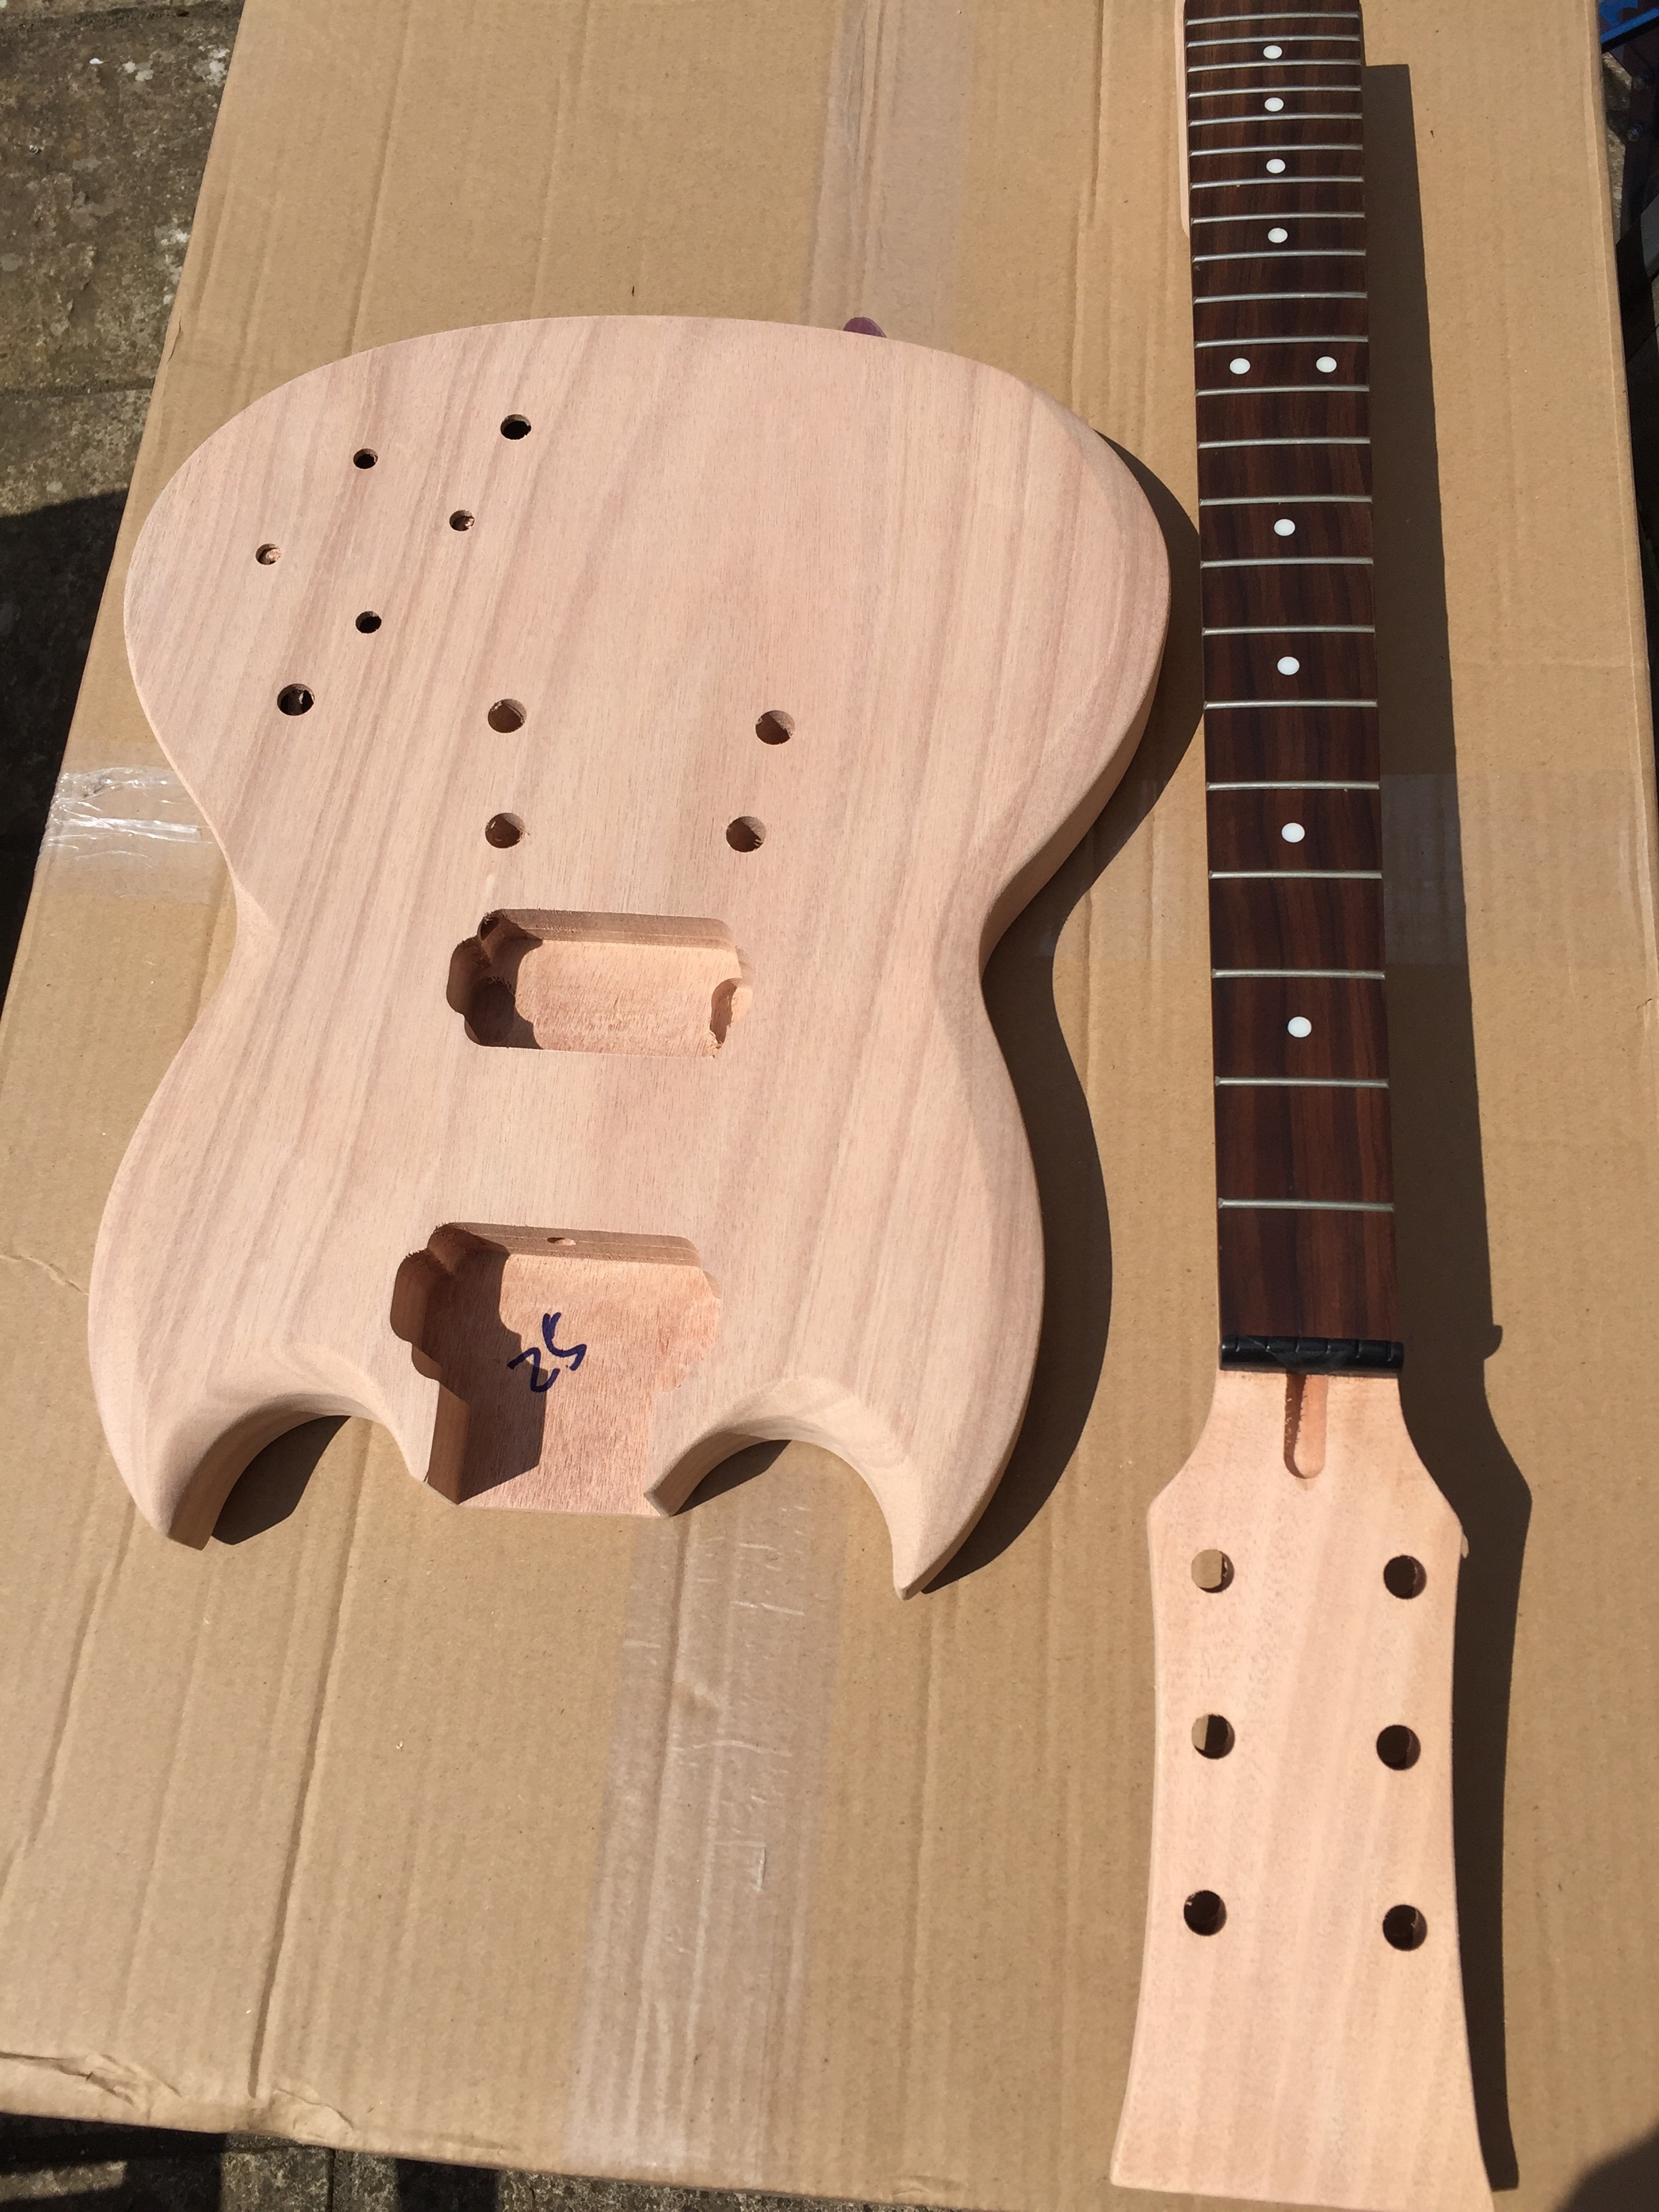
    On the SG-2 kit there was a drilled hole from the neck cavity through to the bridge PUP cavity. You can see it in the picture below.
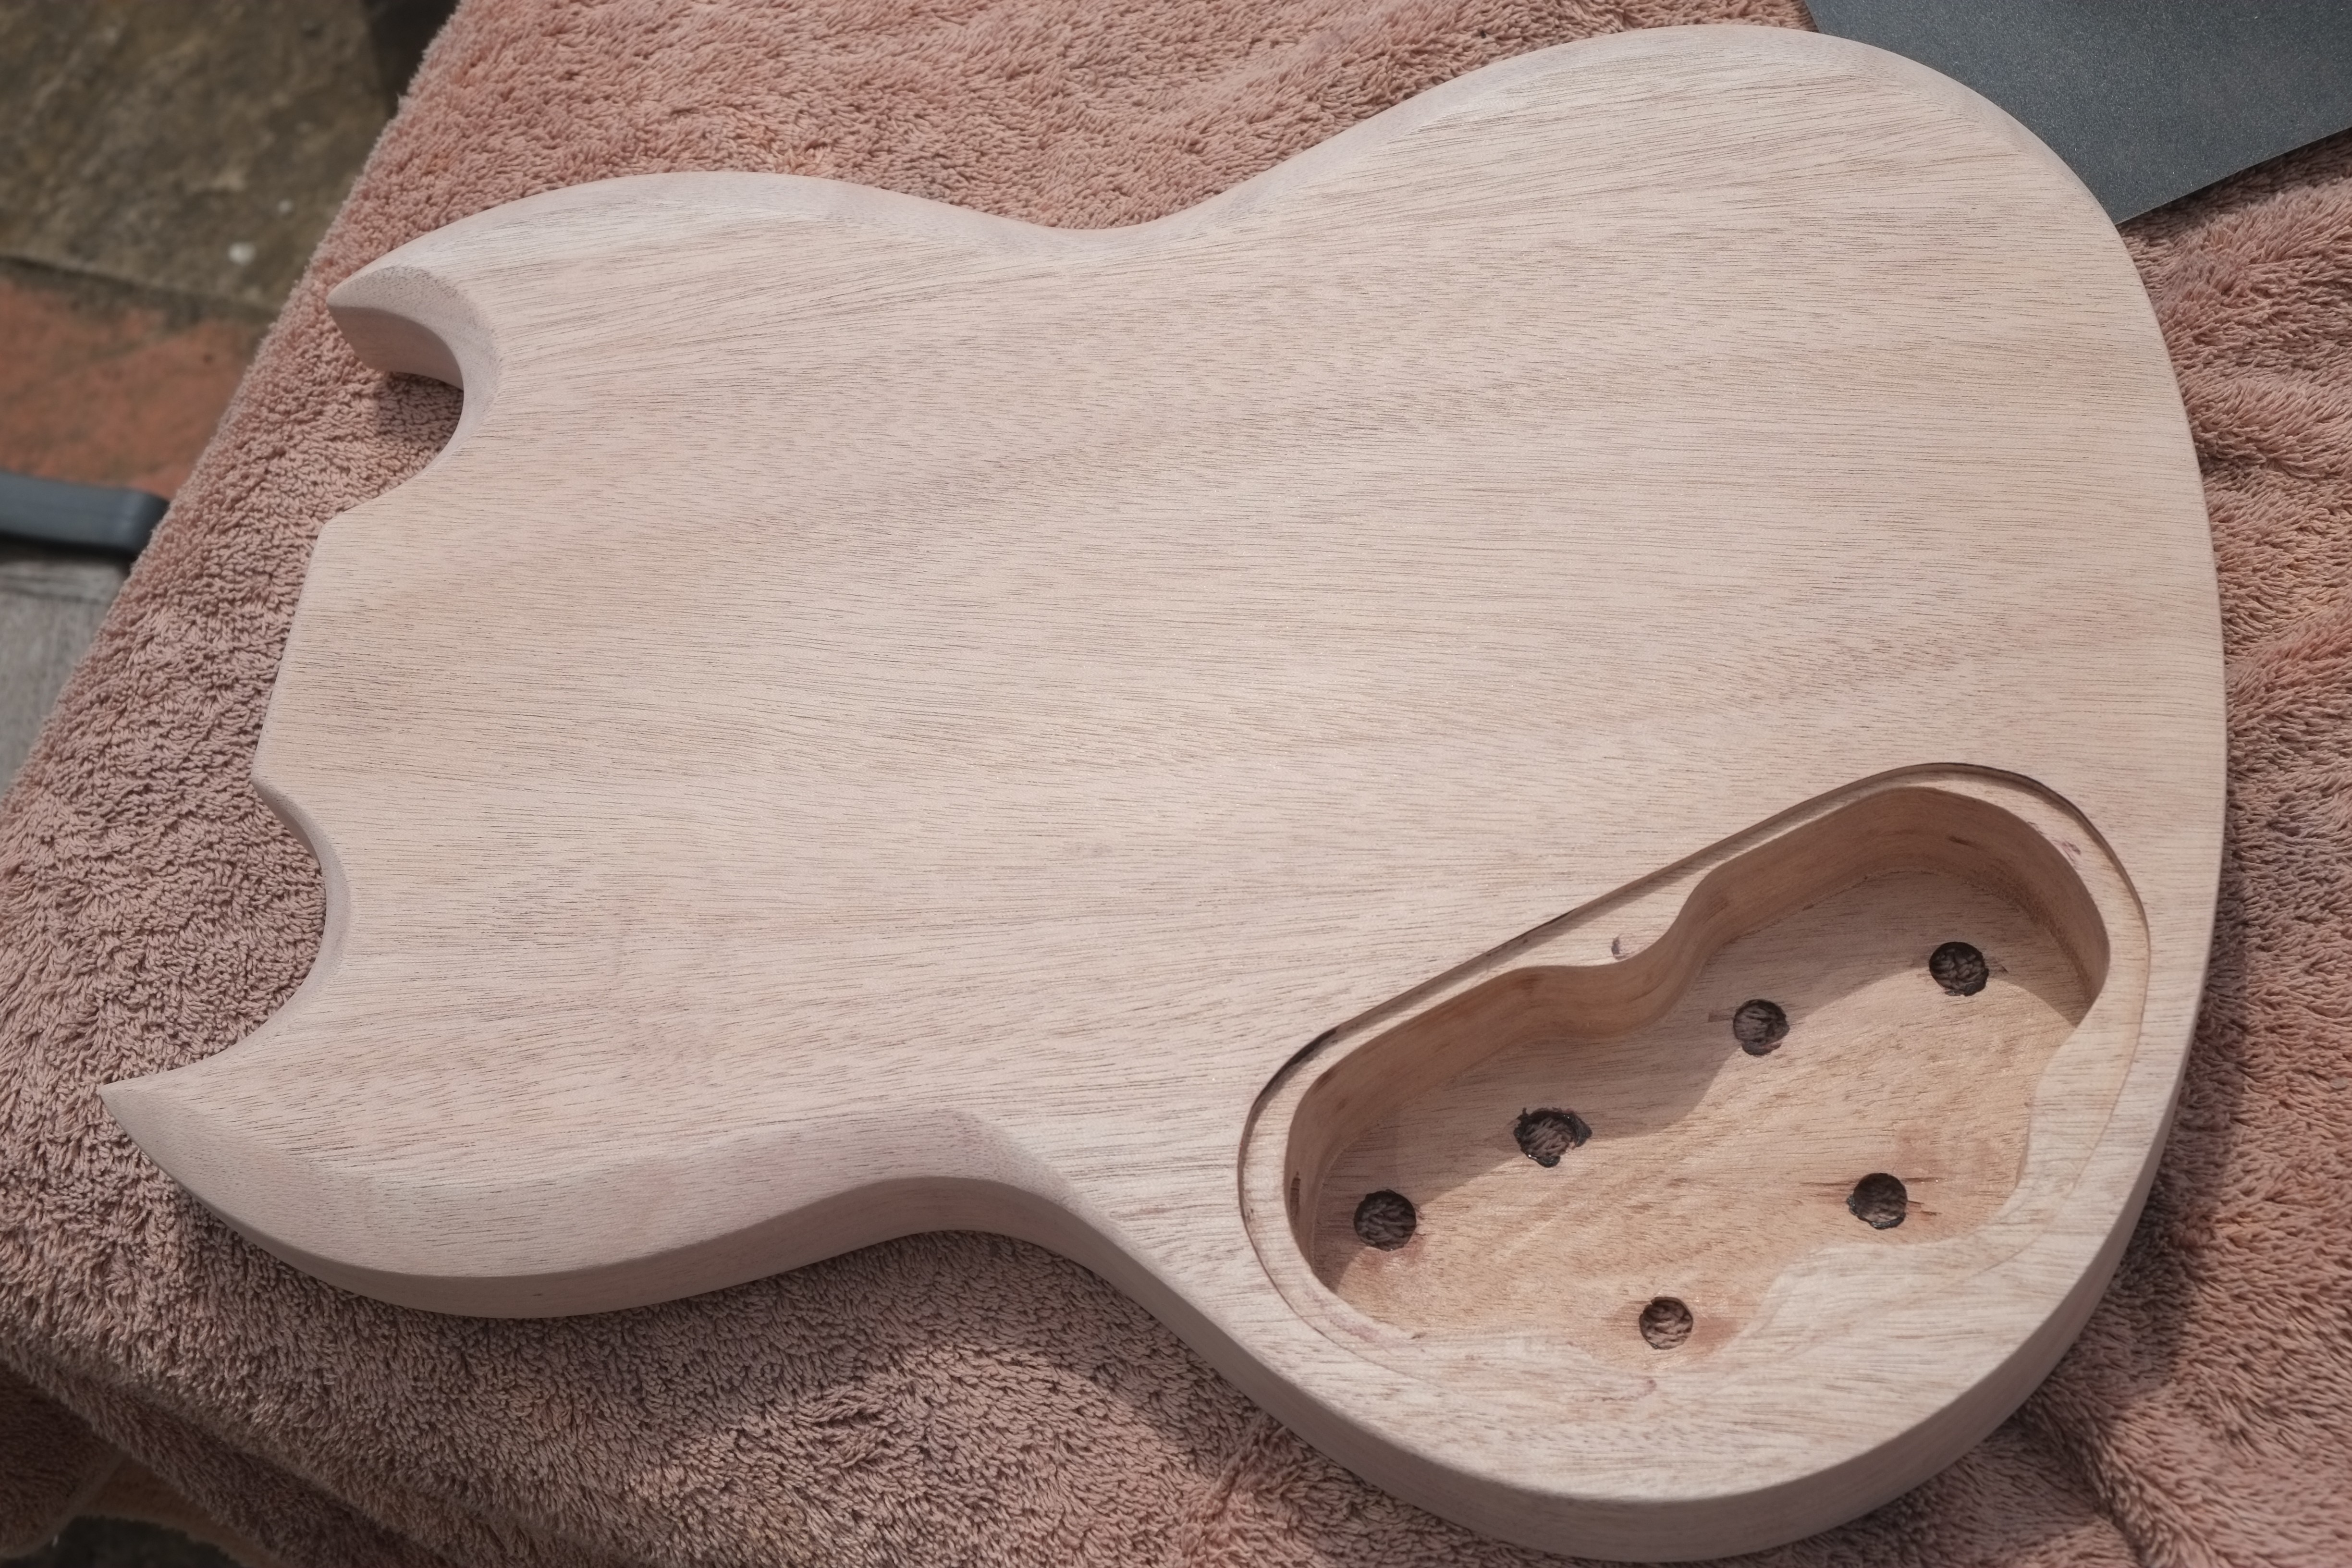
    Then there was a drilled hole from the base of the bridge pup cavity into the control cavity. And another from the Control cavity to the lower bridge stop post for the ground wire.
    Attached Thumbnails Attached Thumbnails Click image for larger version. 

Name:	IMG_0985.jpg 
Views:	94 
Size:	111.7 KB 
ID:	40309   Click image for larger version. 

Name:	IMG_0984.jpg 
Views:	92 
Size:	72.0 KB 
ID:	40310  
    Last edited by Trevor Davies; 26-04-2021 at 07:44 PM.
    PitBull Builds: FVB-4, LP-1SS, FBM-1, AG-2, TB-4, SSCM-1, TLA-1, TL-1TB, STA-1HT, DSCM-1 Truckster, ST-1, STA-1, MBM-1.

    Scratch Builds: Pine Explorer, Axe Bass, Mr Scary, Scratchy Tele's.

    The little voices in my head keep telling me "build more guitars"

  2. #22
    GAStronomist Simon Barden's Avatar
    Join Date
    Oct 2016
    Location
    Reading, UK
    Posts
    10,547
    My GSM-1 had a glued-in neck, so there was no wood between the pocket and the neck pickup cavity as on Trevor's, so it was an easy job to just drill through between the neck and bridge cavities. However, they didn't take much care about it and drilled half-way up instead of right at the bottom of the rout.

    Pretty sure now I had to mess about with those holes as well in order to get the cables in without affecting the pickup movement and angle. So try and keep the holes as low as possible in the pickup routs.


    Otherwise, the rest is exactly the same as Trevor's; bridge pocket through to the control cavity behind the toggle switch and a small hole from the bridge post hole into the control cavity for the ground wire.

    I actually found that I couldn't get the ground wire down through the hole cleanly due to having to bend the wire to go through the hole, so I drilled another hole from the post hole into the pickup cable tunnel and used that instead. The ground wire initially just came out and hit the other side of the tunnel, but I just used a screwdriver to bend the end and poke it down into the control cavity aided by a bit of pulling with some long thin tweezers.

  3. #23
    Member GregLane's Avatar
    Join Date
    Sep 2016
    Location
    Nelson Bay NSW
    Posts
    221
    Thanks Trevor
    Those photos are a great help.
    Can you remember if it looked like they used a long drill from the bridge pick up cavity to the control cavity. It’s a fair distance and I’m interested how they got a low enough angle.
    I have just had a look at your build diary and in one of the early photos I can see where the holes are.
    Guitars:
    Build #4 - Scratch SG - Qld Mahogany - In Progress
    PBG#3- - ES-1F - kit electronics (Dec 2020)- upgrade if I can do it justice
    PBG#2- - STA-1 Ash w black upgrades GOTM June 2020
    PBG#1- LP-1MQ http://www.buildyourownguitar.com.au...ead.php?t=6378
    Acoustics -Washburn WD18SW
    - Maton Australian EA80C
    Electric - Magnum pseudo Stratocaster - upgraded with PitBull bits - 2020

  4. #24
    Mentor Trevor Davies's Avatar
    Join Date
    May 2020
    Location
    Perth
    Posts
    1,378
    Quote Originally Posted by GregLane View Post
    Thanks Trevor
    Those photos are a great help.
    Can you remember if it looked like they used a long drill from the bridge pick up cavity to the control cavity. It’s a fair distance and I’m interested how they got a low enough angle.
    I have just had a look at your build diary and in one of the early photos I can see where the holes are.
    It did look like they used a long drill bit. The BGS has some long bits!
    PitBull Builds: FVB-4, LP-1SS, FBM-1, AG-2, TB-4, SSCM-1, TLA-1, TL-1TB, STA-1HT, DSCM-1 Truckster, ST-1, STA-1, MBM-1.

    Scratch Builds: Pine Explorer, Axe Bass, Mr Scary, Scratchy Tele's.

    The little voices in my head keep telling me "build more guitars"

  5. #25
    GAStronomist Simon Barden's Avatar
    Join Date
    Oct 2016
    Location
    Reading, UK
    Posts
    10,547
    As you can see, the GSM-1 cavity was full-sized, but even then, with the pickup wires coming out right behind the toggle-switch, there wasn't much room to route them around the switch.


    I seem to remember having to widen the tunnel exit with a Dremel tool to make it easier. Which is why I was concerned about your smaller control cavity. Possibly made harder by my harness being quite rigid, but mainly by wanting to keep the toggle switch operating at the correct angle.

  6. #26
    Member GregLane's Avatar
    Join Date
    Sep 2016
    Location
    Nelson Bay NSW
    Posts
    221
    Thanks for your help. I will cut out the rest of the pockets and then check what angles I've got then.
    Guitars:
    Build #4 - Scratch SG - Qld Mahogany - In Progress
    PBG#3- - ES-1F - kit electronics (Dec 2020)- upgrade if I can do it justice
    PBG#2- - STA-1 Ash w black upgrades GOTM June 2020
    PBG#1- LP-1MQ http://www.buildyourownguitar.com.au...ead.php?t=6378
    Acoustics -Washburn WD18SW
    - Maton Australian EA80C
    Electric - Magnum pseudo Stratocaster - upgraded with PitBull bits - 2020

  7. #27
    Member GregLane's Avatar
    Join Date
    Sep 2016
    Location
    Nelson Bay NSW
    Posts
    221
    What is this contraption?
    Click image for larger version. 

Name:	IMG_0510crp.jpg 
Views:	92 
Size:	557.8 KB 
ID:	40379

    I have just spent nearly a week working out what the break angle should be on the neck pocket.
    I got all sort of answers anywhere between 0 and 3 degrees.
    In the end I decide to cut the pocket flat and then insert a shim. But what size shim. They are not cheap to buy.
    So I unlimbered the trusty Triton and tried to make some shims of various degrees by slicing up a piece of the Queenland Mahogany that the body is made from.
    I cut a piece twice as long the shim which gave me a wider cut at the top of the the shim and the saw could slice out anywhere it liked.
    I am very happy with the result the shims need a little of sanding to level across them. Only about .3mm at max. Either the the saw or the piece of wood was not quite vertical.
    Here is the result before I have trimmed them to the correct length and sanded them flat. The thinnest is 1 degree the thickest 3 degrees.
    Click image for larger version. 

Name:	IMG_0511crp.jpg 
Views:	101 
Size:	500.7 KB 
ID:	40377 Click image for larger version. 

Name:	IMG_0512crp.jpg 
Views:	105 
Size:	438.3 KB 
ID:	40378
    Guitars:
    Build #4 - Scratch SG - Qld Mahogany - In Progress
    PBG#3- - ES-1F - kit electronics (Dec 2020)- upgrade if I can do it justice
    PBG#2- - STA-1 Ash w black upgrades GOTM June 2020
    PBG#1- LP-1MQ http://www.buildyourownguitar.com.au...ead.php?t=6378
    Acoustics -Washburn WD18SW
    - Maton Australian EA80C
    Electric - Magnum pseudo Stratocaster - upgraded with PitBull bits - 2020

  8. #28
    Member GregLane's Avatar
    Join Date
    Sep 2016
    Location
    Nelson Bay NSW
    Posts
    221
    Finally took the the plunge and cut the neck. My wife suggested I had been procrastinating for at least t month.
    Anyway all went well with route.
    Click image for larger version. 

Name:	IMG_0518crp.jpg 
Views:	98 
Size:	765.6 KB 
ID:	40527 Click image for larger version. 

Name:	IMG_0537crp.jpg 
Views:	96 
Size:	853.9 KB 
ID:	40528

    Fits nicely. I need take about 10mm off the end of the cavity. I had to make it a bit longer than the plan because of the odd neck foot that does not go in under the pickup like a real SG.
    I need to run the shoulders into the neck but haven't quite worked out a shape or how to do it.
    Click image for larger version. 

Name:	IMG_0520crp.jpg 
Views:	88 
Size:	654.8 KB 
ID:	40529

    The my first real AAARGHF!
    The holes for the machine heads were too small and need drilling out. The neck is covered in thick gloss which looks easy to chip. I taped over the holes and drilled .5 mm each time. Needed 2mm. On the very last hole when AAARGHF!. The drill bit and ripped the head from my grip. Must have been a seniors moment thinking how great I was having drilled the holes without even a scratch. Well I sure paid for it.
    At least it wasn't a neck I had spend hours buliding.
    I haven't decide on a solution yet: fill and respray, cover with a piece of veneer made for the Queensland Mahogany?
    Click image for larger version. 

Name:	IMG_0526crp.jpg 
Views:	107 
Size:	602.1 KB 
ID:	40530

    Suggestions for the neck cavity shape and the fix or the head would be appreciated.

    I fitted the neck and needed a 1 degree shim to get the strings resting on the last fret.
    My original idea was to have the neck sitting 2mm above the body (black) just in case I would decide to fit a pickguard. Then I could route out a bit more if the shim pushed it up too high. As the shim is only 1mm and the black is now slightly less than 3mm I think I will leave it as unless. Unless there some suggestions?
    Click image for larger version. 

Name:	IMG_0532crp.jpg 
Views:	102 
Size:	239.7 KB 
ID:	40531
    Guitars:
    Build #4 - Scratch SG - Qld Mahogany - In Progress
    PBG#3- - ES-1F - kit electronics (Dec 2020)- upgrade if I can do it justice
    PBG#2- - STA-1 Ash w black upgrades GOTM June 2020
    PBG#1- LP-1MQ http://www.buildyourownguitar.com.au...ead.php?t=6378
    Acoustics -Washburn WD18SW
    - Maton Australian EA80C
    Electric - Magnum pseudo Stratocaster - upgraded with PitBull bits - 2020

  9. #29
    Member GregLane's Avatar
    Join Date
    Sep 2016
    Location
    Nelson Bay NSW
    Posts
    221
    I decided not to be lazy and drop the neck in a further 3mm. That meant resetting the neck angle with a new shim.
    Finished up needing 2 degrees. The strings are almost touching the frets and when I did a rough setup I have plenty of break angle over the stop bar.
    Click image for larger version. 

Name:	IMG_0541crp.jpg 
Views:	102 
Size:	825.3 KB 
ID:	40643 Click image for larger version. 

Name:	IMG_0540crp.jpg 
Views:	104 
Size:	610.4 KB 
ID:	40641
    New shim 2 degrees. - - Strings almost on frets
    Click image for larger version. 

Name:	IMG_0539crp.jpg 
Views:	90 
Size:	339.2 KB 
ID:	40642
    Adequate break angle. Sorry for the fuzz
    Guitars:
    Build #4 - Scratch SG - Qld Mahogany - In Progress
    PBG#3- - ES-1F - kit electronics (Dec 2020)- upgrade if I can do it justice
    PBG#2- - STA-1 Ash w black upgrades GOTM June 2020
    PBG#1- LP-1MQ http://www.buildyourownguitar.com.au...ead.php?t=6378
    Acoustics -Washburn WD18SW
    - Maton Australian EA80C
    Electric - Magnum pseudo Stratocaster - upgraded with PitBull bits - 2020

  10. #30
    Member GregLane's Avatar
    Join Date
    Sep 2016
    Location
    Nelson Bay NSW
    Posts
    221
    Made a jig for the pickup cavities. Thanks to YouTube.
    Click image for larger version. 

Name:	IMG_0544crp.jpg 
Views:	92 
Size:	817.4 KB 
ID:	40644

    Click image for larger version. 

Name:	IMG_0546crp.jpg 
Views:	92 
Size:	653.2 KB 
ID:	40645 Click image for larger version. 

Name:	IMG_0547crp.jpg 
Views:	91 
Size:	658.7 KB 
ID:	40646
    Guitars:
    Build #4 - Scratch SG - Qld Mahogany - In Progress
    PBG#3- - ES-1F - kit electronics (Dec 2020)- upgrade if I can do it justice
    PBG#2- - STA-1 Ash w black upgrades GOTM June 2020
    PBG#1- LP-1MQ http://www.buildyourownguitar.com.au...ead.php?t=6378
    Acoustics -Washburn WD18SW
    - Maton Australian EA80C
    Electric - Magnum pseudo Stratocaster - upgraded with PitBull bits - 2020

Page 3 of 5 FirstFirst 1 2 3 4 5 LastLast

Posting Permissions

  • You may not post new threads
  • You may not post replies
  • You may not post attachments
  • You may not edit your posts
  •