Page 6 of 8 FirstFirst ... 4 5 6 7 8 LastLast
Results 51 to 60 of 73

Thread: GST-1 'Hexacaster' build

  1. #51
    GAStronomist Simon Barden's Avatar
    Join Date
    Oct 2016
    Location
    Reading, UK
    Posts
    10,547
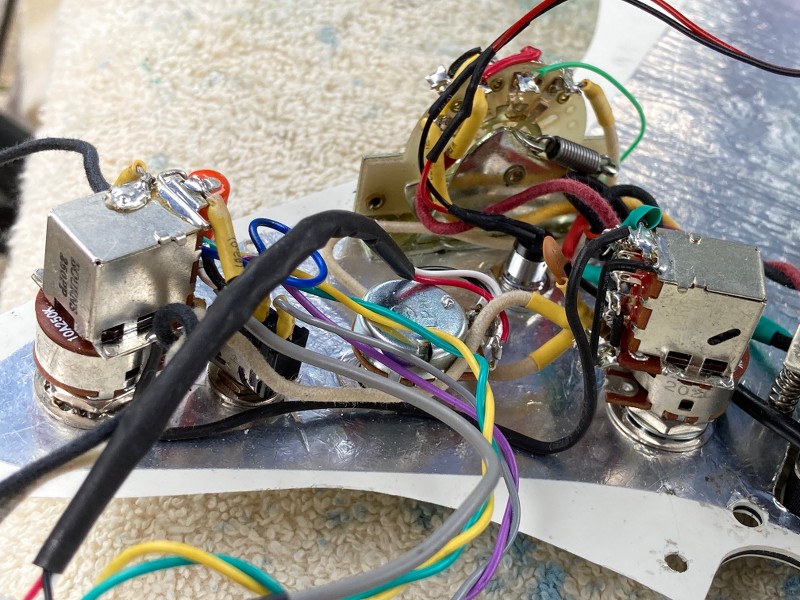
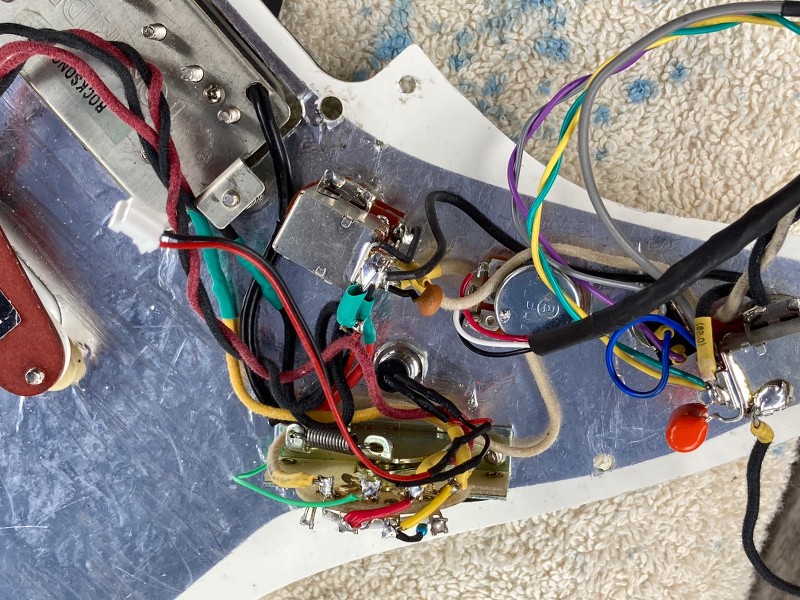
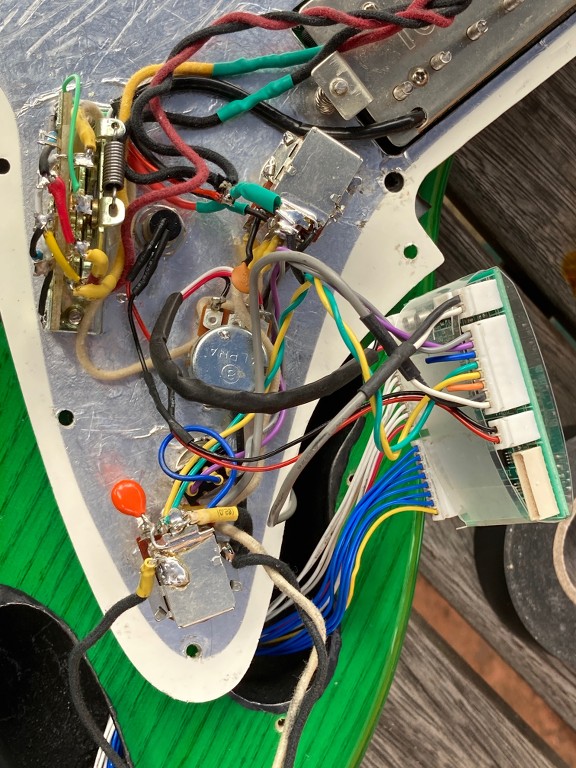
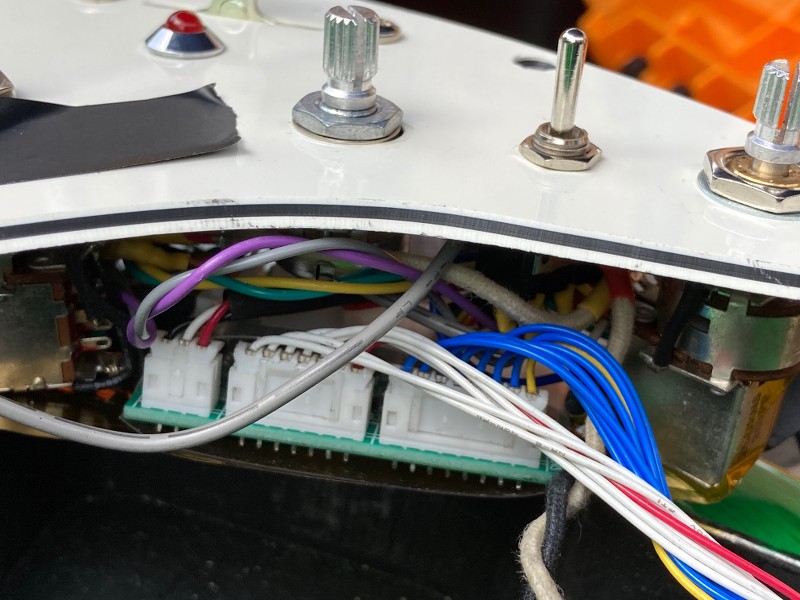
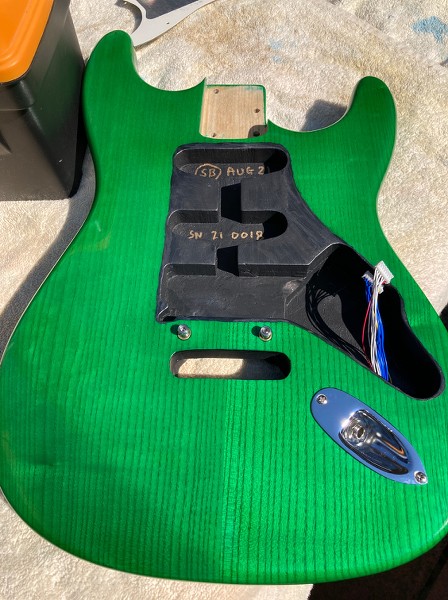
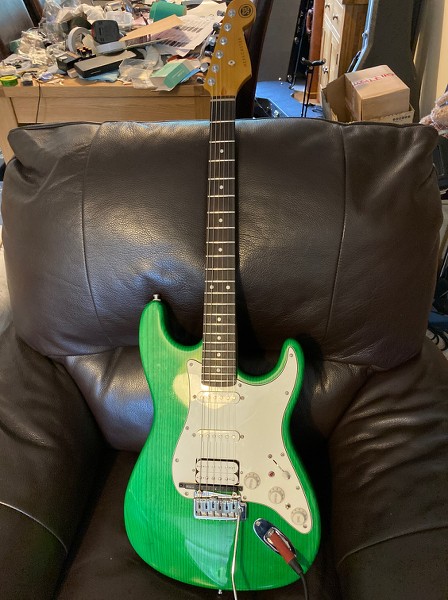
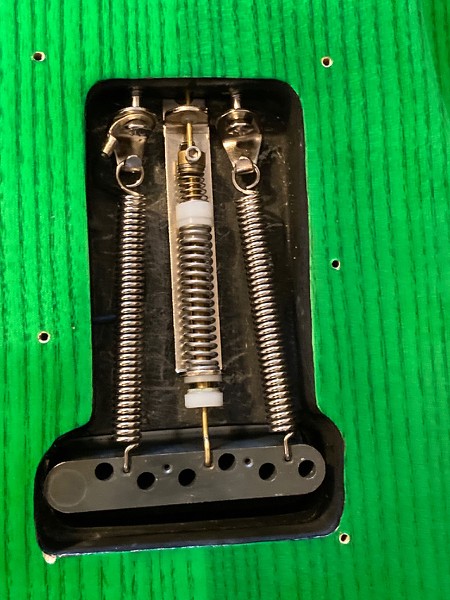
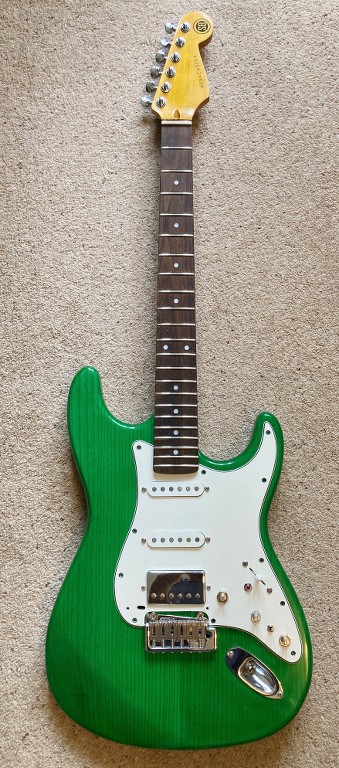
    The finish wasn't quite as hard as it should have been, as that masking tape left a faint pattern of dots behind when removed it. So I left it a few more days. Today I re-sanded and re-polished it, and have started to fit bits to it. Still to solder the wiring, but I'm feeling a bit under the weather the past few days and not at my most mentally alert, so am waiting until whatever I have passes and am thinking clearly. There's a lot of wiring to fit in a small space.


  2. Liked by: dave.king1, dozymuppet

  3. #52
    Overlord of Music McCreed's Avatar
    Join Date
    Oct 2018
    Location
    AUS
    Posts
    3,552
    That looks nice Simon.

    Your mate will be recording a YT demo for us all before you know it!

    Feel better!
    Making the world a better place; one guitar at a time...

  4. #53
    Member jonwhitear's Avatar
    Join Date
    May 2020
    Location
    Sydney, Australia
    Posts
    260
    That's looking great, Simon.

  5. #54
    Looks fantastic!
    #001 (LP-1S) [finished - co-runner up Nov 2018 GOTM]
    #002 (WL-1)
    #003 (MPL Megacaster - semi scratch build) [finished]
    #004 (ST-1 JR - Arachnoid Superhero build) [finished]
    #005 (LP jr)
    #006 (TL-1A)

    Junk shop acoustic refurbs (various)
    'The TGS Special'

  6. #55
    GAStronomist Simon Barden's Avatar
    Join Date
    Oct 2016
    Location
    Reading, UK
    Posts
    10,547
    It all got put together and strung up for the first time and found that the neck angle was too shallow and the strings were touching the GK pickup, so a small neck shim was added.

    Then I found:

    1)The humbucker was polarity reversed with respect to the single coils
    2) The split humbucker wasn't hum cancelling when mixed with the middle pickup, despite swapping the middle and neck pickup in their positions as per the Bare Knuckle guideline sheet for installing a HSS configuration.
    3) I was getting no synth sounds from a Roland GR20, though I was getting the guitar sound through the GK cable and the up/down momentary switch was doing the same thing as the up/down switch on my GK2a pickup on my own MIDI guitar.
    4) I was getting signals from 3 of the 6 hex pickups on the sensitivity setting mode, but as they weren't triggering any sounds, the GR20 obviously thought it was in synth off mode.
    5) The humbucker sound was rather 'meh', and the single coils OK bu not outstanding.
    6) The covered humbucker didn't look aesthetically pleasing once the bridge was installed; too large a mass of chrome divided by the thin black GK pickup.

    So I first decided to try a different humbucker and Ordered a Tonerider Rocksong, as I know Steve Harris/Arkieboy prefers a more powerful bridge pickup to me.

    I obviously took the guitar apart and checked the wiring for faults, but didn't find any. I then tried the components out of the guitar and found that the hex pickup now triggered sounds, so I probably had a short to the shielding in the 13-pin output cavity. So some insulating tape was added to the back of the small PCB on the rear of the 13-pin socket.

    By now I'd read more on the web on installing the system, and noted that having the GK board connected when the guitar was just used as a guitar had an adverse affect on the sound, so I bought and installed a Switchcraft 12A jack, which has a simple switch function that breaks the guitar signal feed to the GK board when a jack is inserted.

    Over the past few days, the Rocksong has been installed, the middle and neck pickups swapped over, a 470k resistor per single coil pickup fitted to the pickup selector switch to give an equivalent 250k volume pot feel.

    As you can see there's quite a lot of wiring to fit in a small space to start with, especially with the two push/pull pots for humbucker coil split and a GK only/GK + guitar selector:


    Then once the GK board gets plugged in, it becomes even more busy inside:


    And then it's time to push all the wires inside and hope for the best!


    Well, it did all go in, and a resistance check on the pickup output indicated they are all fine.

    The neck is back on and I finally found the missing volume knob that was hiding right under the back of a sofa.

    Tomorrow it will be restrung and I'll fit the Hipshot Tremsetter to help stabilise the trem. It worked well on the Eggle Berlin Pro I refurbished for Steve/Arkieboy as he likes a solid bridge for palm muting. Though that GK pickup circuit needs to be proved to work first or I won't be a happy bunny!

    I've set the GK pickup radius to match the 12" neck radius, so it should be fairly easy to get all the GK pickup elements within 1mm of their respective strings, especially as I've cut down some pickup mounting springs to provide a small amount of height adjustment at each end and enlarged the GK mounting screw holes in the scratchplate for them to sit in. I had tried a thin strip of foam rubber, but screwing down on the two ends of the GK pickup left the middle high and the pickup curve radius reduced, with the two E magnets too far away from the strings with the D and G strings too close.

    So let's see what tomorrow brings...

  7. #56
    GAStronomist Simon Barden's Avatar
    Join Date
    Oct 2016
    Location
    Reading, UK
    Posts
    10,547
    ...the realisation that I messed up the 250k resistor wiring on the selector switch and I did only need one, but wired up differently.

    Oh well. Lets hope it all fits back in again.

    Here's the internal picture I forgot to post, with the serial number on the inside.

    I've gone for graphite paint for this one, rather than copper shielding, mainly because I first used it for the trem cavity to cover up the various repairs, and the resistance was so low I decided to use it everywhere.


    It also meant that I could connect the main rout with the jack rout shielding directly using the paint, made easier by having that extra passage for the GK output connector cables you can see poking through.

  8. #57
    Mentor Andyxlh's Avatar
    Join Date
    Nov 2016
    Location
    Sydney
    Posts
    1,206
    What an interesting project, cool!
    I like the colour too

  9. #58
    GAStronomist Simon Barden's Avatar
    Join Date
    Oct 2016
    Location
    Reading, UK
    Posts
    10,547
    Well it all went together again, and the GK pickup side now works.


    But it's all got to come apart again. The coil split brings the screw coil, not the slug coil into play, and that's too near the bridge and too thin sounding.

    Also, only the outer 'E's sound properly. The inner strings sound really thin and 'crackly'. I can only think that as the coil is next to the hex pickup magnets, there is some interference going with the magnetic field so that the strings aren't being read correctly by that coil, though the GK pickup seems unaffected by the humbucker. But the GK magnets are higher up than the humbucker magnet, which may be why, and so it's just the field near the strings that is going wonky and fighting the field at the bottom of the humbucker coil.

    This thinness is also affecting the humbucker sound, as although the full humbucker doesn't have any noticeably weak strings, overall it sounds a lot less powerful and less full sounding than you'd expect it to.

    Off to do some research now, as I only want to take the effing thing apart and put it back together again one more time and for it to be perfect after that.

    Oh, and the probably reason the Gibson humbucker sounded 'meh' through my HT5 was the fact that the HT5's definitely not well, probably with a dying power valve. Well it was from the very first batch back in 2008, so not too bad for an amp that's had a lot of use. But the Rocksong looks far better and sits flat, so as long as it can be made to work, it's staying.

  10. #59
    GAStronomist Simon Barden's Avatar
    Join Date
    Oct 2016
    Location
    Reading, UK
    Posts
    10,547
    Well, it turns out it wasn't a proximity magnetic effect, it was plain physical interference.

    Although it could only be heard in that split coil mode, and wasn't picked up by the other pickups, the four middle strings were just lightly buzzing on the GK pickup magnets, which were that bit too close. You have a very narrow window with the GK pickups. over 1mm from the string and the influence of the neighbouring strings is too strong for a clean signal. Too near and the strings will touch.

    I expect when they touched or came very close to the magnet, they themselves briefly became magnetic pole pieces, much likes the slugs in a humbucker do. Which then upset the signal picked up by the split humbucker, causing the signal weakness.

    Anyway, simply raising the strings a touch and lowering the GK pickup a bit cured the problem. In messing about with the GK mounting height, I did away with the small neck shim, and added some fixed height 'washers' made out of old plectrums, which I first drilled a hole in to fit the mounting screw, and then cut a piece out around the hole with scissors to fit under the ends of the GK pickup. (A couple of years ago I had ordered a mixed bag of Jim Dunlop pickups of different thicknesses and materials to see if I could change from my standard red sharkfins. I settled for the celluloid thins, leaving a whole load of unused plectrums, which make ideal thin spacers).

    After this was done, the humbucker now sounded like a humbucker should, and with a lot more output.

    It was then time to fit the Hipshot Tremsetter. A bit of measuring, a couple of holes drilled and the Tremsetter was installed.


    The Tremsetter really keeps the bridge stable when you don't use the trem, and you can palm-mute quite happily without affecting the tuning. The two-point trem is floating, so the whole set-up really benefits from having it. If you use the trem a lot, I can really recommend them.

    You can also see the graphite shielding paint in the cavity which neatly hides all the bits of repair work, plus it adds a bit of extra shielding. It's grounded by the ground lead running to the trem claw screw (which obviously also grounds the bridge and strings).

    The observant among you may notice the small mark on the bottom left corner of the trem spring cavity. This is where the sixth of the trem spring cover pate screws wanted to go, but there wasn't any wood. The trem is an OEM 2-point Wilkinson unit with a steel block and steel saddles. The block has the now-standard Wilkinson offset string loading holes, designed so that the hole is in roughly the right place for the saddle position so that all the hole-to-saddle string lengths are about equal, and the hole isn't covered up by one end or other of saddle, but always comes up through the slot in the middle. However, this means that with a standard trem cover plate with either one big slot (as on this build) or six smaller 'racetrack' slots, the fore/aft sting hole distribution only allows one position to put the trem cover plate if you want to access all six holes through the slot. Which meant that one screw didn't work. So the cover plate now has a cosmetic screw head glued in that location.

    So hopefully I'll take some photos tomorrow (Saturday). Steve/Arkieboy comes to collect it on Sunday. Provided he's happy with the guitar, I should then video him playing it in both guitar and synth mode.

  11. #60
    Overlord of Music McCreed's Avatar
    Join Date
    Oct 2018
    Location
    AUS
    Posts
    3,552
    Man, this has been a big job with lots of troubleshooting. Good on you for getting it done.
    Look forward to seeing a demo!
    Making the world a better place; one guitar at a time...

Page 6 of 8 FirstFirst ... 4 5 6 7 8 LastLast

Posting Permissions

  • You may not post new threads
  • You may not post replies
  • You may not post attachments
  • You may not edit your posts
  •