Page 3 of 6 FirstFirst 1 2 3 4 5 ... LastLast
Results 21 to 30 of 55

Thread: Dora the EX-4plora

  1. #21
    So, the story thus far.....

    There are a number of different ways the headstock mod could be done. The more simple way would be to cut the heatstock parallel the width of the nut, if the bit left is a bit too short, the end cut strait (either 90deg of at an angle, but a strait cut). The extra material needed then glued to the reminants of the original headstock. Then the new headstock shape cut.

    The elegant way of doing it would be to cut the original headstock off, carefully remove the remaining part of the original headstock, exposing the scarf joint. Care must be taken not to damage the truss rod. Using a large enough chunk of timber, create a new headstock, including a short section of the neck, and scarfing that in, effectivly replacing the original headstock. Obviously you would need to rout the neck part of the new headstock to accommodate the truss rod. Ironicaly, shortly after thinking of this approach, I saw a YouTube video of a headstock repair on a Les Paul doing exactly this!

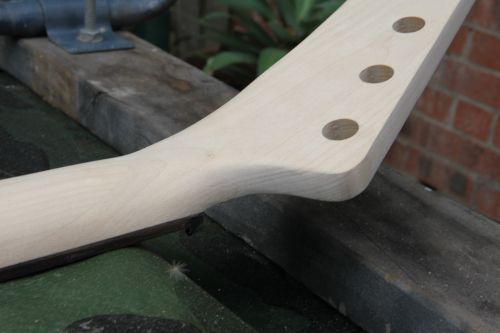
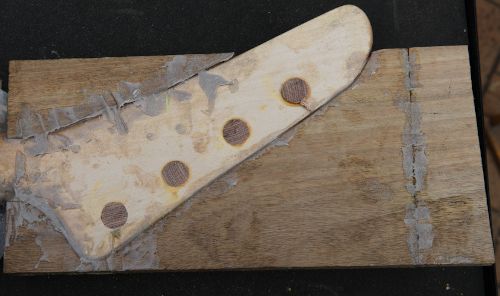
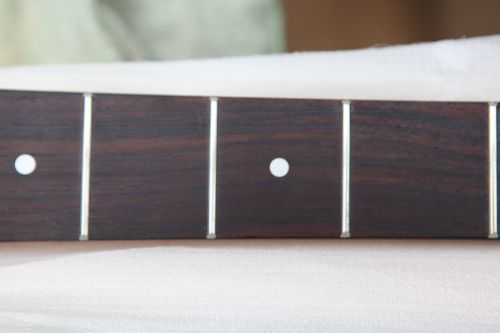
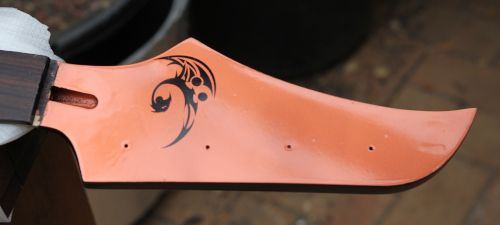
    And then there's what I did (if there's a hard way of doing something, I'll find it ) Here's what I had to work with:


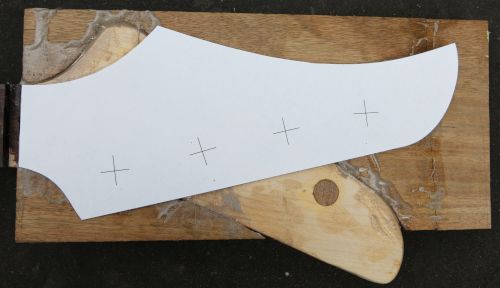
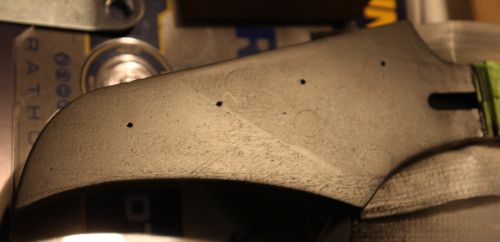
    As you can see they blended the headstock smoothly into the neck. Looks good, but a pain for what I had planned. This was my solution:


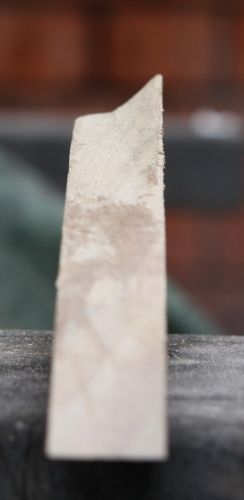
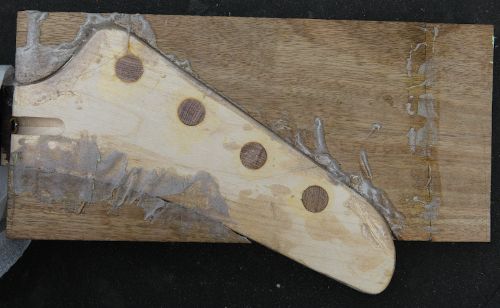
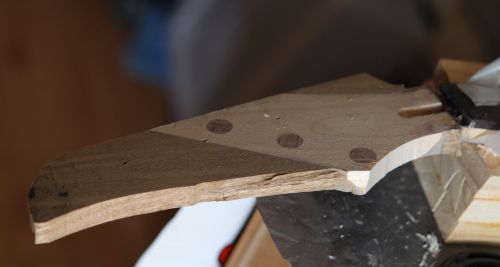
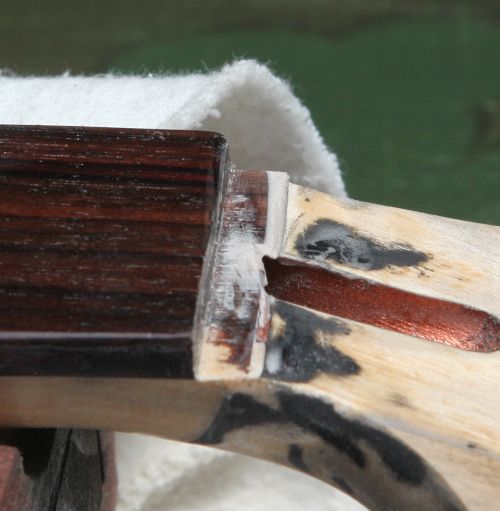
    Here's the headstock paddle after I had added the extra timber:


    As you can see, it's a bit of a mess. Both for strength, and the fact that the fit was not good enough for wood glue, I used epoxy with a special purpose filler to create a glue. A bit of time with a cabinet scraper would have resulted in a wood glue appropriate fit. I could not use clamps on this thing, so I had to use green masking tape. The tape I use has some stretch, so some clamping pressure could be applied from the tape. The down side is that the timber did move a little, so surface was not 100% parallel with the face of the headstock. The other problem is that the squeese out is trapped under the tape, so it leaves a mess. <shrug> it will sand out . The more astute of you will notice there was an extra bit of timber added to the end.

    "So, did you blow a sneaker like everyboby says, or did you just **** up?"........"No Darryl, I just ****ed up...."


    That's it for now folks!

  2. #22
    And so it continues....

    The headstock is now shaped:


    Again, the more astute of you may have noticed that something had been cut off and a piece glued on. Again, I ****ed up. ....


    I had roughed out the shape to make it easier to remove the extra thickness of the NG Teak that I had added. Thinking I'd be clever, I made a ply template of the headstock, which I screwed to the headstock using the tuner hole centres. The plan was to router around the template to give it it's final dimensions.

    Now, I consider myself to be a reasonably experienced woodworker, so I had paid attention to the grain before I screwed the template on. The template coverd the piece so I could not see to confirm. I thought wrong, hence the tear out. In hindsight, probably should have noted the grain direction on the template just to be sure. I have included this little screw up in the hopes that it will help someone else avoid the same mistake.

    I made a plug template of the neck pocket so I could shape the heel of the neck to match the end. After marking it out on the heel, I noticed very little material needed to be removed and it wasn't worth the effort of setting up the template for the router. A few passes with the fine side of the saw rasp had it sorted. Then I noticed another slight flaw in the design of the kit. The sides of the neck pocket are parallel, the sides of the neck heel are tapered to match the finger board. The upshot is the neck can rotate slightly . I took some small pieces of veneer, sanded a taper on them, and glued them to the sides of the neck pocket to centre the neck.

    In the process of gluing the timber to the headstock, I must have gotten some of the epoxy on the finger board, despite it being covered. It had been wiped off, but as soon as it gets on ther, some of it will soak in, leaving a spot darker than the rest. Now, I expect that would disappear once I wiped the fingerboard down with orange oil, then I remembered that I read on this forum that some people flood the board with cyanoacrylate. I don't like that idea, but it did give me an idea. The epoxy system I use has an epoxy based wood preservative added to the first coat when used for encapsulation. Aside from helping to preserve the timber, it also thins the epoxy so it soaks in better. I made a small batch of this up, carefully painted it onto the fingerboard. After 30 mins I wiped off any epoxy still sitting on the surface. Here's how it turned out:


    Untill next time gang.... stay thirsty!

  3. #23
    Overlord of Music Fretworn's Avatar
    Join Date
    May 2013
    Location
    Hornsby Area, Sydney, NSW
    Posts
    3,951
    Looks very neat. Your experience in woodwork is clearly on display.
    Current:
    GTH-1

    Completed:
    AST-1FB
    First Act ME276 (resurrected curb-side find)
    ES-5V
    Scratchie lapsteel
    Custom ST-1 12 String
    JBA-4
    TL-1TB
    Scratch Lapsteel
    Meinl DIY Cajon
    Cigar Box lap steel

    Wishing:
    Baritone
    Open D/Standard Double 6 twin neck

  4. #24
    Quote Originally Posted by Fretworn View Post
    Looks very neat. Your experience in woodwork is clearly on display.
    Thanx! It could either be realy cool....or it could hit me in the face when I go to tighten the E string........

    I decided to coat the back of the neck and headstock with thinned epoxy, since epoxy is the preferred substrate for the clear I'll be using. It kinda worked, and kinda didn't. I only used 1 coat (usually a full epoxy job is 3 coats.. I wanted to try keeping things thin. ), and when I sanded back the back of the neck it felt realy smooth, and whan I looked close at an angle with the light, it looked like the grain had been filled. When I sanded back the headstock, I also thought that the grain had been filled, and that the joints and gaps were all nice and level. Apparently I thought wrong!

    Here's what the headstock looked like after shooting it with primer:


    As you can see.. you can still see *everything* 
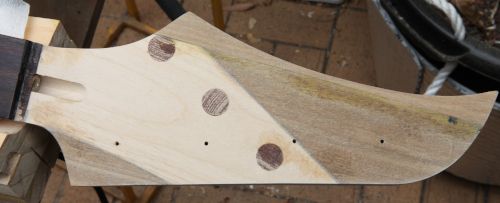
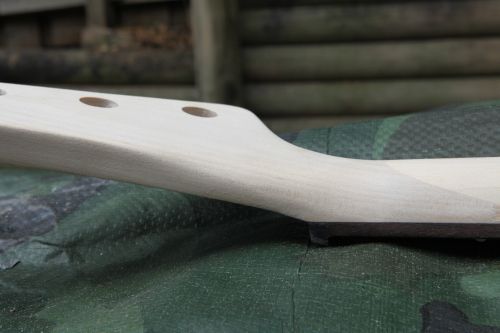
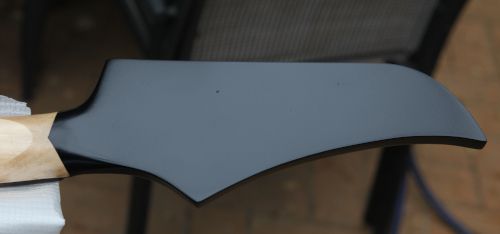
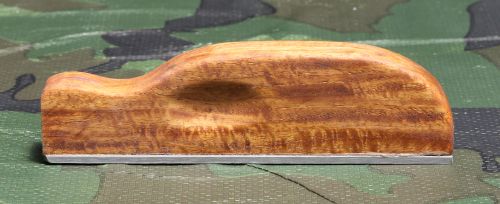
after sanding back smooth, it looked like this:
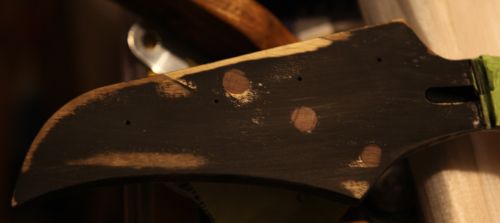


    I again sprayed primer, only with lighter coats. Aaaaand, it looked similar (a bit better) to the first picture. Usually, on metal or plastic you can sand this stuff after an hour. What I think happened is that even though it *should* have been cured. I suspect that a combination of being waterborne and going onto timber, it needs more time, and after sanding probably shrank. This time I have given a bit more coats over the problem arias and will give it 24h to cure before sanding. It's just going to take a few more days to get the neck finish, finished.

  5. #25
    Well, initial painting and clear coating of the neck is done. I'm holding off final sanding and buffing. I've ordered some grain filler so that I won't need to used as many coats of primer and sanding cycles and it *still* not being quite right. I kept the piece of the original headstock that was cut off. Even though it was being cut off, I had doweled all 4 tuning holes. I've sanded it smooth like I had with the headstock. I'll use the grain filler on it. If the dowel disappeares completely after I paint it, I'll sand the front of the headstock back to bare timber, fill, and repaint.I'll put up with the ghosted dowel on the back..it adds a bit of interest I think.


    Lack of bright sunshine has kinda hidden pop of the small flake on the front.

  6. Liked by: Fuzzyworbols

  7. #26
    Well... the decision whether to sand back the front of the headstock has kinda been taken outta my hands. I felt the back of the neck, and it felt like it had a few spots that needed to be knocked down. I used 0000 steel wool on the back, which had it feeling very smooth. Looking at the neck a bit more closely showed that there was still a very feint hint of orange peel. I sanded it back with 800 grit, then 1200 and finally 1500. That had the back of the neck completely flat, with a perfect satin finish. It feels like Hot Black's Sub dive ship. I will *not* be buffing it!

    Then I turned my attention to the back of the headstock. the whole headstock is painted with black primer, with only the front sprayed with base coat over the top.With this primer you do not need to sand before putting on the base, and sanding may show up scratch marks if the base is sprayed too thin with not many coats. When I went to sand the back of the headstock with 800 grit, some of the clear coat caught on the paper, and a strip of clear peeled off. Eek! This suggests an adhesion issue. I was able to peel the clear off the rest of the back. Not happy .

    After sanding the sides, I turned my attention to the front. Interestingly enough, it sanded just fine. I'm wondering if the differences between the primer and the base coat are enough to interact with the clear slightly differently. Once I have the grain filler and re-prime, I then have to decide if I spray the back and sides with black base coat, or spray the whole headstock in metallic copper.

    Until next time peeps!
    Last edited by Rabbit; 02-01-2021 at 11:01 AM.

  8. Liked by: JimC

  9. #27
    Since it looks like my grain filler is still sitting st the City of Industry, I sorted out a few other things.

    I got myself a 600mm stainless ruler (I checked it against a few machined surfaces to make sure it was straight on both sides before taking it to the checkout), cut some crude notches to make something to adjust the truss rod to level the fingerboard in preparation to levelling the frets.


    Since I never levelled the frets on The Hoff and it has such a nice voice, particularly with the tape wounds, I did a 30 inch scale on the other side. I figured it deserved a little love too.

    Due to the continued incompetency of one of the two drivers of a certain courer company (I don't know what the forum's policy is on naming and shaming), my fret levelling file never showed, so I made one:


    I carved indents for my thumb on one side, and my fingers on the other. The tip of the index finger sits in the dip on the top.
    I had ordered a bone nut with my kit. This I dyed black. One of the issues I had and I have seen others post, is a gap under the nut on the left side at the front. Having already tapped the plastic nut off (I figured it would make levelling the frets easier,) I wrapped the bone nut in Glad Wrap, I made up some epoxy filler, placed that on the area where the gap was, then tapped the nut down against the nut bed and across against the finger board.

    Once set I used my fret levelling file to level the nut bed and remove any excess filler:


    The paint will hide the filler . That's it so far... I believe my next project is on it's way on a slow boat from China.

  10. #28
    Ok, I know I's only been a few minutes since my last post, buuut...........I decided to adjust the truss rod to straiten the neck (it had the opposite of relief). In the process, the head of the adjustment bolt pushed up the segment of the nut bed above it (which is paper thin). Even after removing the segment (it's not like it was supporting the nut), the bolt head was still just slightly proud of the nut bed.

    Is there any reason why I shouldn't carve a slight hump in the nut so the bolt head just has clearance?

  11. #29
    Clearly I need to learn maybe a bit more patience, because the neck is proving to be causing me a lot more work than it should. I sanded the headstock back while I waited for the sealer to arrive. While I was waiting, I decided to level, crown and polish the frets. After straitening the neck, since no one answered my question about the nut, I went ahead and used a small half round file to give the head of the truss rod bold enough clearance so that it wasn't preventing the nut to sit flush with the nut bed. After levelling the frets, re-crowning them and polishing them up to a bright shiny finish, I re-checked the frets, only to find that they weren't level!!!!! . This time I got a 600mm level, this double sided taped some 240grit to the bottom, and re-levelled. There was still enough meat left on them to re-crown and polish. They seem ok this time.

    My grainfiller/sealer arrived, so I put a couple of coats on the front of the headstock and sanded smooth, but I think I sanded through the sealer at the end groin of the dowels. After re-priming, the dowels were showing again <sigh> I discovered that I had some black pearl base coat, so I sprayed the back of the headstock with that and copper on the front. Things seemed to be going well. the black peal layed down realy nicely, and the copper went on fine. The dowels were hardly noticeable. I decided to put the logo on, and that's when things went pear shaped. I have been using a small sample pot brush to smooth out the decal and remove bubbles. Unfortunately I wasn't as careful as I should have been when bringing the brush back to position, and caught the edge of the decal a few times. Trying to unfold the delicate membrane while the glue on it is drying was hard.I ended up removing some of the toner, since it's printed on the top of the decal.

    To try and fix things I sanded it back to the primer, re-shot the copper, and tried again. This time, I put a coat of clear on the front, and while still wet, placed a reversed printed decal face down on the headstock. I figured with the stiff backing still on it, it should be easier to remove all the bubbles and face down it woul be protected. I forgot to add the cross linker to the clear, and I didn't wait long enough. When I went to wet the backing and remove it, some of the clear came with it in strips. Worse, there was s bunch of bubbles. I tried to sand back the clear, and puncture the bubbles. My thinking was that the clear would seep into the punctured bubbles and they would disappear .... I thought wrong .

    This time I sanded the front of the headstock back to bare timber, and i noticed the dowel sanded at a different rate, so you could feel them even when you thought it was smooth. I decided to put sealer on again, sadning it level and not sanding though the sealer. Primed again, and again, you could still see the down faintly when the primer dried (while wet you couldn't see them, so I got excited prematurely.). I sanded the primer smooth and shot the base. It looked ok, in the bright light, but in the shade you could see a dark and light sections. I started sanding the back and sides with 800 grit, then 1200, 1500, 200 and 2500. Sadly in the process I managed to get sanding marks on the copper base coat.

    I lightly sanded to the basecoat to remove any deeper marks, printed out another decal, and coated it with a single coat of cross linked clear. Next morning I sprayed another coat of copper base, and it looked nice and smooth, no crap on it, and even colour, even in the shade. WIN!!!! After giving it time to properly dry, I applied the decal. The coat of clear did the trick, and allowed me to position it, and remove any bubbles with a small foam brush. The clear protected the toner from getting rubbed off in the process.

    Then came more potential headaches. I decided rather than having to deal with breaking out the gun and having to clean it again after every coat, I would use a foam brush to brush it on. I made two mistkes, both of which, a video by the manufacturer says not to do . First, they say to apply with a good quality high density foam brush, not one of those cheapo hardware store brushes.....mine came as part of a set for less than $4 from Bunnings. The reason being that the cheap foam brushes will give you bubbles. Well yeh, I had bubbles. Next they say once it on and had a chance to level, don't mess with it! You will end up with lumps from dried clear. Well I took the sample pot brush and tried to remove the bubbles...and yeh, that didn't end well .

    Luckily all was not lost. I gave it an hour (another mistake I had made earlier when spraying was not leaving enough time between coats, probably why it peeled off the primer.). After an hour, with the foam brush I put on a second coat. Immediately after I used the tip of the foam, barely touching to skim across the surface and the bubbles from the first pass went away. I put on another couple of coats this way so now there is enough thickness for me to level sand so I can polish. I'm going to give it a week before I do that. Might post some pics tomorrow after I take them.

  12. #30
    Member Marty's Avatar
    Join Date
    Jul 2020
    Location
    Southampton, UK
    Posts
    31
    Sounds like a right ball ache.

    Looking forward to some pictures.

    If I was more skilled I would have done something special with mine. Maybe on the next build.

Page 3 of 6 FirstFirst 1 2 3 4 5 ... LastLast

Posting Permissions

  • You may not post new threads
  • You may not post replies
  • You may not post attachments
  • You may not edit your posts
  •