
Originally Posted by
Simon Barden

On various nitro finishes, but you can still get the ends sticking into the bare wood and then appearing in any finish you put on top.
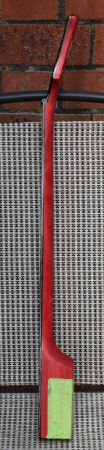
What varnish finish do you plan to use? Poly doesn't attach well to older poly (any more than 24 hours) without the surface being pretty rough so it can key onto it, so with poly you don't want to have the old finish surface too smooth when applying the second set of coats.
The first couple of coats of anything will sink into the wood significantly (less so on the maple veneer than on the back and sides), so the surface will be relatively rough. You'd be hard pressed to sand it very smooth without sanding through into the finish and removing some stain in places. So certainly knock the peaks back a bit, but do be very careful.


 Reply With Quote
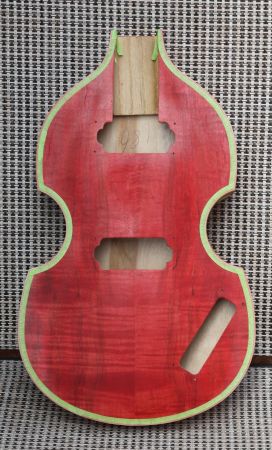
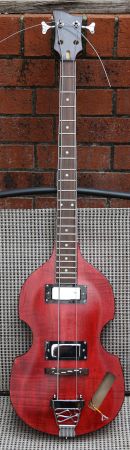
 . At first glance the back does look more interesting than the front, however, looks can be deceiving. The figure of the timber on the front will make it's presence known when the varnish goes on. It's a bit like New Guinea Rosewood. Everything pops when you put on the finish.
 . Once the striping is done and it's been unmasked, I'll give it a final couple of coats to lock it all down .
 ") .
.


 .
. 

 . My last project was a strip canoe, so I have a fair bit of experience with both. I know with softwood , the timber will fail before the PVA will, just wasn't sure with the tension of the strings how it would fair with the maple. PVA it is then <thmbsups>.