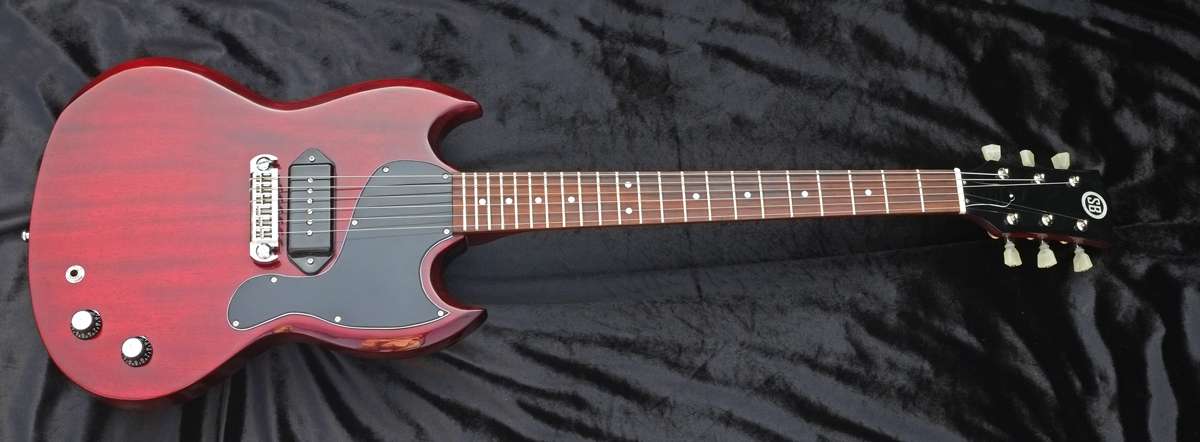
Right. Just spent a period away from forums concentrating on spraying and building my kits, as the good days of summer/early autumn are running out. So I've got 4 kits fully clear coated and hardening up but I'm declaring the SGJ-1 finally finished.
I didn't use any of the kit hardware except the control cavity backplate. So we have:
Bare Knuckle Nantucket 90 P90 pickup.
3.0mm fibreboard shim made for the pickup.
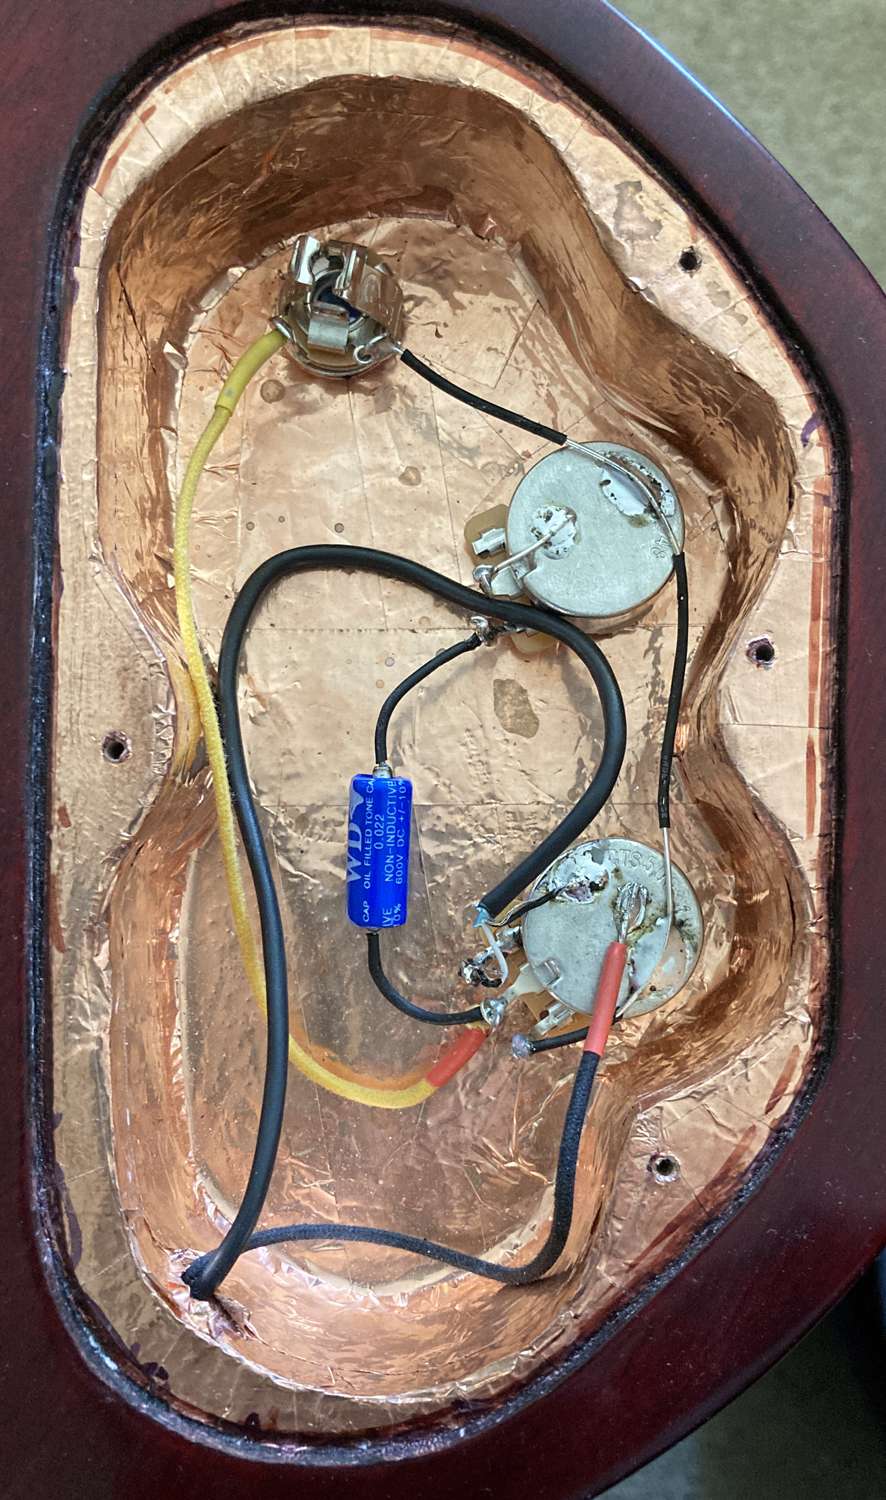
CTS pots
Pure Tone 1/4" output jack
WD Music PIO 0.022uF capacitor
24-spline knobs for CTS pots and metal pointers from Axesrus.
Musiclily adjustable wraparound bridge
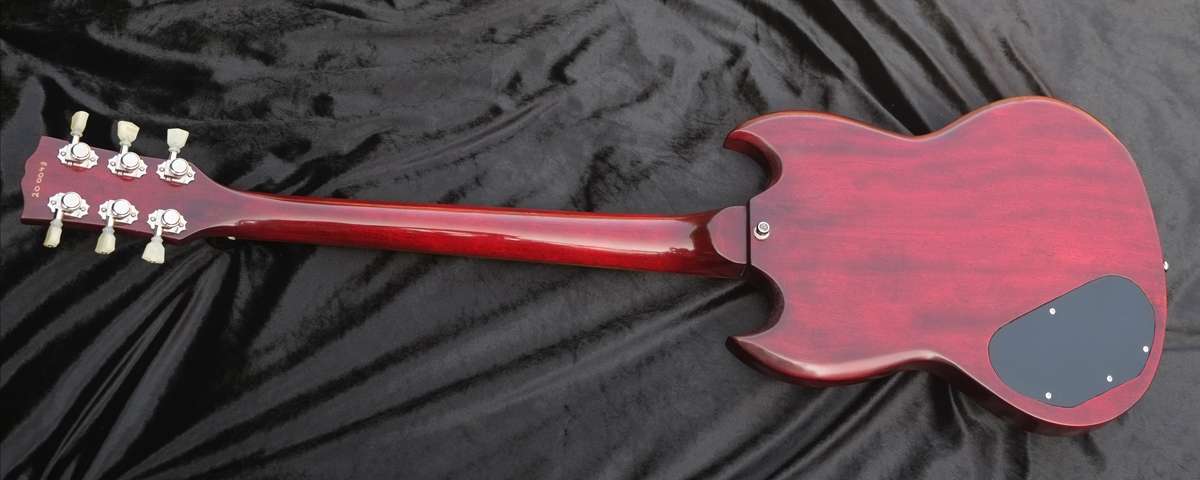
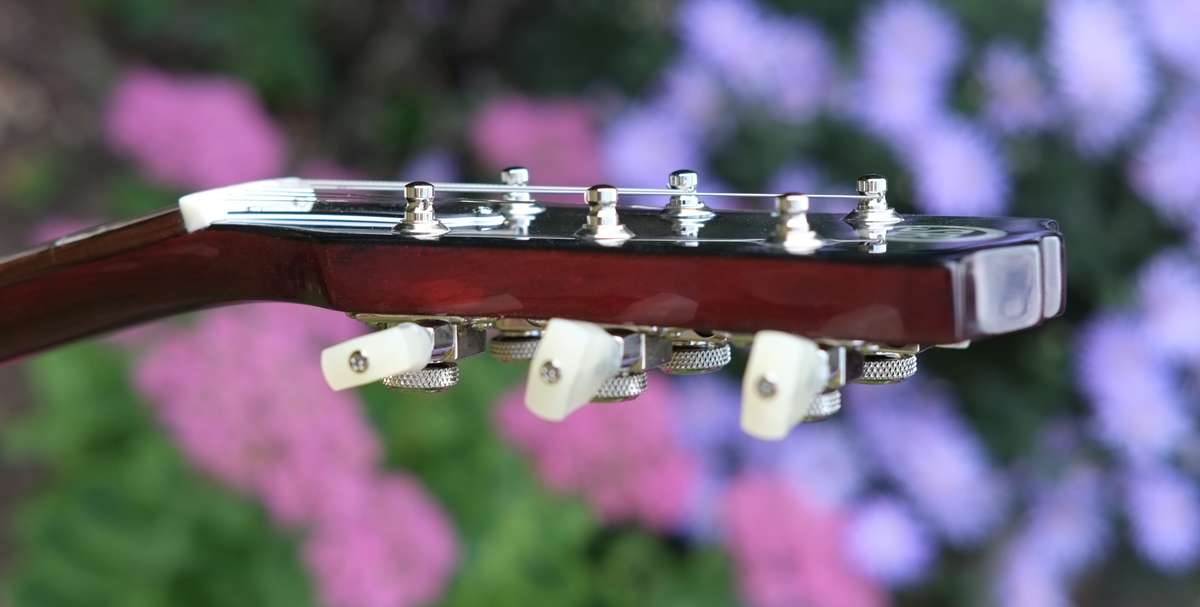
Kluson revolution 19:1 vintage style rear locking tuners
Bone nut
Schaller strap locks
3-ply truss-rod cover
Bespoke 3-ply pickguard more in keeping with a vintage SG Jr pickguard shape.
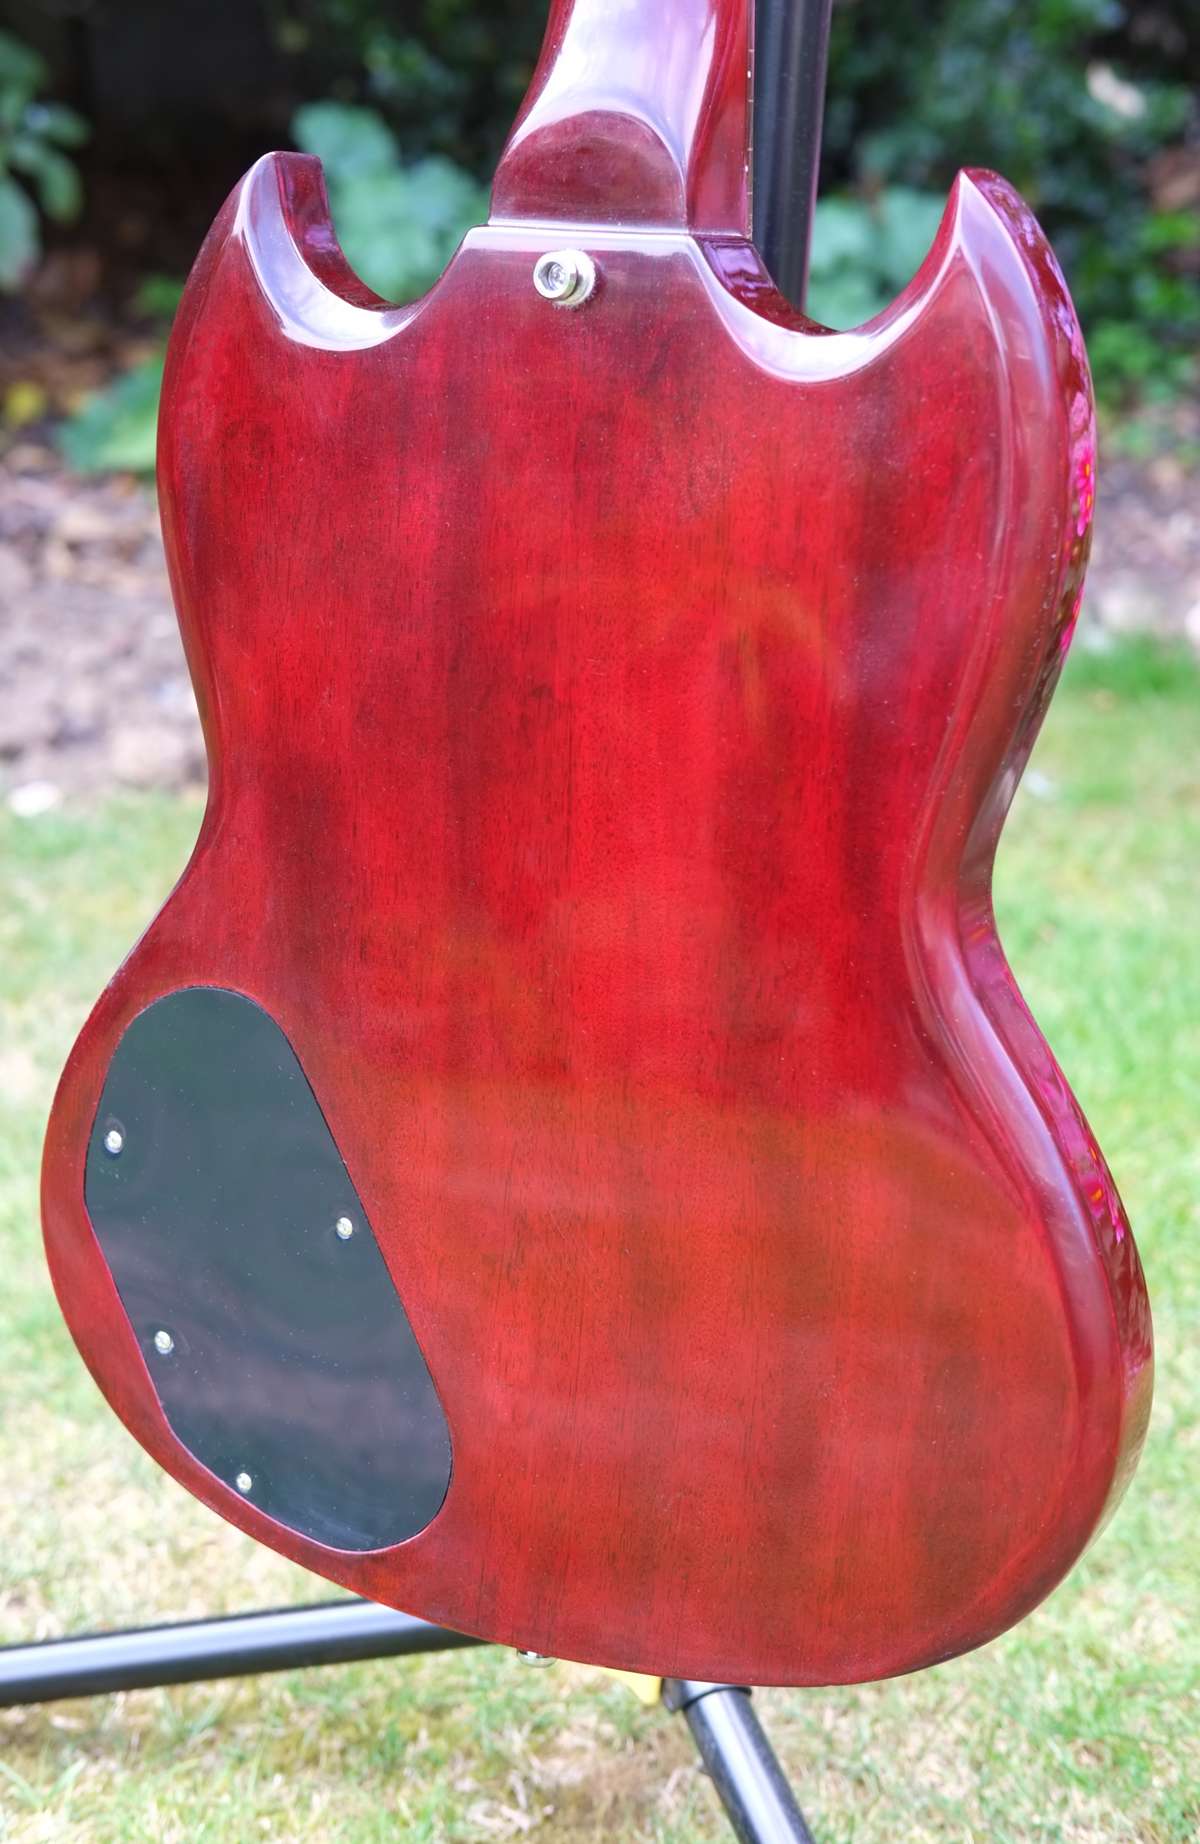
The body was first grain filed with dark brown tinted Aqua Clear grain filler, then stained with spirit-based Vintage Cherry stain. It was then sprayed with some clear nitro lacquer, then some vintage cherry tinted lacquer to help cover up the odd wood blemish and centreline join line that I felt were too prominent on their own, and more clear lacquer on top of that. Various sand-throughs saw localised touch-ups with brown Sharpie and vintage cherry nitro.
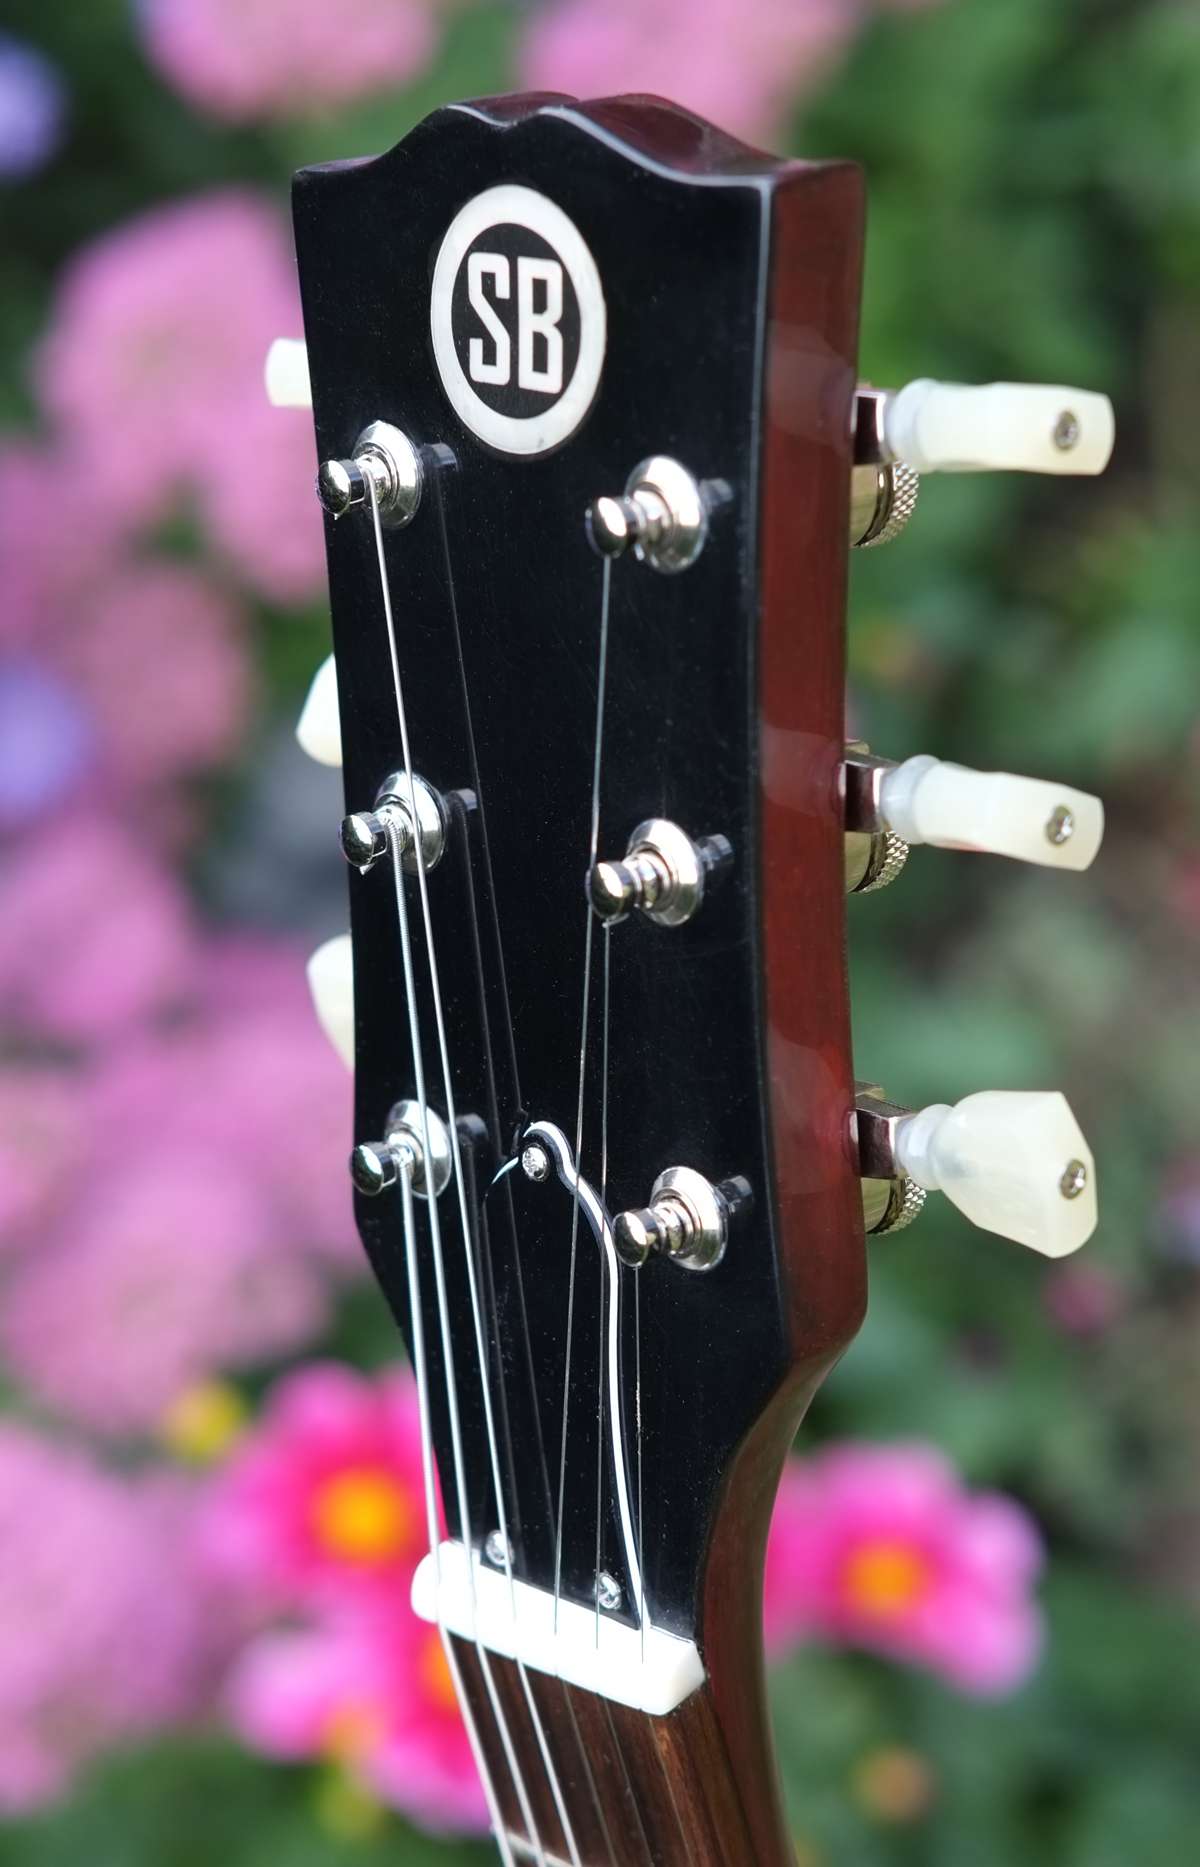
The headstock had a 0.8mm thick fibreboard veneer fitted on the top face, which helped give a nice solid edges and corners. It's so easy to round off the basic wood headstock when sanding, whilst the fibreboard is far harder and keeps it shape so much better.
The SB logo was originally supposed to be a thin abalone disk with a black decal over the top. That became a thick abalone disk with a decal on top inset into the fibreboard as the thin abalone couldn't take much sanding to get it flat before it wore through. In fact, neither did the thicker abalone (thin abalone laminated using CA) when trying to sand it flat and level with built-up layers of black nitro. So that all got sanded back flat, more black went on and then a thin pearlescent vinyl disk with a black decal over the top. And then much clearcoat.
The downside of the veneer and all the nitro layers is that the standard Kluson vintage tuners I first fitted didn't have tall enough posts, and I could only just fit one wind of string underneath the post hole. which was less than ideal, so they got swapped out for the locking tuners, when you don't need a full turn of string at all before it's in tune.
They are heavier than the standard Klusons, but the guitar still balances well on its strap. At 6.2lbs/2.8kg, it's a nice light guitar to strap on and play.
The neck has a good vintage Gibson feel to it. It's quite rounded in feel, but not too chunky and comfortable in the hand. Certainly different to the more ubiquitous modern C-shape that most of the kits have. the fretwork was pretty muck spot on, with no rough fret ends. I did do a token fret level, but it really was minimal and I could have got away with not doing one. The neck joins the body at the 22nd fret, and with the SG cutaways as well, there's certainly no limit to upper fret access. In fact this shifts the neck forward a bit, rather like on a Firebird, one reason that SGs are prone to be neck-heavy. It does mean that the guitar is very long, and you'll need an extra long case to fit it in. I bought a Gator XL ABS case for it which is 4cm longer than standard, and it fits in with 2cm to spare.
Action is low, rather than super-low (my normal set up), so about 1mm on the treble side and 1.5mm on the bass. Below that it does get a bit buzzy.
It's obviously got a P90 with a wide flat coil and is very liable to pick up hum, a lot more so than a Strat or Tele single coil does. So the pickup cavity and control cavity were foil shielded, and I must say that it's very effective. There is some very slight hum, but no more so than even a humbucker equipped guitar, as long as the guitar isn't placed right next to an amp (where the hum is then more magnetically induced from the transformer than from RFI).
I've wired it up in the 'vintage' way, with the tone circuit connected to the volume pot output, rather than input. This certainly saves any need to fit a treble bleed circuit, as it cleans up really nicely without losing any top-end when the volume is reduced. And if you want a clean sound and have any gain at all dialled in your amp, then you'll need to turn that volume control back to get a clean sound and stop the guitar from overdriving the amp, as it does have a lot of output. It's got a lot more output than the bridge MojoTone P90s fitted in my Gold Top Les Paul, even after I adjusted that to be as close to the strings as the BK pickup is. Certainly fatter than a bridge Strat or Tele pickup is, but still with a lot of clarity, just how I envisaged it would be.
Maybe I should have gone for a linear tone pot, as in this configuration, the tone only starts to lose any serious amount of treble below 3 on the tone knob. With a two-pickup guitar, this isn't normally an issue for me as I never like to alter the tone much, but with a single pickup guitar where you are reliant on the tone control to help vary the sound, a linear pot would help to dial in a darker sound a bit quicker. The tones are all there, but down in the 1-3 area. Still too much mud for me with the tone pot on 0. So whilst I said it was finished, I may just swap the tone pot out and see how that feels to me.
I've now got 9 days maximum to do that, as then my mate travels up from Devon to collect it, and as it's a joint belated Birthday/early Christmas present for him, it disappears off with him when he goes back.
Ignoring the costs of consumables like sandpaper, this has probably cost in the region of £500 to put together. Without the locking tuners that would have been nearer £460. I had another friend come over and play it yesterday, and he said that he'd happily gig with it, and that it to him certainly felt like at least a £500-£600 guitar (even if a bought guitar would have less small cosmetic blemishes on it). So at least I feel I haven't wasted the money, and it has a lot more character than a mass-produced guitar would have. Obviously any sell-on value is going to be minimal.
Now I'm waiting for the touch-up lacquer on the GSM-1 to harden (more sand-throughs on edges in a couple of places when flat sanding the clear-coat) so I can then get that polished and assembled.


 Reply With Quote