Hmmmmm. Basic set-up done except for intonation. But the pickup is too far from the strings. Need a pickup shim as it's a dogear. I've raised the pole pieces up by about 3mm but not a huge improvement. Sounds more like a twangy tele than a ballsy P90 Jr. Could be the Artec pickup as it reads a bit under strength at 7.2k and is supposed to be 9k-ish. I'm sure its the same as the Vanson one (which would be a re-badged Artec) as the written specs are identical. But first the coil needs raising up closer to the strings. Temporary cardboard shims will be fitted to see if that improves things (just though of temporary shims whilst typing so haven't done it yet). Tone pot (CTS) needs replacing as it works OK but it's not got a smooth travel and is quite stiff in a couple of places.
Bear in mind DCr is also a matter of winding wire gauge. Tele neck pickups measure high DCr compared to equivalent bridge pickups despite a small winding pack and less winds due to 43awg. Also not all ceramic mags are equal. This no-name Firebird blade mag is stronger than the P90 Epiphone magnet
Supposed to be Alnico V magnets. No wire gauge is given, but I doubt it would be 41AWG, as 42 is the standard for P90s. Bridge pickup should be 9.4k.
I've got a set of Gibson P90s that came from my gold top LP (which currently has MojoTone noiseless P90s) , so may think about swapping back-plates over and fitting the Gibson bridge pickup.
Last edited by Simon Barden; 30-08-2020 at 06:50 PM.
But the end of the base-plate dog ears sit against the body, so it would only be a temporary measure (which is I'm sure what you meant), otherwise the pickup and cover would sit a few mm above the body with a visible gap (which is what a shim fills). But a simple measure, so thanks for that. I have a large stock of hard foam sheets of different depths. Will do that.
(Comment made for clarity for other thread readers who may not fully understand the limitations of height adjustment in dog-ear P90s and which is why P90 soapbars became the norm in solid-body guitars. Not sure why Gibson didn't use soapbars in the Jrs, but they were probably using up old stock on 'beginners' guitars as they'd almost switched entirely from P90s to PAF humbuckers for their jazz guitars by the end of the '50s).
Well, raising the overall pickup height certainly improved the sound and output, but it's still not sounding that special. I've lost motivation for today, so will give up and look at the Gibson P90 tomorrow, try it out in soapbar form first before taking it apart.
The headstock finish is still pretty soft, despite now having at least least 3 weeks curing time now, probably due to excessive depth. The truss-rod cover has marked the finish underneath it so I'll leave it off until it's had time to cure and harden further then reflatten and polish that area.
The sun hasn't got its hat on today, so no opportunity to take photos outside in good light.
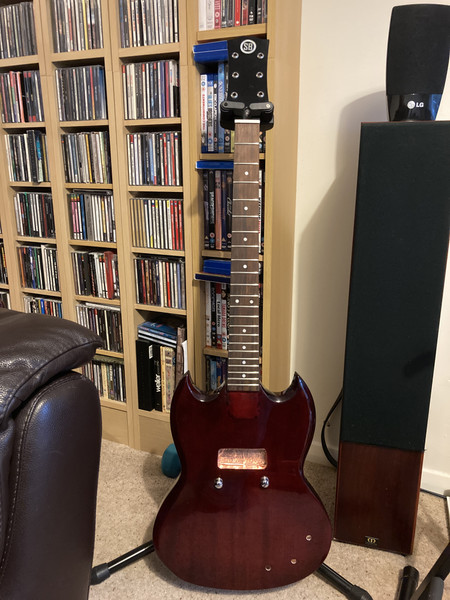
Anyway, some intermediate build pictures from the last few days.
Body after it's been polished (it's actually had quite a few remedial polishes to remove scratches I've added. But it is pretty shiny. Not perfectly flat, but not bad:
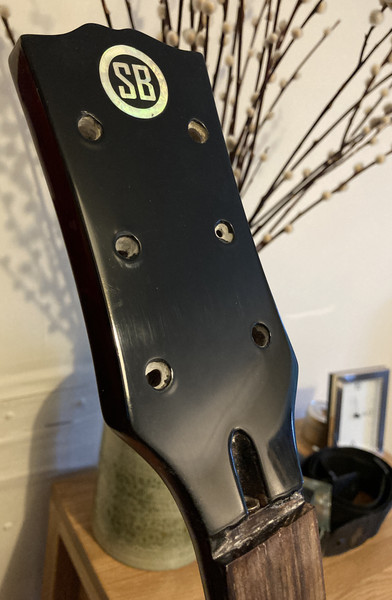
Headstock after some initial polishing. Getting there. but still a few marks to remove. You can see the annoying flaw at the bottom of the headstock logo:
After full polishing, it was time to fit the bushings for the Kluson tulip-key tuners. The holes were reamed out until the bushings just started to fit the very top of the holes. Then I knocked up this bolt-based bushing istaller which pulls the bushings down into the headstock from the rear, under full control, unlike hitting them in with a hammer and a block of wood. I saw it on YouTube, so I can't take credit for it. M6 nut and bolt, a couple of washers, a small piece of 6mm MDF with a piece of adhesive cork sheet stuck to it, and a couple of suitably-sized spanners. It works very well indeed. The bolt keeps the bushing nice and vertical with no risk of it going in at an angle (I've had that when using the hammer method) and you can easily control the progress so the bushing just touches the surface and doesn't pull into the finish (well at least the last five did and the first one only went in slightly).
Headstock with bushings inserted and bone nut fitted:
Front of body with bridge studs inserted and pickup cavity copper shielded. As the rear brass plate of the P90 dog-ear is grounded, I didn't need to run a dedicated ground wire for the shielding, but once I'd drilled the two mounting screw holes for the pickups at either end of the pickup rout, I ran some more tape up to the holes, so the base would sit on the copper and ground it through direct contact:
Rear of the body with the control cavity shielded. The bridge ground wire can be seen dangling. Its a shame taht the GSJ-1 doesn't have a smaller control cavity given that it's only two pots and the output jack in there. And the siting of the holes for the controls means that a protruding body lump (designed for one of the the control cover fixing screws to go in) stops the tabs on the two pots facing each other for an easy neat connection with minimal wire length. The tabs ended up having to face into the cavity, requiring longer wires and less optimal wire routing.


 Posting Permissions

 Reply With Quote