
Some clamped set-neck photos you can use.


Some clamped set-neck photos you can use.
Builds-
#18 PBG GSH-1R https://www.buildyourownguitar.com.a...ad.php?t=10236
#17 PBG PBA-4 https://www.buildyourownguitar.com.a...ead.php?t=9984
#16 PBG IB-1Q http://www.buildyourownguitar.com.au...ead.php?t=8754
#15 PBG TLA-12 http://www.buildyourownguitar.com.au...ead.php?t=8444
#14 PBG PRS-1H
#11 Scratch build AC15 clone headhttps://www.buildyourownguitar.com.a...ead.php?t=7686
#09 PBG ES-1TL
#07 partscaster Alder Denim Tele.

I used a block of wood with spaces to prevent damage to the frets:

Nr 1: Red Widow LP-1MQ (Finished) ->Diary<-

Great photos Marcel and Kick, I will be using a couple of these. Thanks
Cheers,
Adam
adamboyle(at)pitbullguitars.com

I used 2 clamps on my sg placed side by side on the tongue.Originally Posted by adam

They were not as big as Marcel's clamp.
Last edited by DaveC64; 16-11-2017 at 02:12 PM.
1: FV Circa 1975 Total build from scratch fret board the lot Design out of an Electronics mag. RIP
2: FS Candy Red on Gold Basecoat.
3:Finished Build: LP Custom 3 pickup Black Silver Burst.
4:Current Build SGM-1 Electric Guitar Kit (Mahogany) Going for a nice wood stain effect.
5:Current Build P Bass Electric Guitar Kit (Ash) Going for a nice wood stain effect.
6:Current Build ES-3 Electric Hollow Body Guitar Kit (Sunburst) Going for a nice wood stain effect.

Each time I hit the link I get a 404 error
Sent from my iPhone using Tapatalk
The link works fine for me stuzl
Build #1 Completed LP1S
Build #2 Completed STA-1M
Build #3 LP1F http://www.buildyourownguitar.com.au...ead.php?t=7767[url]
Build #4 PRS-1 http://www.buildyourownguitar.com.au...ead.php?t=7881[url]
Build #5 ST-1M http://www.buildyourownguitar.com.au...ead.php?t=7961[url]
Build #6 SGM-1 http://www.buildyourownguitar.com.au...ead.php?t=7857[url]

looking good.
only typo that jumped out during a quick look was
For the next step, we need either a 12ft radius sanding block or a large straight edge. A builders level, about 600mm (2ft), is also ideal.
think it should read 12in
great work so far, will see if I can draw up a 2 volume 1 tone plus 3 way wiring diagram as I didn't find one on the PBG site
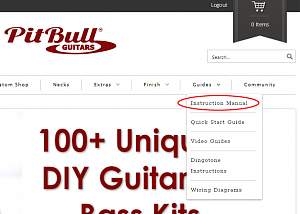
The Instruction Manual is now on the site.
As it says on the cover, this will be a live document and continually updated as we add processes and update processes with new and better techniques.
Thanks again to everyone who contributed to this project.
Cheers,
Adam
adamboyle(at)pitbullguitars.com

Just starting to read through it.
Pg 5, list item 8. "Use a drill size slightly smaller than the screw. If you hold the drill over the shaft of
the screw you should still be able to see the threads on both sides".
As too small a drill bit will still allow you to see the thread on both sides. I suggest this is modified to something along the lines of:
"Use a drill size slightly smaller than the screw. If you hold the drill over the shaft of the screw, you should still be able to see the threads on both sides, but not the main part of the shaft".
Also on Pg 5 in the tools list
"Coping saw (only if your kits head stock came unshaped)" should really read "Coping saw (only if your kit's headstock came unshaped).
(Will do a pdf markup).
Last edited by Simon Barden; 02-01-2018 at 10:41 PM.
I see nothing about the SH-1 headless guitar. Im having installation problems with the bridge, and have nowhere to find information that will help me finish it. It would be a big help if that type of guitar had some type of instructions in the build guide. Thanks.
 Posting Permissions

 Reply With Quote
