Okay, time for a new build diary! The ST1-M ďSurfcasterĒ is still underway, but youíve got to have something to do while the paint cures, right?
This one is a bit different: a N1M diary. Yep, thatís a neck from PBG Ė a maple strat neck. The rest Iíll be making up as I go along. I know, a bit cheeky, but a ďkind ofĒ Pitbull semi-scratch build nonetheless. The first step is the body, and after seeing Gavís scratch pine body Iíve decided to do the same. In a highly controversial move, timber has been sourced from the Big Green Shed in the form of their 90mmx45mmx1.2m and 70mmx45mmx1.2m dressed pine lumber. The reason for the two sizes is that Iíve found the narrower ones are easier to find with clean grain. After trips to two locations and searching through at least 30 lengths of timber, I ended up with bunch of timber at between $9.50 and $12.35 a piece.
Because Iím making this up as I go, I wanted to build a blank that could cope with a variety of body shapes. Turns out using a 90mm wide piece, with two pieces of 70mm on each side works well to get a width of 370mm. As far as length goes Iíve gone for approx. 50cm given that caters for most offset shapes that are my thing. Things like a Bass VI need more like 54cm, so Iíve actually cut a second lot to make a slightly larger blank that Iíll use for another build.
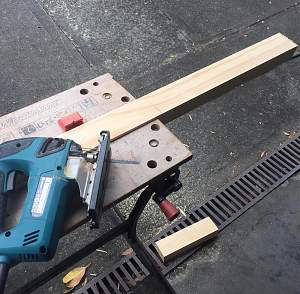
Prior to cutting I layed out the timber to check for any twists etc so I could roughly work out which bits work best next to others. Once that was sorted I marked each piece (middle, top 1, top 2 etc), and cut them up (jigsaw only just coping with the 45mm depth).

Time to glue and I dragged out an old set of 4 trigger clamps and a couple of small pieces to lay the others on. I then used Titebond (cheers Andrew!), using a piece of cardboard (from a PBG kit box no less!) to get a nice even coverage. Then put them together and put the clamps on. And thatís where the first issue raised its head: the clamps were old and the triggers not working too well. I thought I might be screwed but managed to get just enough tension to squeeze the boards together. Iíll be going on to eBay shortly to get some pipe clamps!
And thatís where we sit. Iíll leave it 24 hours to dry and then start preparing the blank.


 Reply With Quote