@Stan and woks - let x be clamps you'll need. X=infinity
@andrew - haha there can never be enough guitars!
Obligatory guitar memes:


@Stan and woks - let x be clamps you'll need. X=infinity
@andrew - haha there can never be enough guitars!
Obligatory guitar memes:
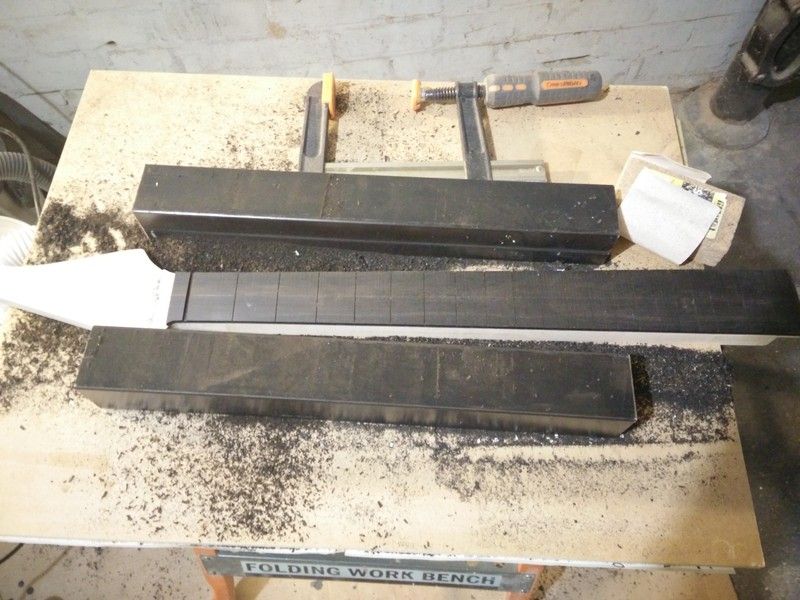
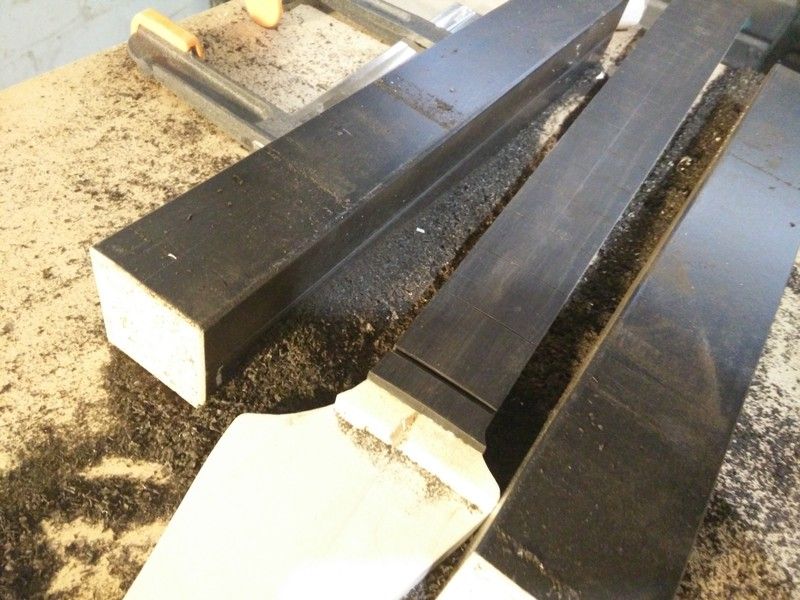
Anyway today I managed to trim the fretboard. I'm really happy with how it turned out. No gaps that I can see at the moment! Solid glue joint.
I used a flush trim bit in a router sled to make sure the router is 100% stable.
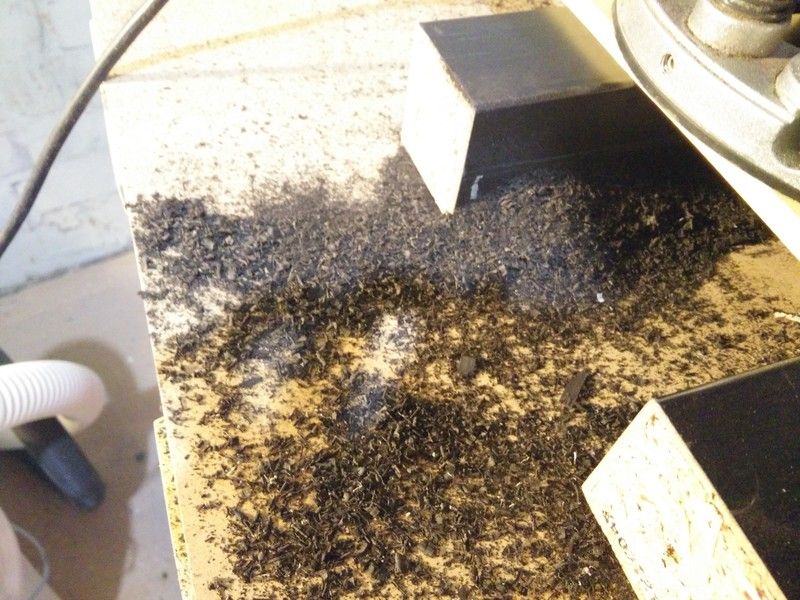
And is it just me, or whenever I work with timbers I always think of food? When I was routing the Fijian mahogany, it smelled like smokey bbq sauce and I thought bbq ribs. When I was sanding the flamed maple neck it smelled like candy. And now working with ebony just reminds me of oreo crumbs and dark chocolate! Yum yum!
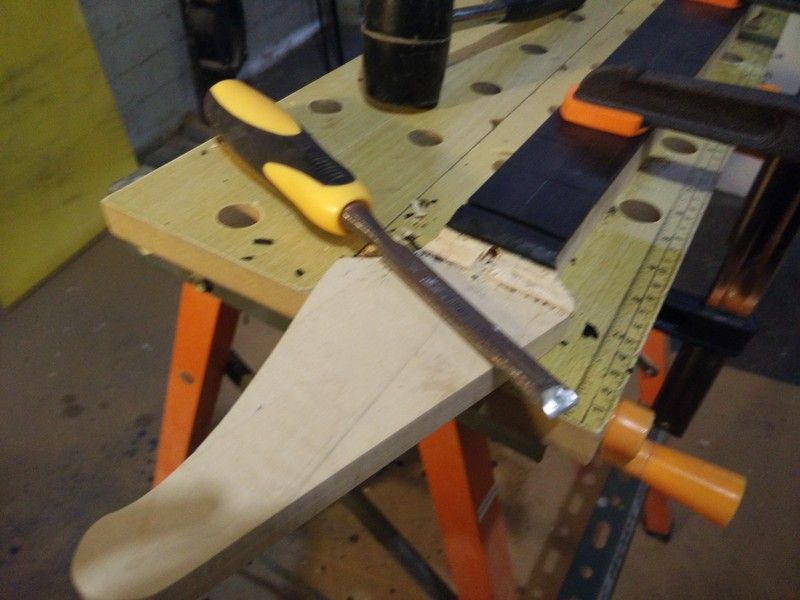
After that was done, I worked on the headstock transition. This time I tried using a chisel and it was fun and fast!
I think I did a better job for the headstock transition this time round. After thicknessing it, I drilled the truss rod access hole at a higher point so the drill bit wouldn't eat into the flat portion of the headstock. The last time I made the curved section of the transition and then drilled the truss rod hole. I must have started drilling at a lower point so the long drill bit actually cut into some part of the headstock. Sorry if I didn't explain it properly but basically the truss rod access hole now looks nicer and cleaner.


Noice werk 😀
There is always a workaround for glitches, mistakes and other Guitar building gremlins.....
Thanks DB. Sorry I didn't have the guts to try a scarf joint. Haha.Originally Posted by dingobass


Now you've made me hungry! Looks excellent.
Scott.

Hey DB, in terms of measurements that looks to be about 1000mm-1100mm long and about 200mm wide (to outer edges) 200mm deep, would that be about right or am i way off?
Ok some major updates! Haven't been posting but I managed to finish the neck this week.
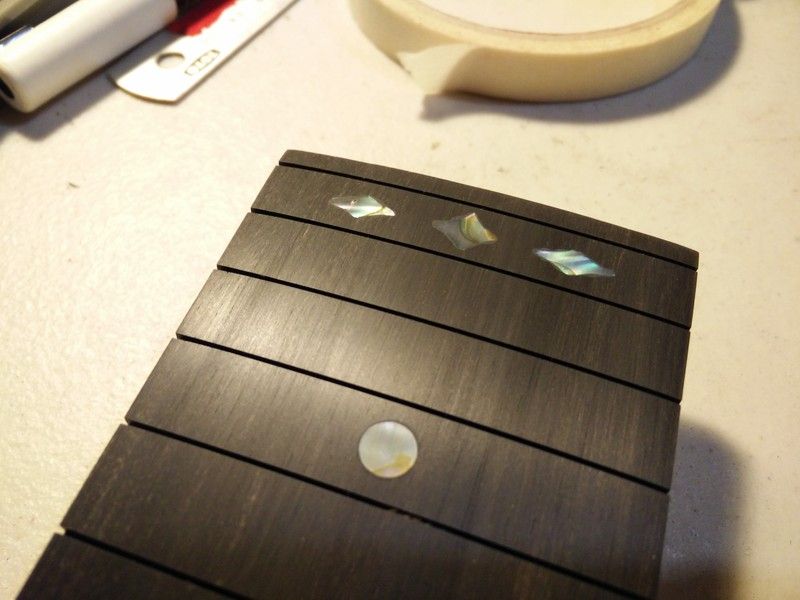
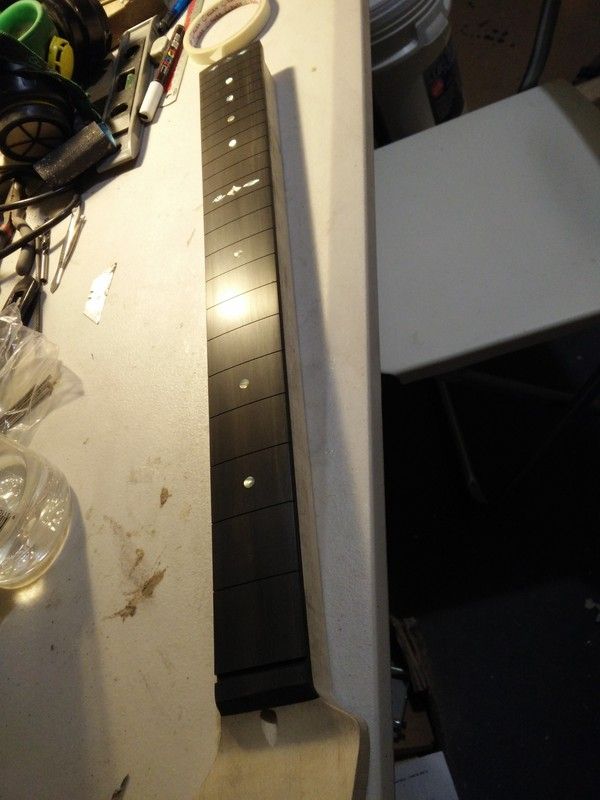
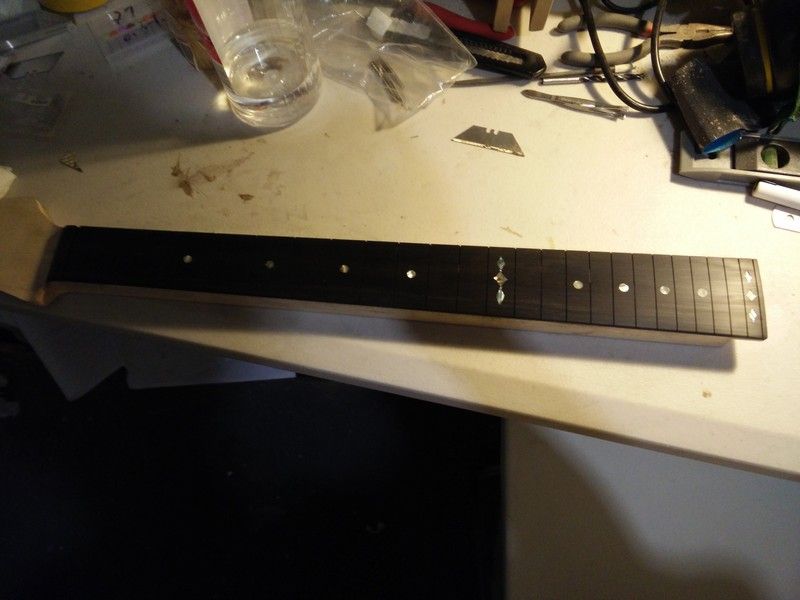
First up, the inlays. I cut out my "signature" asymmetrical diamonds (Not by choice. It's really hard to cut perfectly for such small items!) for the 12th and 24th fret. Then I added abalone dot markers for the remaining fret positions.
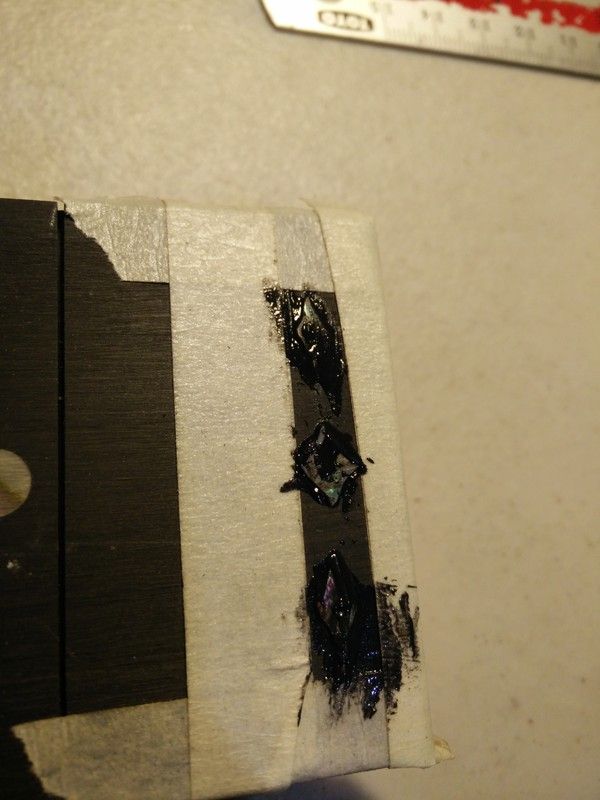
Here's a picture...Yucks! That looks gross!
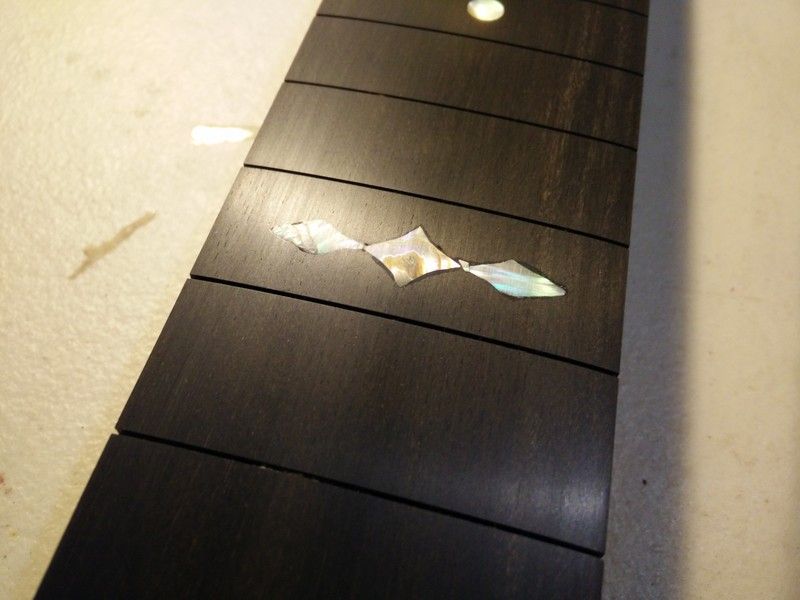
Ah much better! She cleans up well.
And of course I'm unable to get a 100% accurate CNC slot because I'm only human and I have terrible eyesight, plus the slots are really tiny!
I also hate working with abalone dot markers because the pretty ones I select almost always get sanded down to ugly, plain looking ones. A super tiny difference of 0.5mm shaved off can be a huge difference aesthetically!
I also sanded the fretboard up to 1500 grit. And of course it has a 14" radius, which is comfortable for my style of playing, and because that's the only radius block I have at the moment.
And this is after the frets installed. I opted for StewMac's medium fretwire this time and kinda regretted it. The first build had jumbos and I loved the feel. Anyway no harm done because most of my guitars have small to medium fretwire.
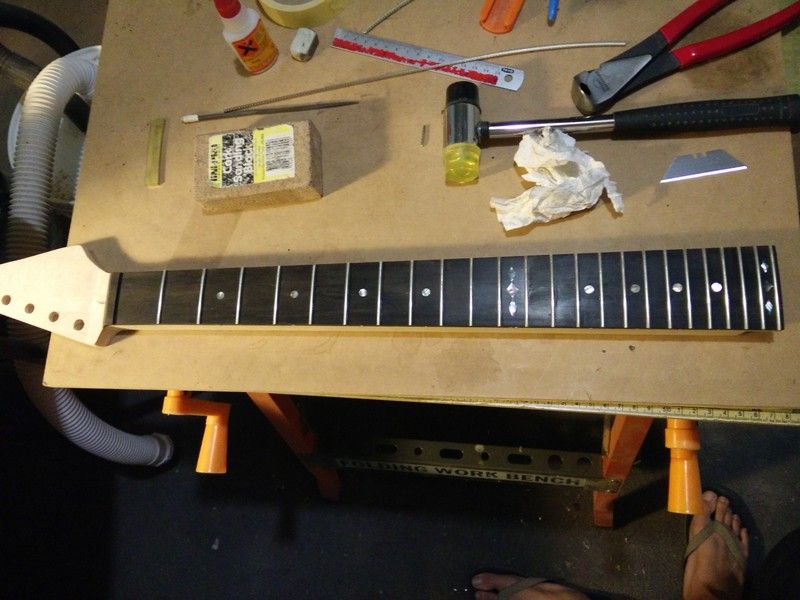
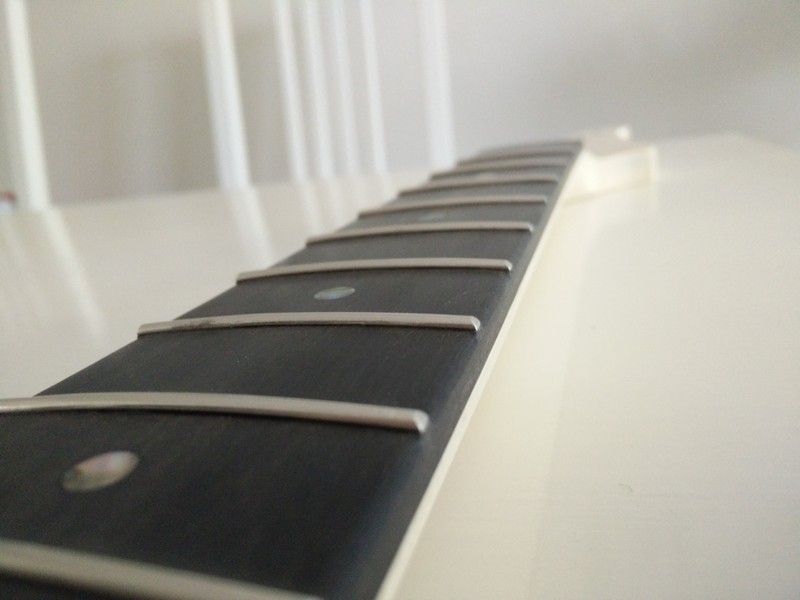
For the frets, I tried a different approach this time. I chose to hide the tangs so I cut off the tangs at the end and filled the slots with ebony dust and CA glue. Unfortunately there was one fret which I might have missed out which has its tang sticking out. I will probably paint it over with some black acrylic paint before finishing.
As you can see above, the tangs can't be seen! I think it looks nicer this way than having the small bit of metal sticking out like a sore thumb amongst the beautiful ebony. And I also scrapped the edges to round the fingerboard in between the frets. This makes a huge difference in terms of comfort.
I also glue in my frets with a drop of CA glue, but that alone still caused a few squeeze outs here and there, which can be scraped off easily.
I am bowing as I read this Simon. I am not worthy, I am SOOOO not worthy! That side shot of your fretboard edge shows off your formidable attention to detail. I applaud and bow Sir.
 Posting Permissions


 Reply With Quote