
Haha, yeah you may aswell go through with it now :P just leave all hammers me destructive tools locked away until your finished! Haha, works is right though, it ends up looking like a bunch of spaghetti!


Haha, yeah you may aswell go through with it now :P just leave all hammers me destructive tools locked away until your finished! Haha, works is right though, it ends up looking like a bunch of spaghetti!
For some things, some times, it's the same time all over the world, and I think we know what time that is...
Hey guy's, I've made a bit of progress on my build and thought I might put some more pics up. So, here she is ready for spraying the headstock.
And now for some flat black.
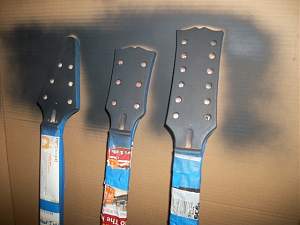
More to come. Cheers!
Trouble Walkin' Studios
Here are a few more.
I gave that a good rub with 4-0000 steel wool between coats, and eventually did 6 coats of flat black. Here are some more.
Now to mask again for clear coat. Stay tuned.
Trouble Walkin' Studios
Masked and ready for clear coat.
After 3 coats of clear with a light rub with steel wool between coats.
After 5.
After 8 coats of clear and since I'm not going to push my luck with a headstock logo, ready for the tuners.
More to come.
Trouble Walkin' Studios

good effort Steve, the headstocks look very nice. Love the PBG box mini spray booth, very good use of the packing box !
Current Builds and status
scratch end grain pine tele - first clear coat on !
JBA-4 - assembled - final tweaks
Telemonster double scale tele - finish tobacco burst on body and sand neck
Completed builds
scratch oak.rose gum Jazzmaster - assembled needs setup
MK-2 Mosrite - assembled - play in
Ash tele with Baritone neck - neck pup wiring tweaks and play in
Here we go.
That was the easy part. lol! Those little screws were a bugger to screw in with those precision screw drivers. I got blisters on my fingers and haven't even played her yet! Then my son handed me a good screw driver. Much easier. Doh!
Next, the saddle pins.
Trouble Walkin' Studios
As promised.
Another angle.
One more.
Next will be the wiring. Wish me luck guy's. From what I've been hearing, I'm gonna need it.
Cheers!
Trouble Walkin' Studios
Thanks woks! A man's gotta do what a man's gotta do brother. lol.
Trouble Walkin' Studios
looks excellent Steve. Wonder why the 6 string fingerboard is so much lighter in colour than the 12 string ? have to polished or oiled the 12 string fingerboard ?
Last edited by wokkaboy; 13-08-2015 at 10:07 AM.
Current Builds and status
scratch end grain pine tele - first clear coat on !
JBA-4 - assembled - final tweaks
Telemonster double scale tele - finish tobacco burst on body and sand neck
Completed builds
scratch oak.rose gum Jazzmaster - assembled needs setup
MK-2 Mosrite - assembled - play in
Ash tele with Baritone neck - neck pup wiring tweaks and play in

Looks good Steve. That's a lot of tuners to install! The finish line is fast approaching
Current Projects
#Planning 5 String Bass
 Posting Permissions

 Reply With Quote