Following on from Sonic's '77 Ibanez SG, and as its quite an interesting guitar, I thought Id describe working on my friend Steve Harris' 1979 Gibson The SG. The idea was to bring this rather battered an neglected guitar up to a state where his son, Matthew, could take it off to University with him instead of his 2017 Firebird.
This set out as a simple set-up and electronics upgrade, but it threw a few curveballs along the way that made it quite challenging. As such I didnt take as many photos as I should have done, especially of the initial state of the guitar. But hopefully youll get an idea of what went on.
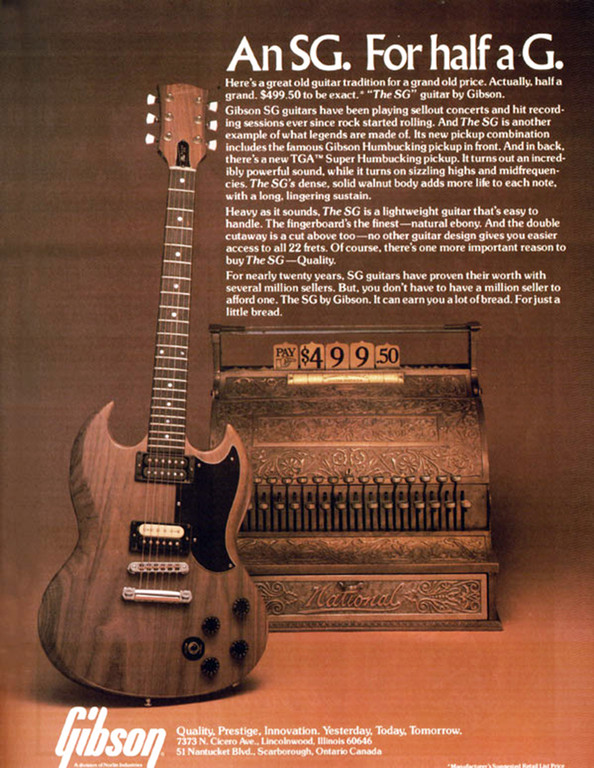
The Gibson The SG followed on in 1979 from 1978s The Paul. These were both lower cost entry-level versions of the SG and Les Paul, featuring natural walnut bodies and three-piece walnut necks, ebony fingerboards and a clear satin finish. Both had Grover milk bottle tuners with metal tulip buttons. The next year, 1980, the The SG transformed into the SG "Firebrand (as did The Paul become a Firebrand), with a branded/burnt-on Gibson logo on the headstock instead of the gold Gibson transfer that this has. There was also some patchy light scorching on the body of the Firebrands.
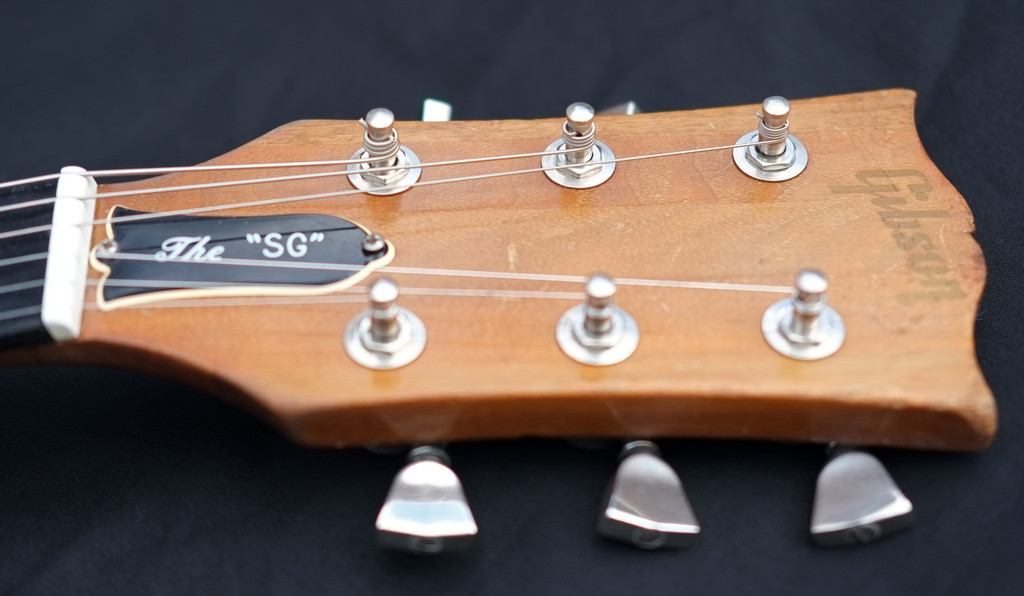
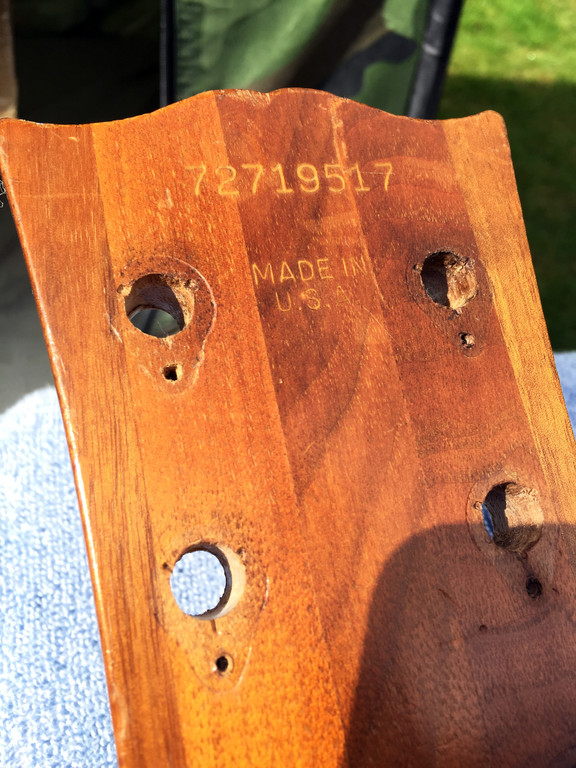
Headstock detail showing the gold Gibson decal. Very hard to read against the walnut background at most angles. What were Gibson thinking? Obviously saving money by not having to veneer and paint the headstock face black:
Despite being advertised as coming with a more powerful bridge pickup, the perceived web knowledge seems to indicate that most of The SG models came out of the factory with the standard T-top humbuckers of the period. The neck pickup is generally deemed fine, but the bridge pickup was always perceived as weak sounding. It probably didnt help that this was the period when Gibson were fitting 300k volume and 100k tone pots to LPs and SGs, instead of 500k pots for both positions as previously and currently used.
Steve, the owner, describes getting the guitar:
I spotted this one in the second-hand section in Musical Exchanges in Birmingham and bought it because I wasnt getting on with a (second hand) Ibanez Alan Holdsworth (wish I still had that one). I installed a GK2 and it became my main guitar for the Ark album Spiritual Physics and the extensive touring we did in a dilapidated converted 50 seat Bedford coach. Right at the height of the controversy with New Age Travellers.
The guitar was loaned to the son of a very good friend of mine for about five years, who learned to play guitar on it on the basis that it would have a re-fret some time during the loan. The original frets were much more traditional Gibson fret wire AFAIR.
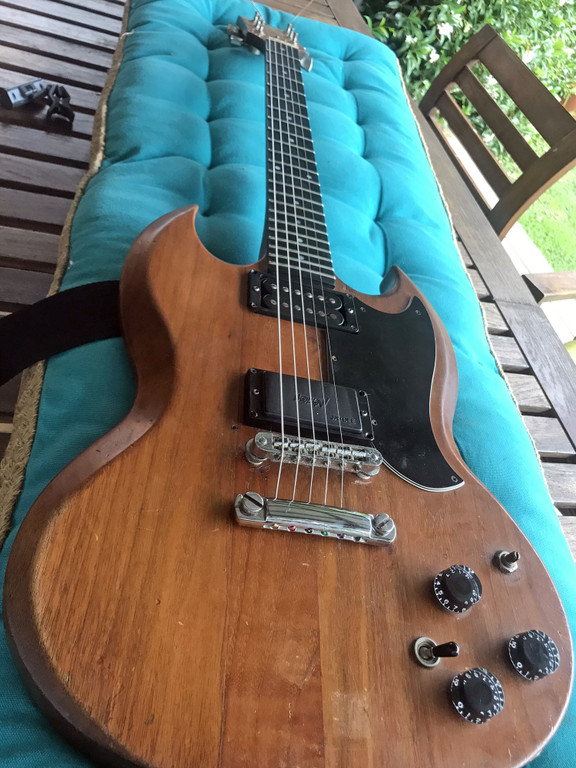
The SG as it came to me:
The new frets were much wider and higher than the original Gibson frets, they were also stainless steel (something I didnt find out about until later). But even so, there was still some light fret wear on the first few frets. The neck isnt the normal thin SG, style. In fact, its pretty solid and chunky with substantial shoulders to it, making it more of a D than a C profile. No detuning by shaking the neck around on this guitar.
The headstock is the very-wide, almost spade-like, headstock of that era. At 91.7mm across the tips. My 1998 Les Paul JP model has the narrowest tip-width of my Gibsons at 76.5mm, which is just narrower than the 77mm of my 1965 Country Western. My 2018 Les Paul Goldtop's headstock is somewhere in the middle at 81.3mm (which I presume went wider because of the need for more space when they started fitting robot tuners).
So overall the '79 SG's headstock is around 15.2mm wider than the 50s/60s headstocks. Presumably Gibson went the bigger headstock route because Fender did.
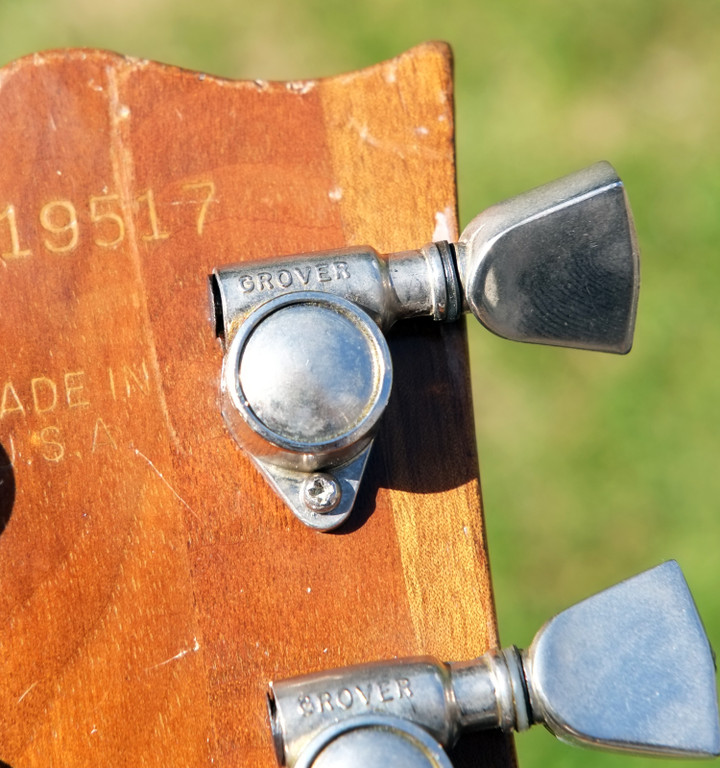
The original Grover "milk bottle" tuners, so-called because of their shape where they narrow towards the button:
Sometime in the mid/late 80s, Steve fitted a Jaydee Hooligan pickup in the bridge position (as he too thought the bridge pickup was weak sounding). His bands bass player worked at Jaydee, so got him the pickup. You may have guessed from the name that this is a high output pickup. I measured the pickup DCR at 24k, but I have no idea of the wire gauge used. The pickup has a black plastic cover and a PCB style base:
There were some marks on the body where there was a Roland GK2 MIDI pickup installed, including a couple of screw holes near the bridge.
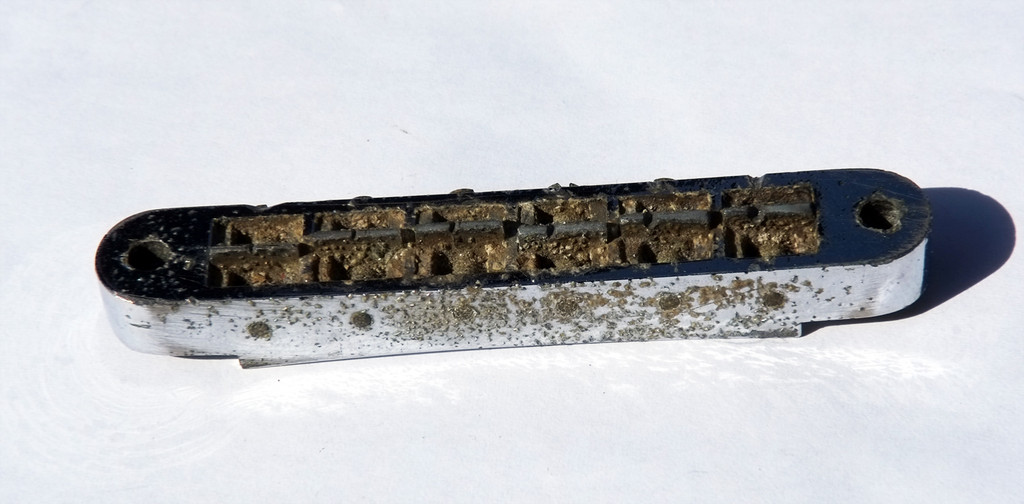
Otherwise, apart from Schaller straplocks, the guitar was stock, if rather worn. There was a year when Steve was playing three gigs a week with it. And Steve is one of those players who sweats a lot, plus his sweat is pretty corrosive. There werent many areas that his sweat hadnt reached, so there were corroded screws, corroded pots, and probably most impressive, a very corroded bridge! There's relic level and then there's this. Several previously unknown lifeforms were discovered living in the grunge:
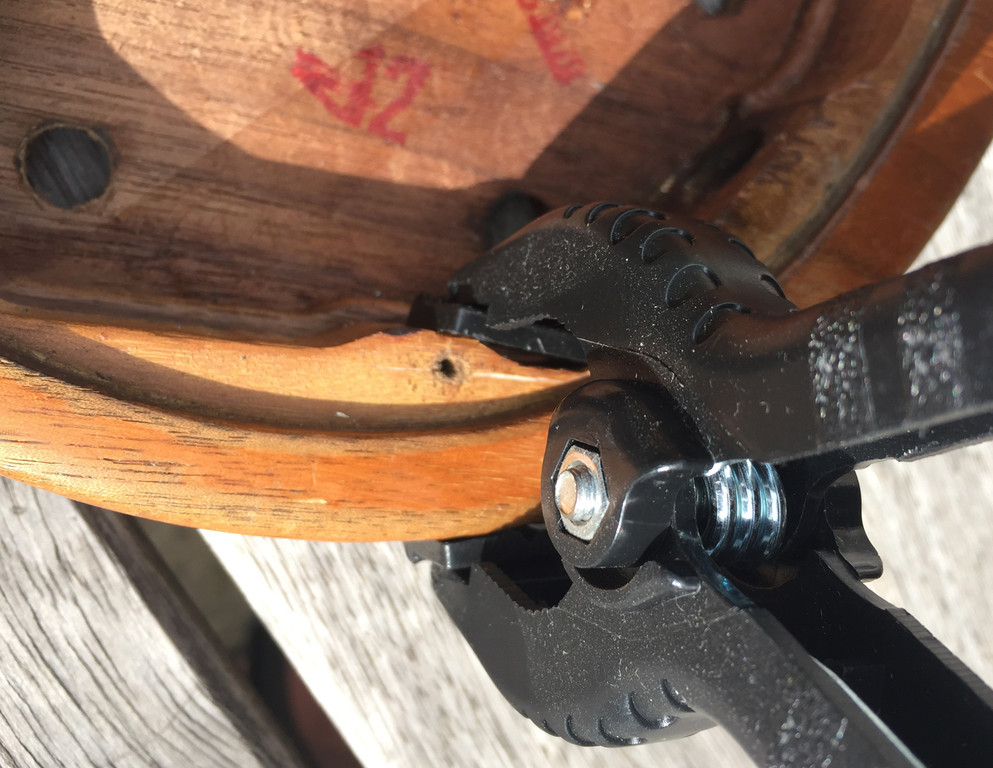
You can also see on the last picture how the strings have eaten away into the metal at the back of the bridge as a result of having the tailpiece set too low. This is not a good thing and the strings should never be allowed to touch the rear of this type of bridge.
One of the pickup rings was missing a corner, the other had a fixing screw missing that had rusted through and broken off at body level.
So there was a fair amount to repair. The plan was to replace all the pickup rings, the pots, the selector switch and the (barrel type) output jack and make a new harness. The Jaydee bridge pickup was a bit too much of a battering ram for Matthews purposes, so after some discussion. Steve settled on an Iron Gear Dirty Torque (a SD JB style pickup).
We did talk about maybe fitting some extra switching options, but we didnt want to drill extra holes in the guitar and the shallow body of the SG precluded fitting switching pots. The control cavity is only 24mm deep, and unfortunately the shallowest switching pot out there is just over 25mm.
Steve ordered up all the new bits and then delivered the guitar to me along with the parts.
The first step was to strip all the parts off the guitar. I started with the tuners and found the anti-rotation screws were all loose in their holes, so they got filled with cocktail sticks for later re-drilling.
Here you can see the headstock is clearly made up from the three pieces of neck walnut, plus two more for the wings. And you can see the widened screw holes, presumably from the tuners being knocked about a fair bit:
Then off with the bridge and tailpiece. The original bridge, a Nashville type, was being replaced with a locking TonePros unit. The existing tailpiece was being reused after a good clean and polish.
The tailpiece bushes remained in place, but one of the bridge body bushings simply came out when I pulled on the height adjustment post, so I decided to use the new bushings that came with the TonePros bridge and so pulled the other existing bushing out as well.
Then out came the electric bits. The barrel jack was quite hard to remove as the locking nut had rusted up, and was also pulled into the body, so there was very little of the nut available to get a spanner on. WD40 to the rescue!
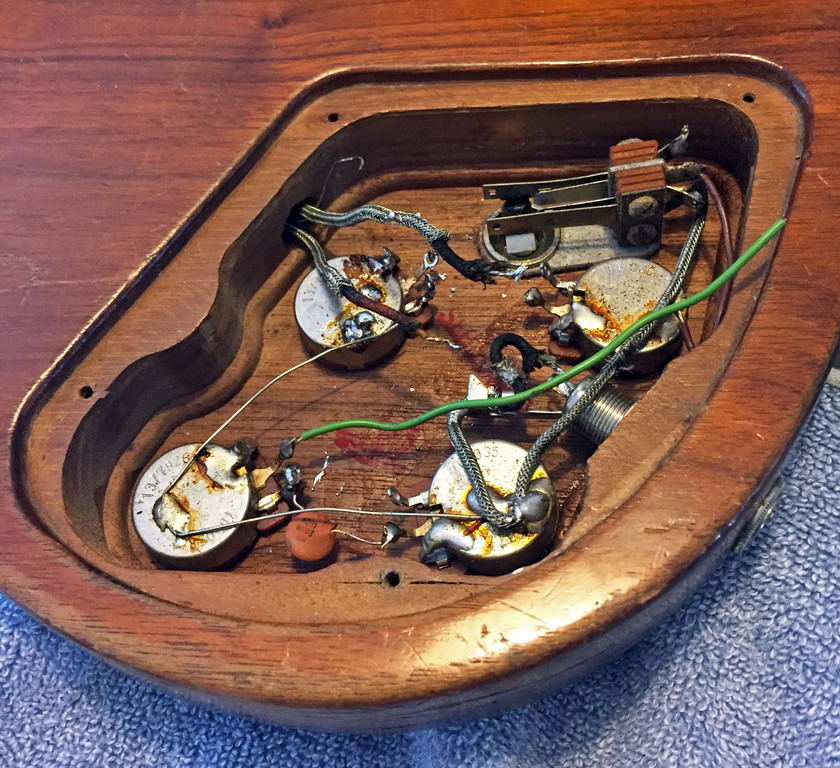
The original control cavity wiring:
I hit a snag when it came to the scratchplate, as two of the screws were so sweat corroded and rusty that a screwdriver couldn't get a grip to turn them at all. So, it was 'drill the heads off' time. This got the scratchplate off but left two screw studs protruding. One came out when turned with pliers, but the other was so rusty that it broke off at body level when I set the pliers on it. That left a total of two screw holes with broken studs left in them to deal with.
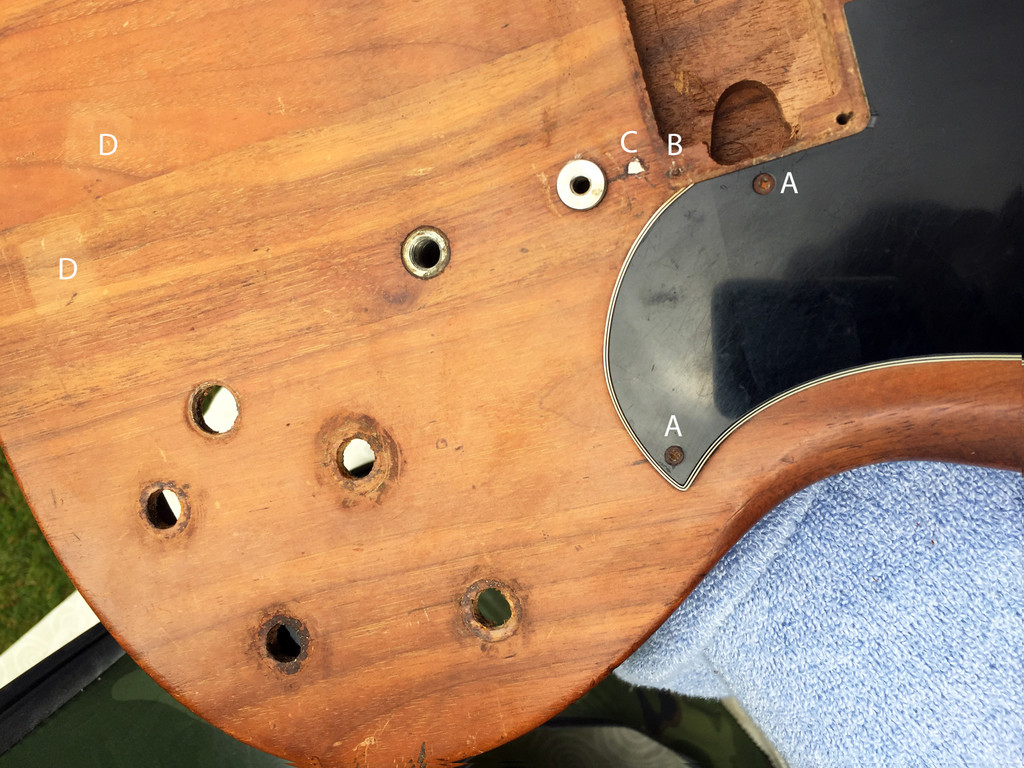
This picture shows (A) the rusted pickguard screws before removal, (B) the broken off pickup-ring screw, (C) a GK2 pickup screw hole after filling but before colouring and (D), lighter areas where the GK2 controller used to sit. You can also see areas around the pot shaft holes where the rusty washers left marks on the lacquer:
There was a spilt in the wood around a control cavity cover plate screw hole, so I glued that back together:
With all the old parts off the body, it was time to give it a clean and an initial polish. The back of the neck was very rough, partly through ridges where the three pieces of neck were glued together, and partly through accumulated dirt and old skin stuck to it. So, the neck was sanded until the dirt and ridges were off, but there was still finish on the neck, and then polished up with increasingly fine grades of Micromesh until it was smooth feeling. The back of the neck still has a couple of slight dents in it, but you cant fell them when playing.


 Reply With Quote