sounds good Simon look forward to that !


sounds good Simon look forward to that !
Current Builds and status
scratch end grain pine tele - first clear coat on !
JBA-4 - assembled - final tweaks
Telemonster double scale tele - finish tobacco burst on body and sand neck
Completed builds
scratch oak.rose gum Jazzmaster - assembled needs setup
MK-2 Mosrite - assembled - play in
Ash tele with Baritone neck - neck pup wiring tweaks and play in

this is guitar porn Simon, super nice build mate
Stan's LP Build for my Sister: http://www.buildyourownguitar.com.au...ead.php?t=3146
Benson Pickup Strat mod: http://www.buildyourownguitar.com.au...ead.php?t=5229
Epiphone LP headstock fix: http://www.buildyourownguitar.com.au...ead.php?t=3410
Martin Backpacker Repair: http://www.buildyourownguitar.com.au...?t=5038&page=3
'57 Harmony Jazz guitar project: http://www.buildyourownguitar.com.au...ead.php?t=2972

Haha thanks stan but this is a family forum!
Woks, here's the video showing how I made the knobs. I think it isn't the best way to do it but I made do with what I have. Using a lathe would probably be better.
nice work Simon good to see how you made them. With the hole saw did you slide the centring pilot drill bit up so it wasn't poking out for the wenge tops? I've never thought of that technique. The knobs and truss rod cover are a nice personal touch. Now I know your technique I might have a crack at wooden knobs next scratchy cheers
Last edited by wokkaboy; 28-07-2016 at 10:47 AM.
Current Builds and status
scratch end grain pine tele - first clear coat on !
JBA-4 - assembled - final tweaks
Telemonster double scale tele - finish tobacco burst on body and sand neck
Completed builds
scratch oak.rose gum Jazzmaster - assembled needs setup
MK-2 Mosrite - assembled - play in
Ash tele with Baritone neck - neck pup wiring tweaks and play in
I bought the cheapest hole saw kit from the green shed, which is the craftright one. So there's the hole saw attachment which has a 6mm drill bit attachment with an allen screw, and I took out the drill bit. I reckon the drill bit is there to centre the hole saw properly. Without it you may have noticed the hole saw was wandering quite a fair bit.Originally Posted by wokkaboy

so Simon if you took the drill bit out what attached the hole saw to the chuck ? Sure the drill bit's purpose is to centre the hole saw
Current Builds and status
scratch end grain pine tele - first clear coat on !
JBA-4 - assembled - final tweaks
Telemonster double scale tele - finish tobacco burst on body and sand neck
Completed builds
scratch oak.rose gum Jazzmaster - assembled needs setup
MK-2 Mosrite - assembled - play in
Ash tele with Baritone neck - neck pup wiring tweaks and play in
There's a large nut which bolts onto the main frame which secures the hole saw. You can attach the drill down it to the main frame or remove it. I'll take some pics later on and show you how it works.
cheers Simon, I'll have a look at my hole saw, got a feeling I should be able to move the drill bit up so it's still attached to the hole saw but not protruding through
Current Builds and status
scratch end grain pine tele - first clear coat on !
JBA-4 - assembled - final tweaks
Telemonster double scale tele - finish tobacco burst on body and sand neck
Completed builds
scratch oak.rose gum Jazzmaster - assembled needs setup
MK-2 Mosrite - assembled - play in
Ash tele with Baritone neck - neck pup wiring tweaks and play in
Woks were you able to figure it out? So sorry I totally forgot. If you still want me to take some pics I can do it tomorrow.
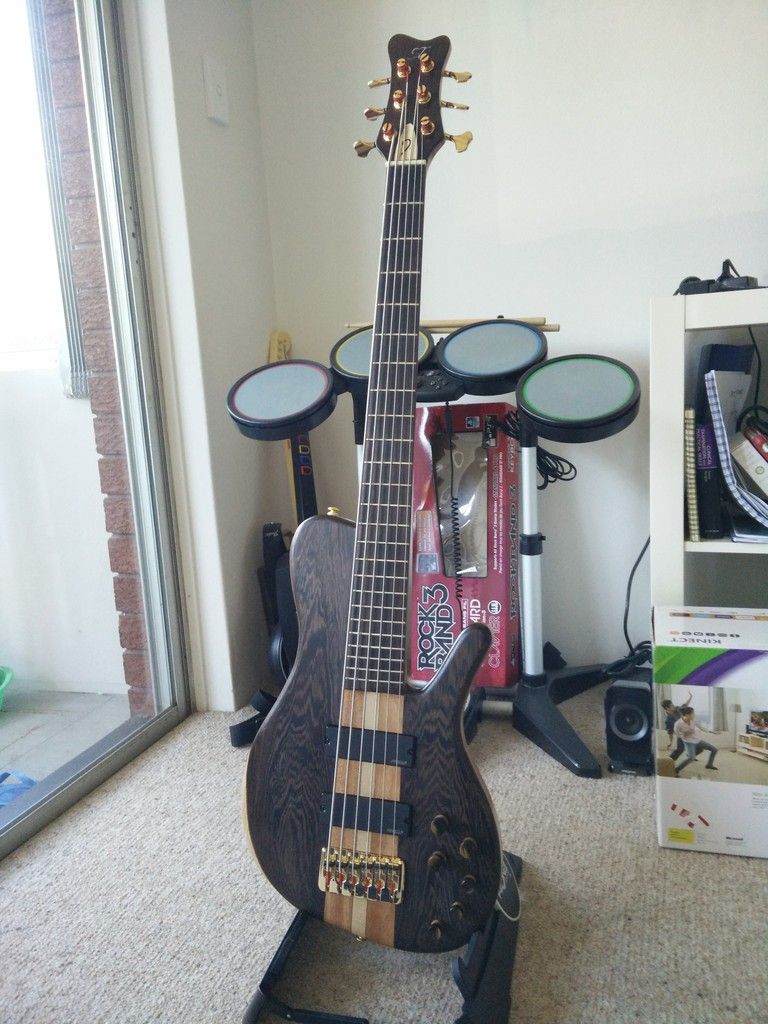
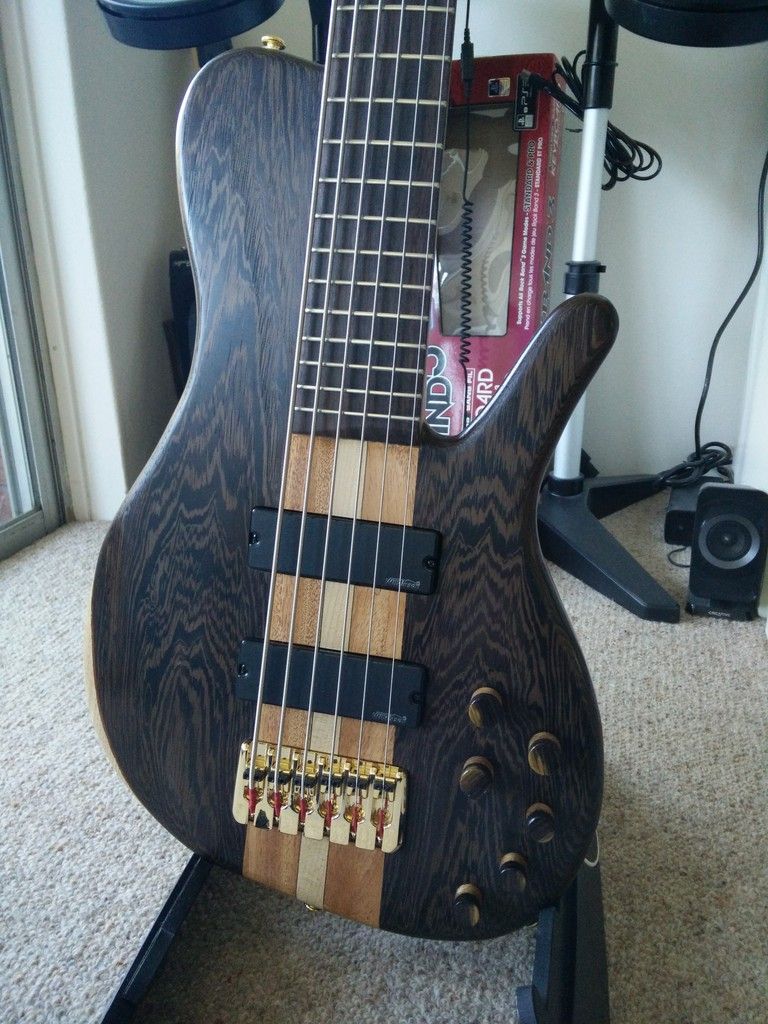
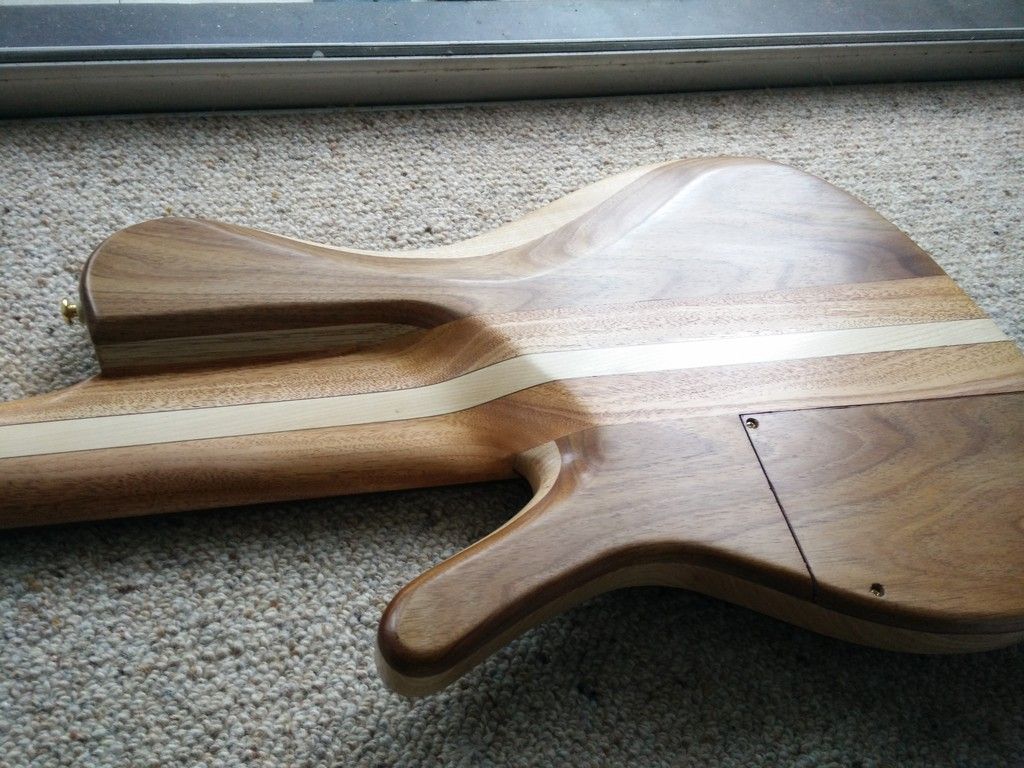
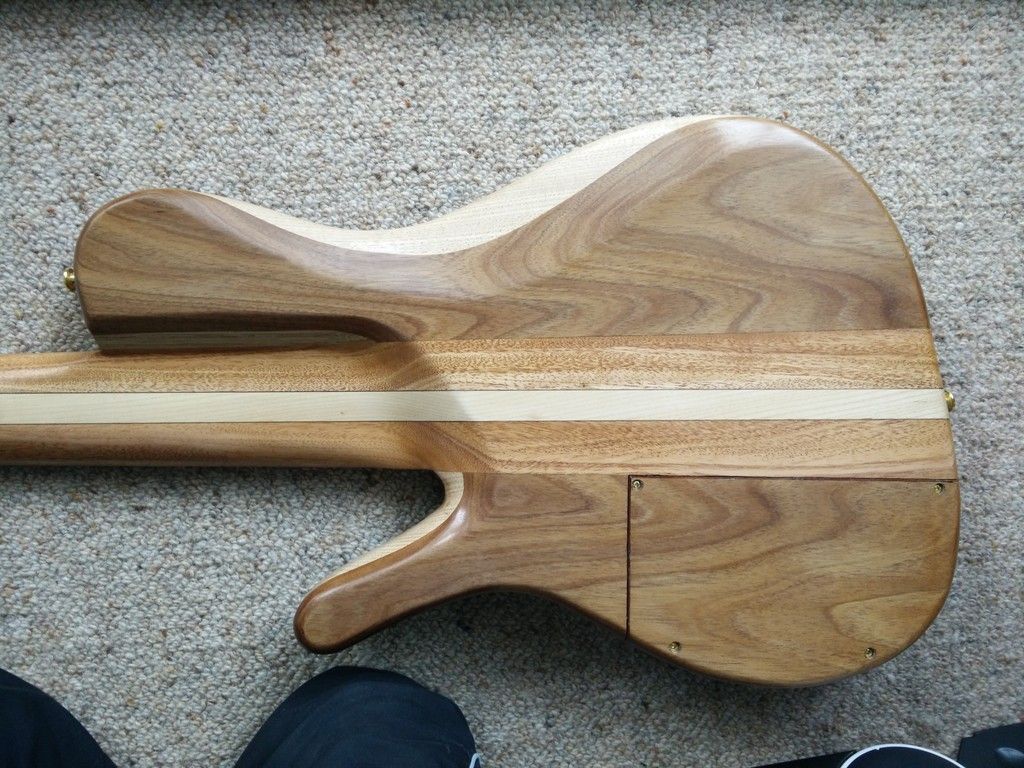
YES! It's finally assembled! This project was the toughest ever and the most time consuming. I'm glad I pushed myself because the end product looks and sounds fantastic.
Things I could've changed in retrospect:
1. Bigger lower horn cutaway.
I have problems reaching the 24th frets on the bass side because the lower horn gets in the way. Clearly a design flaw, but I probably won't even reach those frets!
2. Left the control cover as it was without laminating an aluminium sheet.
It was a pain trying to get the veneer to stick evenly onto the aluminium because it kept breaking and I had areas where the glue didn't contact the veneer. The aluminium also made it much heavier and I couldn't get the magnets to get a firm grip enough so I had to use some screws in the end. The cover held in place with the magnets but a gentle knock against the edge would make it fall off.
3. Straight string feed from the nut to the tuners
The A and D strings were at an angle going to the tuners, which isn't ideal. I designed it this way purely to get the tuners to line up nicely with the headstock edge and I neglected the string pull. I don't think it's a big deal on a bass without a tremolo unlike guitars, but I guess it's purely aesthetics.
Anyway enough reflecting. Time for some pics!
 Posting Permissions


 Reply With Quote