
I don't why this made me laugh so much!Originally Posted by Brendan


I don't why this made me laugh so much!
Over the last few weeks I've been working on the body preparing for the top coat. First time round, thought I had sanded it well enough, but when I sprayed on the undercoat the grain shone through like nothing else. Before I sanded it back, decided to spray on some high build filler to try to fill the grain.
Dry sanded the whole thing back to mostly bare wood. idea was that between the undercoat and the filler I would end up with a nice smooth surface.
Photo's below are post sanding back the first round undercoat and filler.
Thought I had it all sussed, surface was as smooth as a baby's bum. Sprayed on undercoat and surface looked good.
Let it sit for a week, then went to spray on top coat today. Grain is once again showing through. Gave the undercoat a heavier sand than normal before top coat, but not through the undercoat to try and level some of the grain. Put on the top coat and predictably, the grain is showing through. Not happy with the finish, the grain is upsetting what would otherwise be a good finish. Thinking that once the two pac has cured this week, I will sand it partially back next weekend and re-coat to try to get rid of the grain.
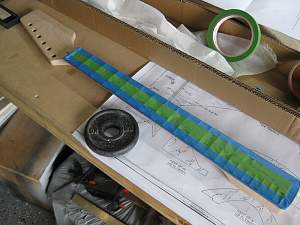
Meanwhile I've been working on the neck in between the body drama. I'm using clear dingo tone for the neck - so far I've done the clear stain and the first coat of the top coat. Gotta admit it looks and feels pretty good. I'm impressed with the silky feel that the neck has got already, so another couple of top coats and it should be really good.
Photo below is of the neck fine sanded and masked prior to stain coat.

Hey StratoDoyle, last year I built myself a Strat with similar colour scheme but with a stain instead of a spray, and to be perfectly honest, it came out better than I originally thought! Bit late now, but give some Dingotone colours a shot, you will be surprised at how easy it is to do!

you could try timbermate thinned out with water as a grainfiller, lots do it here, and sand that back for a super smooth finish, then under coat and colour.
I've noticed that Gibson lets the grain show through on some of their matte finish guitars...
Stan's LP Build for my Sister: http://www.buildyourownguitar.com.au...ead.php?t=3146
Benson Pickup Strat mod: http://www.buildyourownguitar.com.au...ead.php?t=5229
Epiphone LP headstock fix: http://www.buildyourownguitar.com.au...ead.php?t=3410
Martin Backpacker Repair: http://www.buildyourownguitar.com.au...?t=5038&page=3
'57 Harmony Jazz guitar project: http://www.buildyourownguitar.com.au...ead.php?t=2972
Thanks Stan, I'll definitely try the Timbermate next time. Now that the 2pac has finished levelling and hardened overnight, it looks ok, just "grainy". Still deciding if I'll sand and re-spray ...

Last edited by StratoDoyle; 01-03-2015 at 08:19 AM.

I personally like the grain look. Makes it feel like there's some wood hiding under there.
I actually like it Strato, I dont think it detracts at all, but you have to live with it, all the best with that decision: 2 pac will be fun to sand...
Stan's LP Build for my Sister: http://www.buildyourownguitar.com.au...ead.php?t=3146
Benson Pickup Strat mod: http://www.buildyourownguitar.com.au...ead.php?t=5229
Epiphone LP headstock fix: http://www.buildyourownguitar.com.au...ead.php?t=3410
Martin Backpacker Repair: http://www.buildyourownguitar.com.au...?t=5038&page=3
'57 Harmony Jazz guitar project: http://www.buildyourownguitar.com.au...ead.php?t=2972
Stan, the 2k wasn't that bad to sand. Once you cut through the gloss it is pretty much the same as any other paint. Bit of sanding to end up with a 3 tone finish - red, undercoat and the occasional spot of bare timber and the grain had disappeared. I used some CA glue (essentially super glue) to seal the grain on the patches that I'd rubbed through. A trick I picked up elsewhere. Smooth the CA out with your finger.
The CA absorbs into the grain a little and stops it swelling, fluffing up etc. Another light sand to smooth out the CA spots, quick undercoat and it was ready to patin again.
2 top coats yesterday and I'm happy with the finish now. Just need to let it fully cure during the week and for the 3rd coat of DingoStain to cure on the neck and should be in business for assembly next weekend.

great tip there Strato, and it's looking great too!
Stan's LP Build for my Sister: http://www.buildyourownguitar.com.au...ead.php?t=3146
Benson Pickup Strat mod: http://www.buildyourownguitar.com.au...ead.php?t=5229
Epiphone LP headstock fix: http://www.buildyourownguitar.com.au...ead.php?t=3410
Martin Backpacker Repair: http://www.buildyourownguitar.com.au...?t=5038&page=3
'57 Harmony Jazz guitar project: http://www.buildyourownguitar.com.au...ead.php?t=2972
Well started the final assembly last night. Putting the Copper shielding in the cavities.
I may have got a little carried away with myself and shielded the back cavity as well. Hmm read that back and it sounds a little dubious ...
In any case, as you can see from the photos above, the er, well it is shielded now in any case. I hope.
Spent some time this afternoon putting the strings on and setting it up. Had to loosen the nut just a little to get a slight concave shape to the neck. Setting it up according to the way they recommend in "How to Build Electric Guitars". Straight forward enough. Adjusted the bridge heights to get the right clearance and shape. Then got the intonation sorted after a lot of fiddling. Then there she is.
After I plugged in to my little 10W VOX Amp, and had a little strum my son thought i was a "rocking star". At least my son thinks so anyway.
Gotta say, pretty happy with the result. Not that I can play an electric guitar, but it all sounds pretty good to me. At this stage, no buzzing of any kind. My cavities appear to be shielded ...
 Posting Permissions

 Reply With Quote