I lost my login and stuff when the forum switched, and put this on the backburner for a few months but ive been cracking on with it lately and making some progress.


I lost my login and stuff when the forum switched, and put this on the backburner for a few months but ive been cracking on with it lately and making some progress.
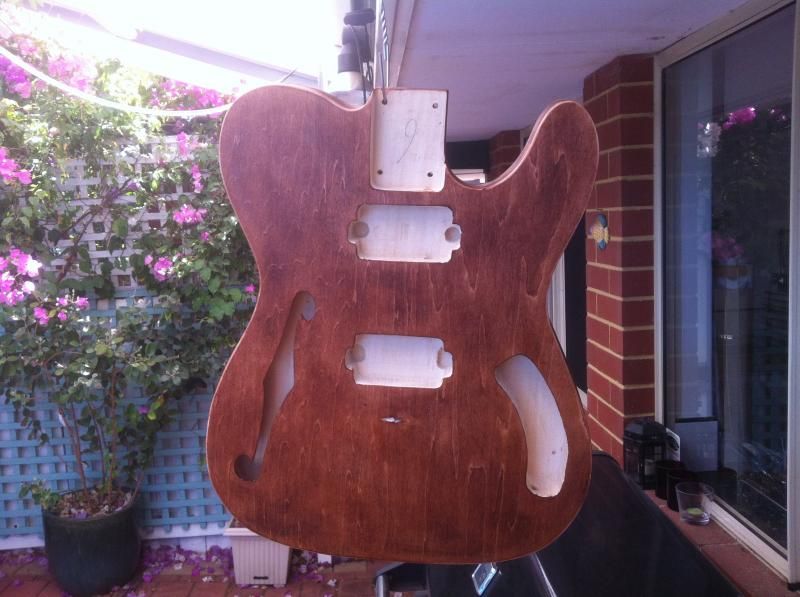
ok so i went with the mahogany woodtone, this was after a couple of coats
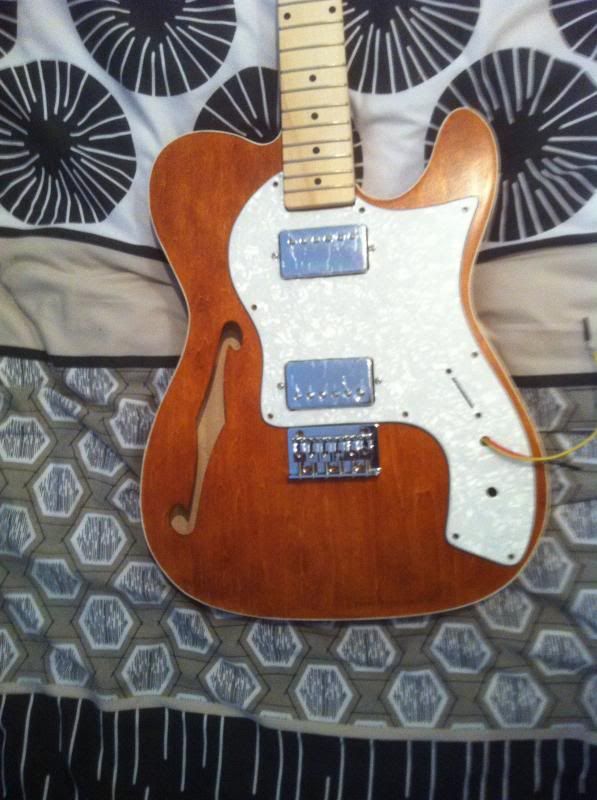
the colour came out not as dark as i thought, but sort of richer and slightly orangy, i like it. heres a mock up i did a while back
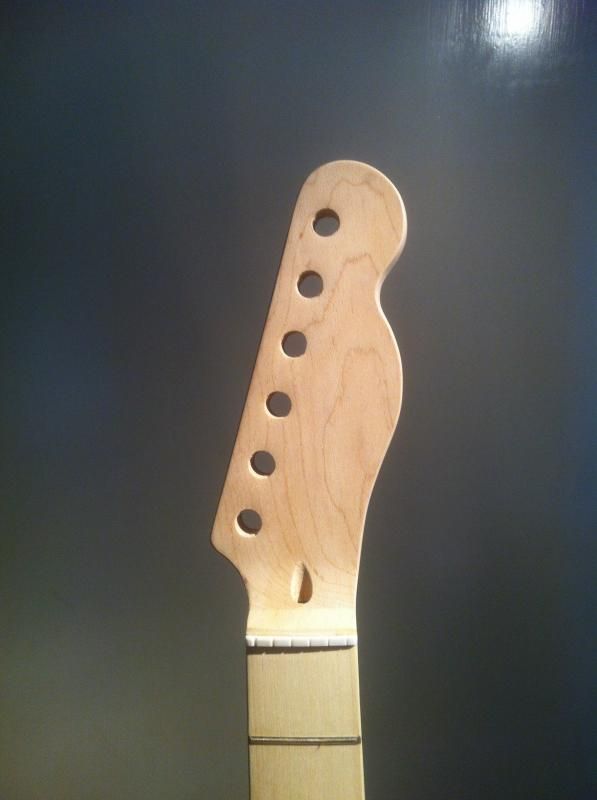
after this i was slack for a while and didnt get the headstock cut for ages. finally did that at the end of last week. came out nice, i really wish id taken a pic when i first cut the rough shape with a saw, it looked so haggard! some patience and some sandpaper cleaned it up very nicely though
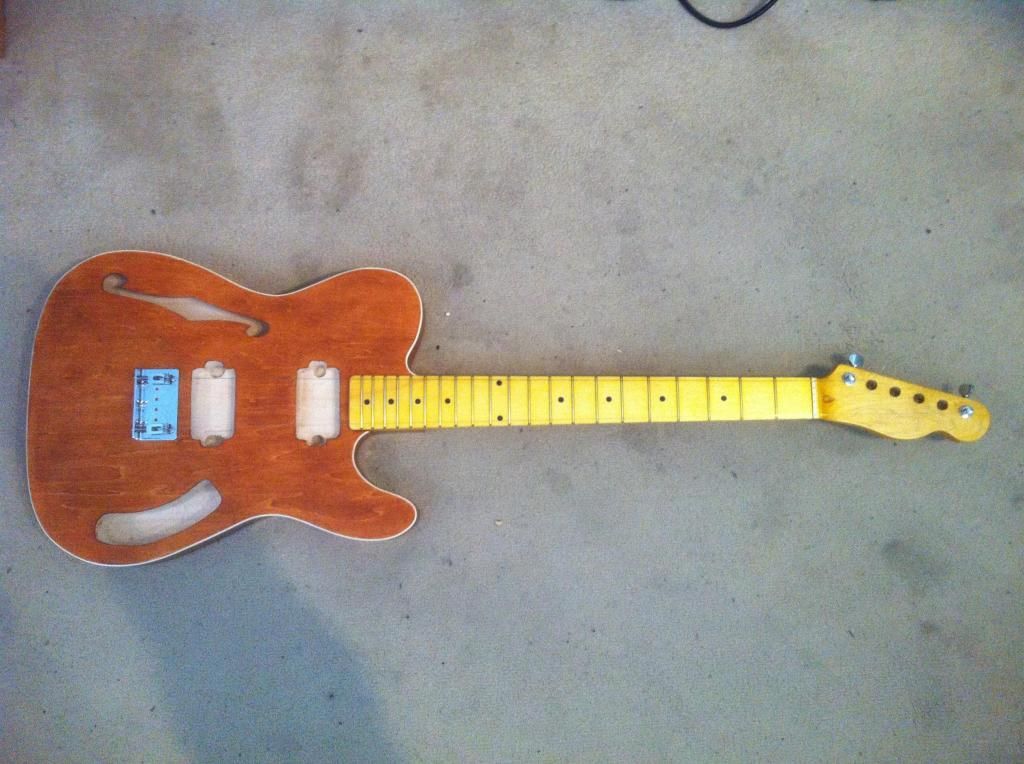
once id shaped the headstock, i got the neck drilled and attached-i was so worried about f***ing this bit up and having a misaligned neck. the neck pocket in the body as routed from the factory wasnt super clean and i was hesitant about taking too much material off to fix it. fortunately it seems to have lined up perfectly
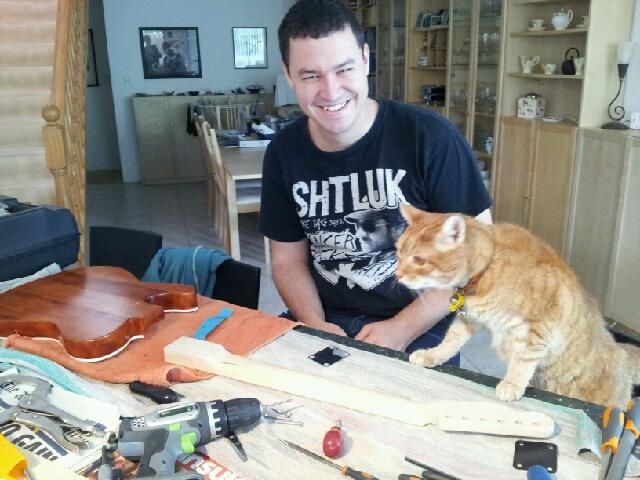
so here it is how it currently stands. i threw a couple of strings on just to check the alignment.
i was originally sceptical about the vintage yellow on the neck (it was the only colour in stock when i ordered my woodtone so i just went with it) but i think it actually looks pretty decent (its not as yellow as in the picture, thats just cos of the light in my room)
even the action on the neck seems ok. its a bit buzzy from about the 6th fret down but hopefully i can sort that later-ive ordered a fret file to work on setting it up.
ive got a few more things i need to look at next
-wiring, i can solder a bit, im hunting down the wiring diagrams for this guitar atm
-pickguard. the cut of the pickguard was a bit crap from the factory. the shape doesnt quite follow the contour of the guitar body so im going to try and get that matched up a bit better by reshaping it a bit
-setting it up. i figured i might as well learn about this, be a useful skill to have
so actually now i think about it, not that much more to do. Its been fun working on this guitar and especially now its coming together! theres things id do differently if i did it again, but i still think its gonna come out nice
theres a few scratches on the body i didnt manage to get out. i sanded the shit out of it, but with the cap being so thin i was cautious on the top. there was one spot where i sanded too far at the edge but you cant notice it unless youre looking for it. i figure guitars always get a few chips and dings in them over time anyway, but next time id like to try one without a cap and binding.
id also be keen to try a different finish, maybe one with a high gloss, im not sure.
anyhow yeah just thought i would do a little update now its coming along, peace out

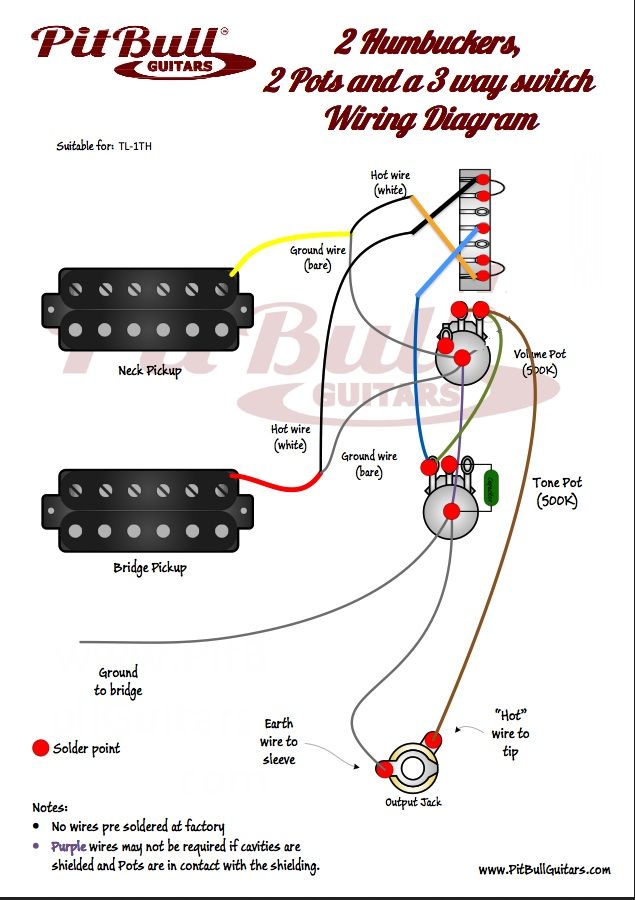
If you're using the stock electronics you essentially want the 2 Humbucker wiring diagram but with the 3-way lever switch from the 2 Single Coil wiring diagram, if that makes sense. So, if you're using the stock two wire humbuckers, you can just wire them like the single coil diagram (the output connects to the middle lugs of the lever switch).
Scott.
i just printed out the 2 humbuckers to 2 pots and 3 way switch one to use
this one http://www.pitbullguitars.com/wp-con...pdf/PRS-1S.pdf
im thinking ill get the switch and pots all soldered together now but not solder the pickups in yet because the wires have to be threaded into the body of the guitar
i still need to slightly enlarge the body cavities for the pickups anyway, they were always a real tight fit from the start but now the pickguard is skewing because the pickups are so tight against the body. or maybe i could file down the leg bits where the screws thread into on the pickups themselves...hmmmm
edit: aha! now that i actually looked at the three way switch i have, yes its totally different to the diagram i printed, thanks for pointing that out! im not concentrating properly, im going to go make a cup of tea and a sandwich before i tackle this

Hey Ben, are you a Perthite ? Build looking good. I built a thinline few months ago and had to same problems, the pup cavities needed widening and the pickguard a bit of filing/shaping near the bridge.
Think you will find the only soldering required are the pups to the switch on the 2 single coil diagram and the output jack. Do this at the end as once the pups are soldered to the switch it is really awkward to lift the pickguard if you need to check any solder joins.
Good to see your cat Megsy/Ginger is happy to help out !
Current Builds and status
scratch end grain pine tele - first clear coat on !
JBA-4 - assembled - final tweaks
Telemonster double scale tele - finish tobacco burst on body and sand neck
Completed builds
scratch oak.rose gum Jazzmaster - assembled needs setup
MK-2 Mosrite - assembled - play in
Ash tele with Baritone neck - neck pup wiring tweaks and play in
Ben, here's a quick and rough mashup of the two diagrams to show how to wire the 3-way lever switch with the humbuckers. Hope it helps.
Scott.
thanks weirdbits, thats awesome.
wokka, yeah im in perth and yeah the pup cavitys are gonna need a bit more work before i can get onto the wiring
so im at the exciting soldering stage, but have a query regarding the above diagram.
the "hot" wire coming from the volume to the output jack, does it connect across both contacts on the volume or just to the middle one? its not quite clear in the diagram, and i dont wanna blow my amp/myself up!
cheers

Hi Ben, I'm no wiring guru (in fact far from it), but when I built my TL-1TH I used this diagram. Its basically the same as the one Scott posted but it shows the pots in a bit clearer detail. Its obviously meant for SD pickups, but once you've got your head around the different wire colours its pretty straight forward.
http://www.seymourduncan.com/support...ic=2h_1v_1t_3w
Hope it helps.
rob
 Posting Permissions

 Reply With Quote