That looks great, Scott. It'll "class up" the join beautifully.


That looks great, Scott. It'll "class up" the join beautifully.

I'm a bit behind on the updates, so time for a catch up...
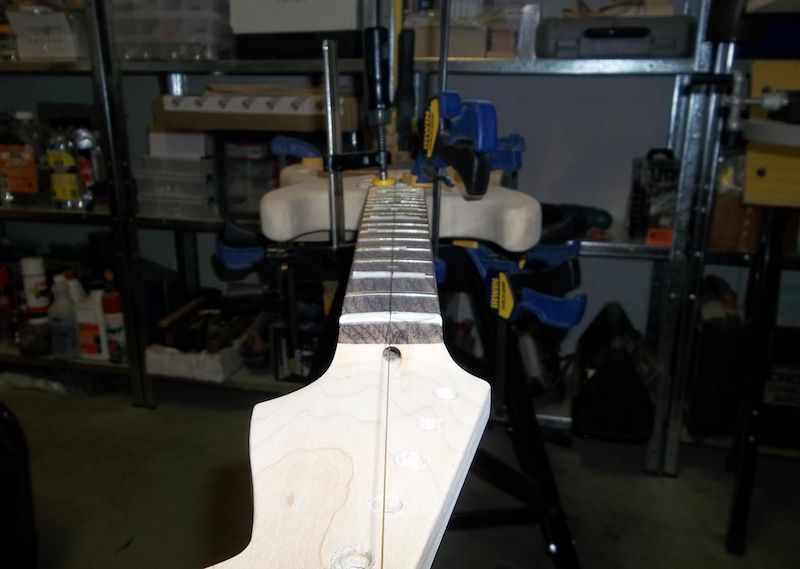
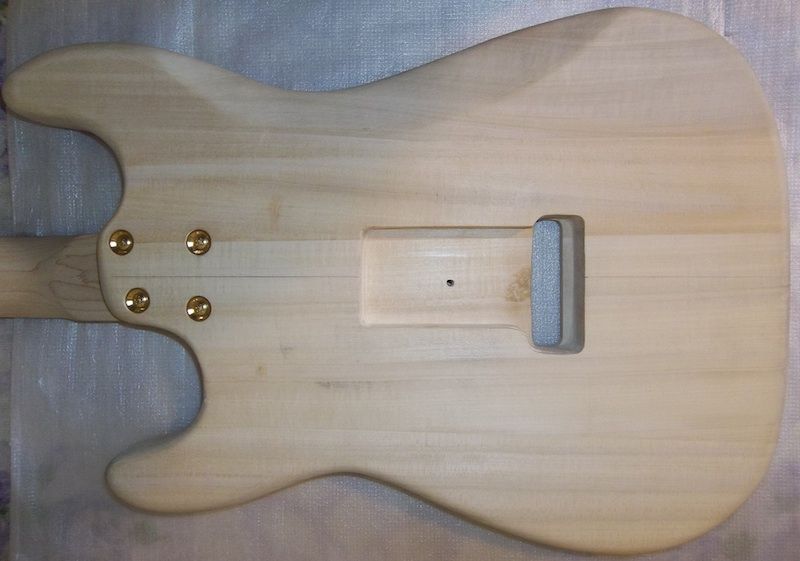
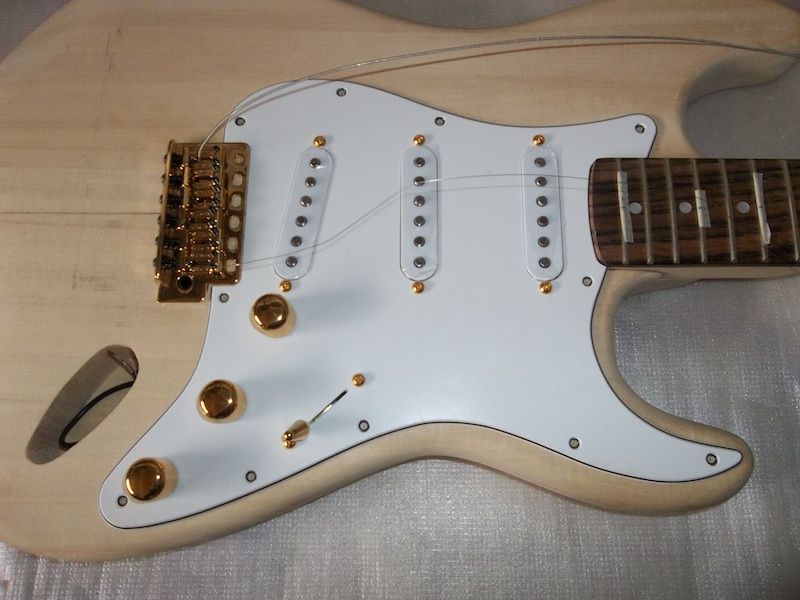
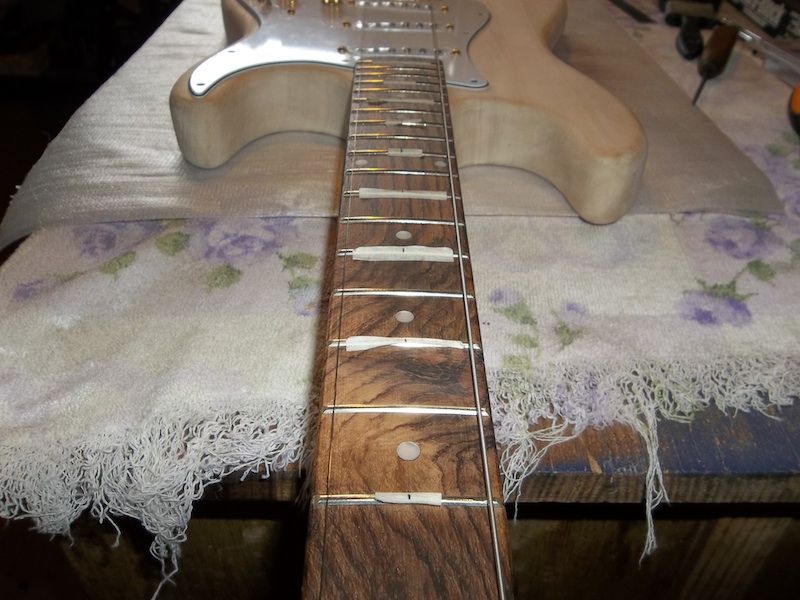
I like getting all the holes drilled and tested before starting the finish, that way I can make any necessary adjustments. The neck ferrule modification/experiment is looking ok so it was time to line up and bolt on the neck.
I put strips of masking tape across every second fret and measured and marked the centre of the neck (the fret dots aren't accurate enough), and then used a fishing line centre line to line up and clamp the neck.
Once everything was lined up I carefully drilled the neck mount holes to the required depth, then released the clamps and removed the neck so I could prep the screw holes by waxing the screws and gradually working them down to the full depth. This not only lets me check the hole depth and cut the threads into the holes but if a screw is going to break I'd rather it happen before it is attached in the neck pocket.
Scott.
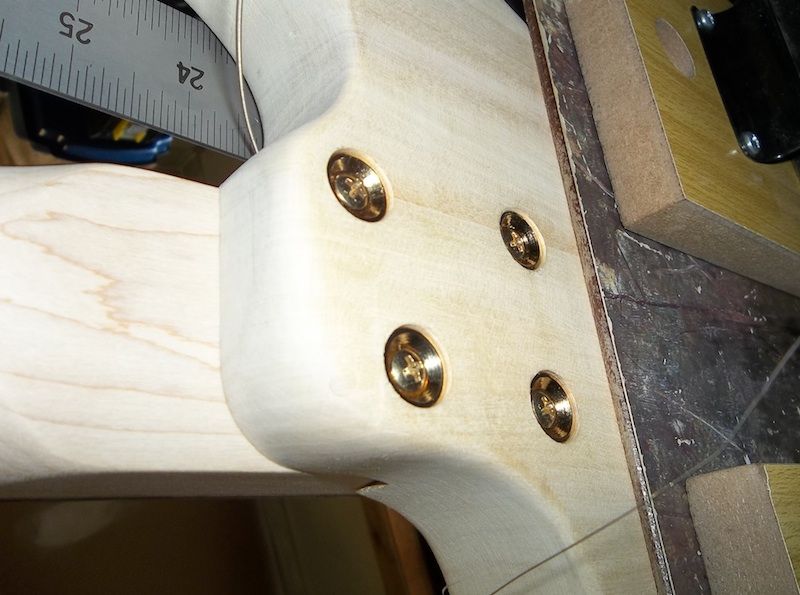
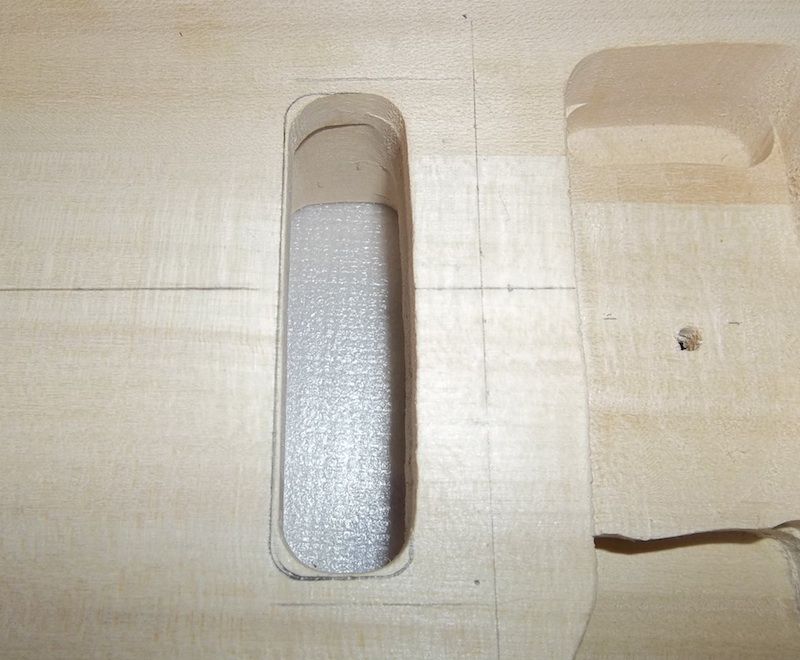
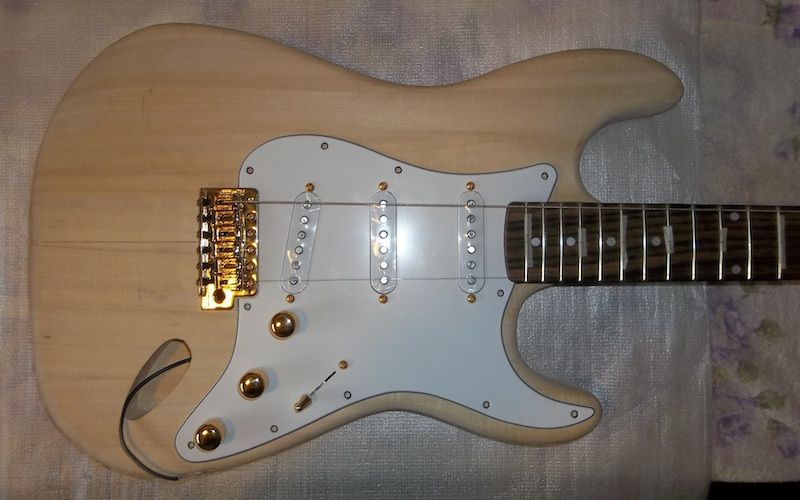
Neck attached with the ferrules, which are slightly recessed (the edges will be dipped and rounded in final sanding).
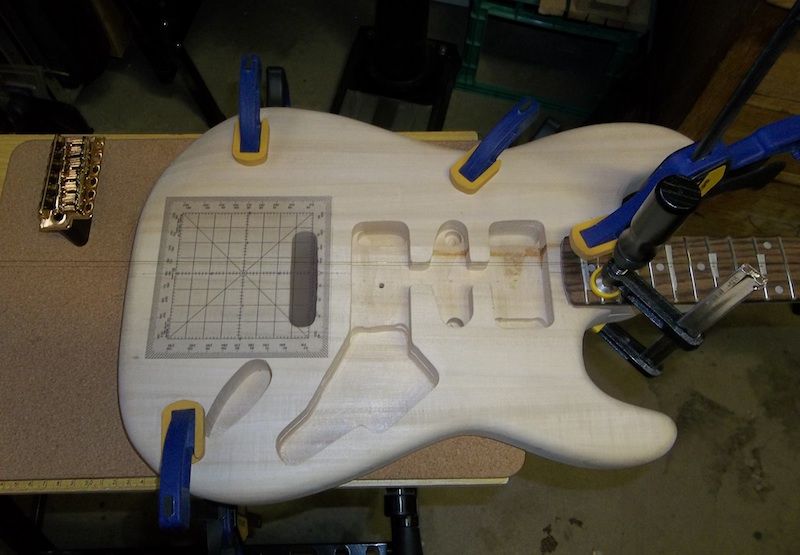
Next step is to align and position the bridge for the right scale length, and then mark and drill all the mount holes.
However...
Scott.
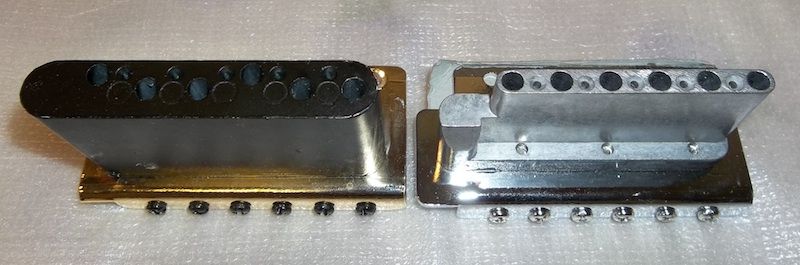
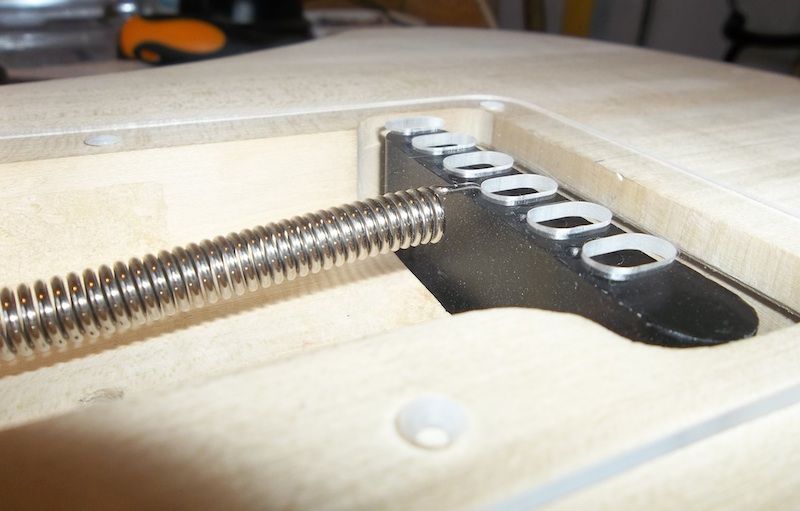
The routs for the trem block and spring cavity are both a little misshapen and spring cavity in particular is bit askew. This wouldn't be an issue for the standard bridge but the trem block on the Wilkinson bridge I'm using is much larger, so the cavities will need to be adjusted to get the bridge in the correct position and give it full movement.
The rout for the block mainly needed to be widened on the treble (arm) side to get the bridge aligned correctly, and a little off the back to square it up and give full movement.
The spring cavity was twisted a bit towards the bass side, which made things a little tough as I needed to square it up so that both the block and the springs would be clear of the body but without taking away too much wood otherwise I'd need a larger trem cover. I could only afford to take a little off the back of the cavity to square it up for the block.
Continued...
Scott.
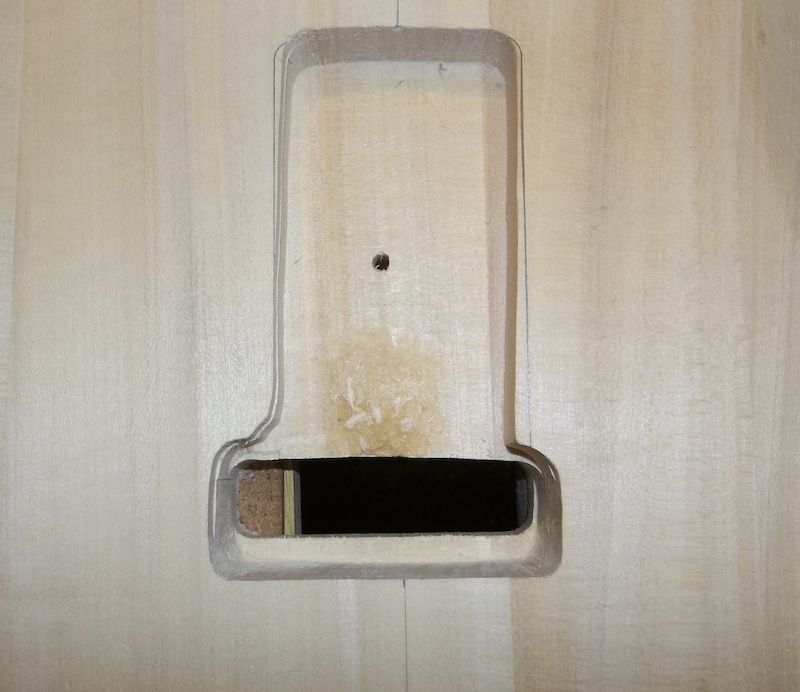
The sides of the spring section needed a bit more to square it up. The blotchy fill spot is my glue and sawdust filler I used to patch a large gouge/tear-out from the factory.
And finally, the squared up cavity. The front edge where the claw attaches isn't quite as straight and square as I'd like, but it is near enough and I don't want to take any more wood away.
After doing a few tilt tests with the bridge it was still slightly restricted from its full range, so as a final touch I added a shallow recess in the block cavity to allow the edge of the block to travel that little bit further.
Looks like it is going to be a pretty tight fit under the trem cover, the block is ok but the spring hooks are very close. Which lead me to my next step
Scott.
My first custom trem cover cut from my home-made templates (54mm string spacing) in clear! (I had to hold it at an angle to photograph otherwise it disappears because it is so clear)
I made this to use as a guide/template for positioning the trem cover on the body, and to allow me to 'see' the clearance of the block and springs etc with everything in place. I also cut a second clear cover which I'm thinking of actually using as the cover on the Blondie (Colourless) strat. It will have a white pearloid pickguard, and I think the clear cover would be something different and potentially make a nice neat spring cavity a 'feature' not sure yet. It may scratch up too quickly and look bad or just not look good full stop, we'll just have to wait and see.
Scott.
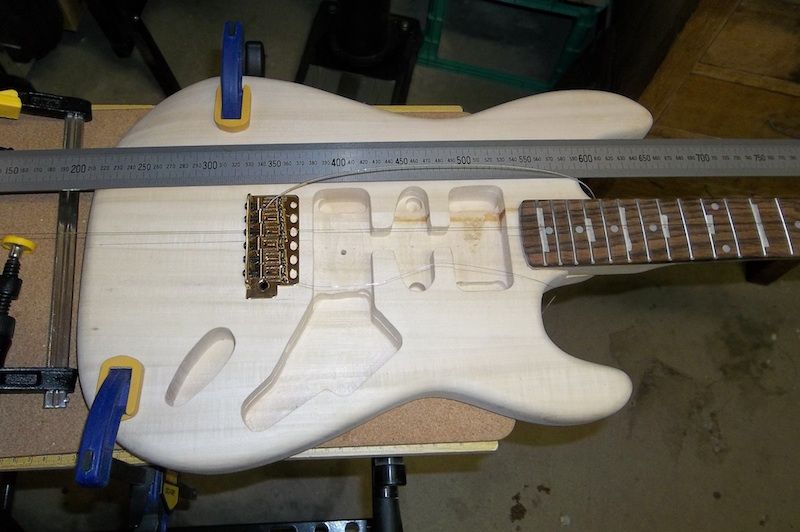
Time to fit the bridge. I used a 1m steel rule and handy little square to check the position line for the mount screws (~642mm for the Wilkinson), and then checked the position and alignment with the bridge and pickguard in place and a couple of old E strings. String position and scale length looked good so I marked and then (nervously) drilled the bridge mount holes I had to be careful as the max depth required for the holes only left about 1.8mm short of the spring cavity and I didn't want to break through.
For the trem claw mount holes I was going to use a cordless with an extra long drill bit, but the angle was still a little steep even with the chuck against the body and I was worried it may drill through to the pup cavity. Instead, I rummaged through my old tool boxes and eventually dug up my first ever drill (received as a gift from my grandfather when I was still in single digits). It hasn't turned a cog in anger in a while but with a touch of lube it was soon back to fighting speed. I wouldn't want to drill too much with it, but because it is so slim it was perfect for drilling the shallow angle I wanted in the soft basswood without needing to use the long bit.
Scott.
With all the holes drilled I waxed the screws and attached the bridge, then repeated the process with the trem claw and hooked up a single spring for the test fitting. Pickguard in place and some old strings clamped tight to check spacing and alignment.
The stock bridge has a 52.5mm string spread and the Wilkinson is 54mm spacing, which is why I've been paying so much attention to the string position. It looks pretty good in this pic, but is actually even better once the strings have some real tension on them.
As you can see, there is not a lot of clearance above the hook of the trem spring and it will be even tighter once all the springs are on and the bridge is tilted slightly in its final floating position. This guitar (Brownie) is going to have a white trem cover, but the clear gives me a good idea of position and clearance etc. Because this block has staggered holes I'll probably cut a trem cover with longer than normal slots.
Scott.
And a quick pic to get an idea of what the Blondie strat could look like with a clear trem cover, albeit with a different bridge and block and a chrome neck plate.

Scott.

Scott - looks like you really scored on that neck - it looks fantastic - love the grain. The extra work you put into getting everything just right - man alive - they just look fantastic!
Current builds:
GPB-4B: https://www.buildyourownguitar.com.a...548#post184548
 Posting Permissions

 Reply With Quote