Lol... Blackie may approve, but he will have to fight a 10 year old for the guitar. The kid has been very patient waiting for the build to finish, but I think a dude in leather claiming it would tip him over the edge.Originally Posted by Fretworn


Lol... Blackie may approve, but he will have to fight a 10 year old for the guitar. The kid has been very patient waiting for the build to finish, but I think a dude in leather claiming it would tip him over the edge.

3mm ply sprayed black with red edging perhaps?
# 1 - EX-5 https://goo.gl/fQJMqh
# 2 - EX-1 https://goo.gl/KSY9W9
# 3 - Non PBG Tele https://goo.gl/W14G5g
# 4 - Non PBG J Bass https://goo.gl/FbBaFy
# 5 - TL-1AR GOTM Aug 2017 https://goo.gl/sUh14s
# 6 - MMB-4 Runner-up GOTM Oct 2018https://goo.gl/gvrPkp
# 7 - ES-1 Runner-up GOTM Aug 2018https://goo.gl/T9BEY8
Yeah I was also thinking about that option. If I go down that road, I'll probably hold off a few months til I get some better spraying weather again. I can live with the crappy plastic cover for a while if need be.
Cheap Black Strat ones on eBay for less than $10 and I saw one in particular that was all black, not 3 ply with a white inner core as most of them were. All Red ones are pearloid and would look out of place and probably wrong shade of red too.
# 1 - EX-5 https://goo.gl/fQJMqh
# 2 - EX-1 https://goo.gl/KSY9W9
# 3 - Non PBG Tele https://goo.gl/W14G5g
# 4 - Non PBG J Bass https://goo.gl/FbBaFy
# 5 - TL-1AR GOTM Aug 2017 https://goo.gl/sUh14s
# 6 - MMB-4 Runner-up GOTM Oct 2018https://goo.gl/gvrPkp
# 7 - ES-1 Runner-up GOTM Aug 2018https://goo.gl/T9BEY8

You could try spraying the plastic cover black (maybe with some red edging).
Thanks Simon and Waz, that's given me some things to think about.
This weekends efforts:
Finished 12,000 micro mesh sanding. Wow, it really is reflective. Still a slight scratch pattern in full sun on an angle. I've got the maguires ready to go for next weekend.
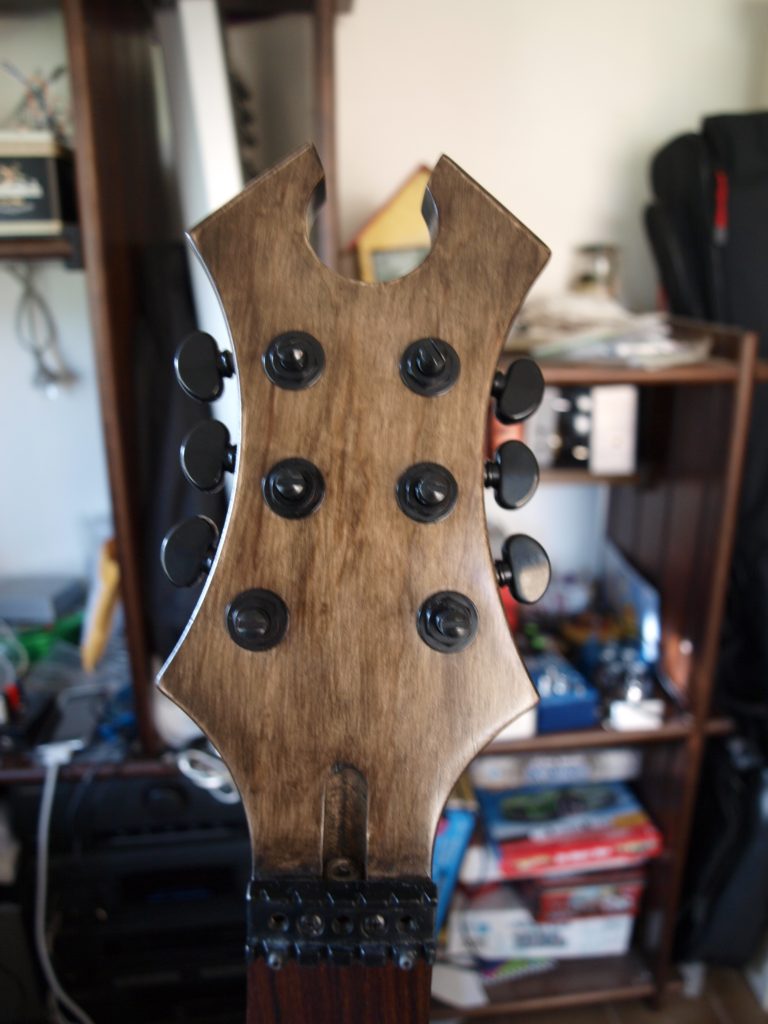
Put the tuning pegs on. Decided to curve them with the head shape, rather than line them up parallel, mainly because the top ones ended up half behind the head when they were parallel. Which looked odd, and also was a bit worried that they would be harder to turn the pegs.
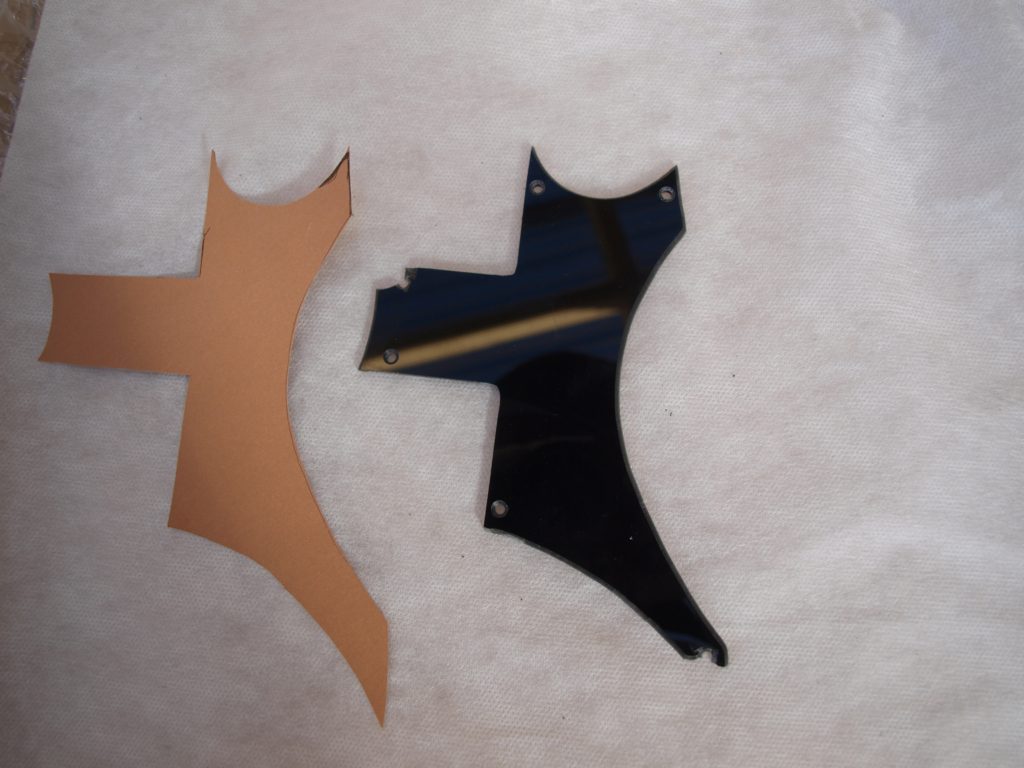
Also had a go at routing some acrylic for a pick guard. Went OK, until I snapped off one of the sharper corners... and then totally killed it when trying to countersink the screw holes. Ordered more acrylic to arrive this week, and have purchased a proper countersink bit for the drill press. Let's call this one a practice run. I talked to a friend who does a fair bit of plastic work, so have some tips for next attempt.
Very shiny indeed!
I've countersunk holes in plastic before by just using a large drill bit and turning it by hand. Worth trying it out. And try out your countersink bit on the old scratchplate first, just in case it still doesn't like it.
Also put in the bridge pins. First up I cleaned the paint out of the holes, and cleared a bit of space around the lip of the holes, where the paint had gone in a bit. Thanks to Simon for advice on that. I ended up using a cylindrical bit from my dremel clone, and used it to sand out the holes by hand. Took the opportunity to also clean up the holes for the pots and switch, as the paint had filled them enough that the electronics no longer fit through the holes.
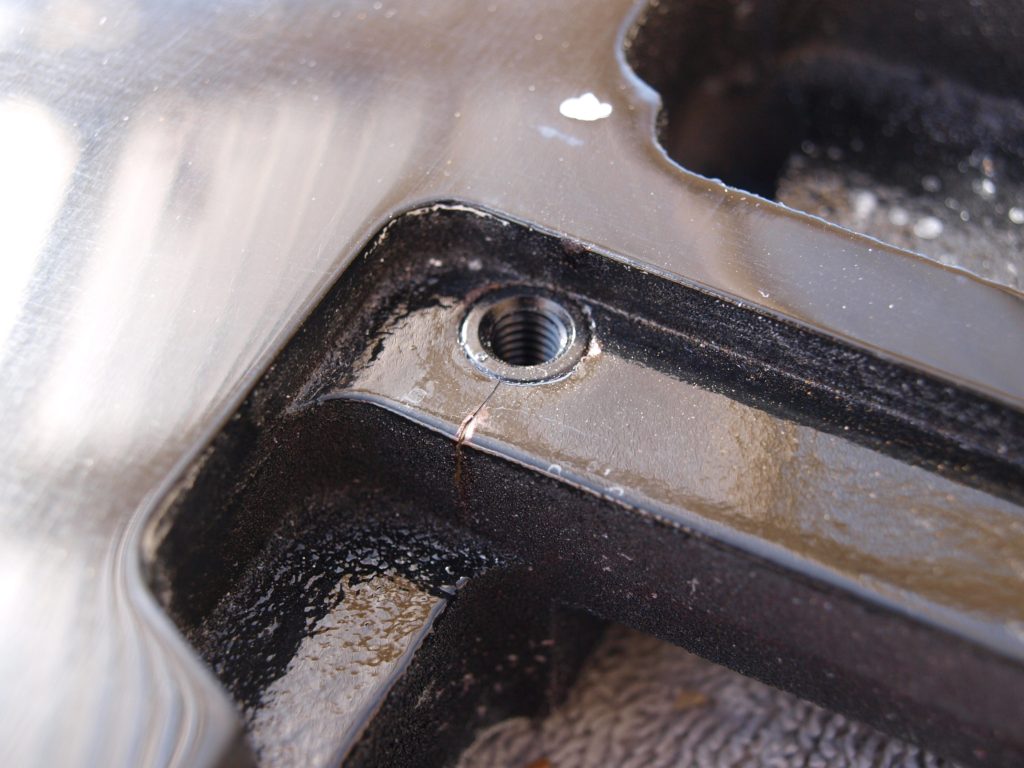
Hammered the pins in, and it didn't chip the paint... but it did cause the paint under the bridge to crack. At least that's what I thought had happened... I then realised that it's actually the wood underneath the bridge has split with the stress of the pins going in. Later on I noticed there's a horizontal stress crack underneath the right hand pin as well.
Well, bugger.
I've filled the cracks with thin super glue, as it really wicks into the gap. Hoping that will be enough to stop any further cracking?
I'm wondering if widening the holes even more would have stopped these cracks from happening. There definitely seemed to be plenty of room in the holes - the central part of the pin well and truly fit, it was just part of the fluting that dug into the wood. I also don't know if I could have drilled the holes much wider, as the top edge of the holes is right up against the edge of the bridge cavity as it is. Any widening of the holes might have stuffed the paint on the top of the guitar. Oh well.
Yep, I've been practicing on the one that I stuffed up. The new countersink bit seems to do the trick. I think the problem with drilling the countersinks is that I got a bit enthusiastic and went a bit fast. Doing it by hand would have solved that problem I guess. :-)
 Posting Permissions


 Reply With Quote