
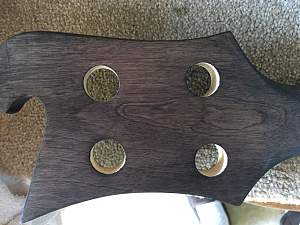
Looks great! I'd keep as is - personally I like some grain showing through


Looks great! I'd keep as is - personally I like some grain showing through
Current Projects
#Planning 5 String Bass

can you glue the pickup ring on from the back of the pick guard?
Build 19 PSH-1 Kustom
Build 18 HB-4S Kustom
Build 17 WL-1 Kustom
Build 16 TL-1TB Kustom
Build 15 PBG-2-
Build 14 FTD-1
Build 13 RD-1 Kustom
Build 12 DM-1S
Build 11 MKA-2 -
Build 10 Basic strat
Build 9 JM Kustom
Build 8 FV-1G
Build 7 ES-2V
Build 6- Community prototype
Build 5 LP-1LQ
Build 4 ES-5V
Build 3 JR-1
Build 2 GD-1
Build 1 TLA-1

Nice smooth satin looking sheen...Originally Posted by stuzl873213

Builds-
#18 PBG GSH-1R https://www.buildyourownguitar.com.a...ad.php?t=10236
#17 PBG PBA-4 https://www.buildyourownguitar.com.a...ead.php?t=9984
#16 PBG IB-1Q http://www.buildyourownguitar.com.au...ead.php?t=8754
#15 PBG TLA-12 http://www.buildyourownguitar.com.au...ead.php?t=8444
#14 PBG PRS-1H
#11 Scratch build AC15 clone headhttps://www.buildyourownguitar.com.a...ead.php?t=7686
#09 PBG ES-1TL
#07 partscaster Alder Denim Tele.

Great idea Deddy.
# 1 - EX-5 https://goo.gl/fQJMqh
# 2 - EX-1 https://goo.gl/KSY9W9
# 3 - Non PBG Tele https://goo.gl/W14G5g
# 4 - Non PBG J Bass https://goo.gl/FbBaFy
# 5 - TL-1AR GOTM Aug 2017 https://goo.gl/sUh14s
# 6 - MMB-4 Runner-up GOTM Oct 2018https://goo.gl/gvrPkp
# 7 - ES-1 Runner-up GOTM Aug 2018https://goo.gl/T9BEY8

Given me an idea.
If I:-
a) inset the mounting ring into the body so that it is flush with it
b) I open up the holes in the Pick guard so that it fully reveals the adjustment screw head.
Then I can the use the pick guard to effectively sandwich the pup in place, allowing it to be adjusted and allow the pick guard to be folded back without removing the pup (a bit like the jbase pup)
mmmmmmm, might work?
On further inspection I reckon go with out the PUP mounting ring and just squeeze the spring in under the scratch plate.
If tempted to countersink the screw holes suggest using a drill bit by hand moved in reverse direction so that it doesn't bite and tear out big chunks. Be careful as you still need a bit of thickness for it to work properly.
# 1 - EX-5 https://goo.gl/fQJMqh
# 2 - EX-1 https://goo.gl/KSY9W9
# 3 - Non PBG Tele https://goo.gl/W14G5g
# 4 - Non PBG J Bass https://goo.gl/FbBaFy
# 5 - TL-1AR GOTM Aug 2017 https://goo.gl/sUh14s
# 6 - MMB-4 Runner-up GOTM Oct 2018https://goo.gl/gvrPkp
# 7 - ES-1 Runner-up GOTM Aug 2018https://goo.gl/T9BEY8

The whole point of this is to try and get around the issue of having a loop of wire that runs through the body between the neck and control cavities and that's connected to the pickguard at both ends, which makes wiring and removing the pickguard very difficult unless that cable loop is very long.
Another option is the old fashioned Tele Neck mount method where those holes on top of the scratch plate are there for a small jewellers phillips head screw driver to do the raising or lowering of the PUP. Underneath you would need to figure out whether to countersink a section for the proper HB mounting ring to sit and do its thing or use longer screws and screw down into the body at the bottom of the PUP rout. The latter option is far more fiddly as I had to do a similar thing when top loading HB's in my EX-1 without using any mounting rings.
# 1 - EX-5 https://goo.gl/fQJMqh
# 2 - EX-1 https://goo.gl/KSY9W9
# 3 - Non PBG Tele https://goo.gl/W14G5g
# 4 - Non PBG J Bass https://goo.gl/FbBaFy
# 5 - TL-1AR GOTM Aug 2017 https://goo.gl/sUh14s
# 6 - MMB-4 Runner-up GOTM Oct 2018https://goo.gl/gvrPkp
# 7 - ES-1 Runner-up GOTM Aug 2018https://goo.gl/T9BEY8
Ok
Trying first extra gloss top coat on back. Logic is that if I put a coat or 2 of finish on then when I glue the neck on it is hopefully easier to clean up. Once the neck is on then a couple more coats, leave it for a month and then buff up.
So the pics are with the newly applied extra gloss top coat on the back of the body (weird affect of light on the rhs) and the neck after its first coat of Dark Onyx.

I love that headstock shape! Really cool man!
Nr 1: Red Widow LP-1MQ (Finished) ->Diary<-
 Posting Permissions

 Reply With Quote