Page 6 of 12 FirstFirst ... 4 5 6 7 8 ... LastLast
Results 51 to 60 of 120

Thread: Drummerdude's first build.. TLA-1Q. Wish me luck

  1. #51
    Well I drilled the string thru holes and man was that a learning experience. I had brand new bits and I had the bridge attached and drilled the outer holes all they way thru with a 2 way level on my drill. Then I drilled half way thru the other holes. Then I removed bridge and moved to the back and put two punches into the outer holes to hold it firm and drilled the other holes, which worked very good. Pretty straight... but then I marked the depth on my larger bit for the ferrules and started to drill the first and got a huge tear out. I had never drilled basswood before man it is soft. So I proceeded to put tape on the body and marked the holes and tried the other outer and still got some tear out so I drilled the rest with the drill in reverse and that worked great. So I had to get out the good ol timbermate and fix my good ups. And then re stain.

    I also started the tru oil finish on the neck. I got 3 coats on today and now I will wait for my water slide decal and then probably 3-4 coats and wet sanding with some naphtha to level out the decal and then another 3-4 coats and some more wet sanding and buffing. I ordered a lvlp spray gun to spray the poly on the body since I have a smaller compressor. I am planning on about 10 coats with light sanding between coats and level sand and buff.
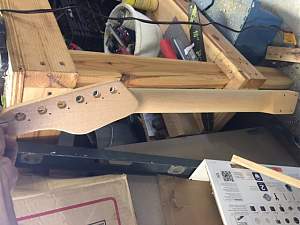
 Click image for larger version. 

Name:	IMG_2119.JPG 
Views:	429 
Size:	116.8 KB 
ID:	19187Click image for larger version. 

Name:	IMG_2120.JPG 
Views:	441 
Size:	69.4 KB 
ID:	19188Click image for larger version. 

Name:	IMG_2121.JPG 
Views:	436 
Size:	107.9 KB 
ID:	19189Click image for larger version. 

Name:	IMG_2122.JPG 
Views:	434 
Size:	101.0 KB 
ID:	19190

  2. #52
    GAStronomist wazkelly's Avatar
    Join Date
    Aug 2015
    Location
    Caloundra West, Sunshine Coast Qld
    Posts
    6,631
    Bad luck with the tear outs.

    I always drill in reverse if there is an existing hole to prevent such things happening. Takes a lot longer on the metal control plate if you choose to fit upgraded Bourns pots.
    # 1 - EX-5 https://goo.gl/fQJMqh
    # 2 - EX-1 https://goo.gl/KSY9W9
    # 3 - Non PBG Tele https://goo.gl/W14G5g
    # 4 - Non PBG J Bass https://goo.gl/FbBaFy
    # 5 - TL-1AR GOTM Aug 2017 https://goo.gl/sUh14s
    # 6 - MMB-4 Runner-up GOTM Oct 2018https://goo.gl/gvrPkp
    # 7 - ES-1 Runner-up GOTM Aug 2018https://goo.gl/T9BEY8

  3. #53
    I did have to drill the control plate just a tad bit no problems I gues my metal drill bits are better than these new ones I bought. I also had to sand/ rout out the control cavity to get the new pots to fit in they were way bigger in diameter. I just use the good ol Dremel with the sanding drum and widen out where the pots fit making sure not to go too far to be covered by the plate.

    I ordered the humbucker and the bridge oversized bridge pickup from guitar fetish and they have a quick plug on the pickups and they have the upgraded pots tone cap installed prewired with the male plugs on so only soldering will be the ground to the bridge. It seems like a good system, if you wanna change pickups you can buy from them with the quick plug and no soldering, change it out in minute or two. I have heard good thing about their stuff we shall see if it's any good.

  4. #54
    GAStronomist wazkelly's Avatar
    Join Date
    Aug 2015
    Location
    Caloundra West, Sunshine Coast Qld
    Posts
    6,631
    Have seen them before, I think EMG do that too and looks like a good idea.
    # 1 - EX-5 https://goo.gl/fQJMqh
    # 2 - EX-1 https://goo.gl/KSY9W9
    # 3 - Non PBG Tele https://goo.gl/W14G5g
    # 4 - Non PBG J Bass https://goo.gl/FbBaFy
    # 5 - TL-1AR GOTM Aug 2017 https://goo.gl/sUh14s
    # 6 - MMB-4 Runner-up GOTM Oct 2018https://goo.gl/gvrPkp
    # 7 - ES-1 Runner-up GOTM Aug 2018https://goo.gl/T9BEY8

  5. #55
    GAStronomist Simon Barden's Avatar
    Join Date
    Oct 2016
    Location
    Reading, UK
    Posts
    10,547
    I know Gibson and Kinman also do it, though Gibson did if for a while on some guitars and then seemed to stop doing it. I had two Gibson Melody Maker Les Pauls (one went to a friend), one had the solderless set-up, the other (a bit later build) was standard. I've still got the one with the push connectors and they have been fine so far - but it is only 4 years old. It just means that if you want to swap the pickups for some that don't have push-fit connectors or a compatible arrangement, you need to create a new soldered wiring harness - but that's no big deal.

  6. #56
    Overlord of Music Andy40's Avatar
    Join Date
    Oct 2015
    Posts
    3,913
    Sorry about the tear outs, but man that quilt looks awesome!
    Build #1 - ST-1 - Completed
    Build #2 - LP-1SS - Completed
    Build #3 - TLA-1R - Completed
    Build #4 - SGD-612 - Completed
    Build #5 - ES-1G - Completed
    Build #6 - STA-1HT | Completed
    Build #7 - ST1JR - Completed
    Current Build #8 - JBA-4
    Build #9 - Semi-scratch build Tele x 2 - Completed
    Current Build #10 - PRS-1H
    Current Build #11 - AGJR-1 - Completed
    Current Build #12 - ATL-1SB
    Current Build #13 - GST-1
    Current Build #14 - FBM-1

  7. #57
    GAStronomist Simon Barden's Avatar
    Join Date
    Oct 2016
    Location
    Reading, UK
    Posts
    10,547
    I've only done this once so far, but I used a very thin drill to start with for the pilot holes, then used a brad point wood drill (rather than an HSS one) for the ferrule insert holes, then widened out the through-holes. It was a bit fussy, but I didn't get any tear-outs.

  8. #58
    GAStronomist Simon Barden's Avatar
    Join Date
    Oct 2016
    Location
    Reading, UK
    Posts
    10,547
    The ferrule edges will hide most of the tear-out. A bit of green-dyed timbermate in those should help hide the bits that will be visible.

  9. #59
    Well I built a make shift spray booth to keep overspray down and dust out, or at least help. I will be spraying the poly this weekend and I have already got about 8 coats of tru oil on neck. I ordered a water slide custom decal instead of the inlay and once it is on I will do some more coats of oil to hide decal paper. Then buffing and polishing.. the end is near..Click image for larger version. 

Name:	IMG_2138.JPG 
Views:	314 
Size:	92.3 KB 
ID:	19307Click image for larger version. 

Name:	IMG_2139.JPG 
Views:	316 
Size:	82.2 KB 
ID:	19308Click image for larger version. 

Name:	IMG_2140.JPG 
Views:	316 
Size:	78.3 KB 
ID:	19309

  10. #60
    Member
    Join Date
    Mar 2016
    Location
    Wyndham Vale
    Posts
    138
    I take it you used a drill press to drill the holes and I can tell you it is technique rather than the drill type but if I had problems I would use a brad point or as we call them sheet metal tips but I can grind these type of tip by hand which takes a little bit of experience. You have the same problem drilling soft metals, especially brass that can be overcome by changing how you use the press. When drilling brass most tradesmen remove the sharp edges as it causes the drill to bite in and tear the part out of the vice, especially on larger drills, but due to the technique I use I have never had to change the grind on a drill and have had other tradesmen telling me it wont work and you have to take the sharp edge off only to prove them wrong. I have found that when you drill softer materials if you change the way you introduce the drill to the material and control the downward feed you will eliminate the tears. Most people pull the knob down on the press without supporting the underside of the knob which allows the drill bit to pull down into the material and tear the material. If you grab the knob with the palm of your hand under knob rather than just the tips of your fingers and slowly drill and keep an upward pressure on the knob you will find you will have no tears or if the press has a lock to fix the height you can just tighten it slightly to stop it grabbing the drill and pulling it into the wood. Or alternatively you can use 2 hands on 2 different knobs to control the feed, you pull down with one and hold back with the other. The other technique is to clamp another piece of material on the back of the guitar, say a scrap piece of pine and drill through both with the pilot hole and then when you turn it over you drill through the scrap into the guitar to the depth you need and as long scrap stays in contact with the guitar body then you have no tears but this technique takes more setup and calculations to get the depth right.

Page 6 of 12 FirstFirst ... 4 5 6 7 8 ... LastLast

Posting Permissions

  • You may not post new threads
  • You may not post replies
  • You may not post attachments
  • You may not edit your posts
  •