Page 11 of 21 FirstFirst ... 9 10 11 12 13 ... LastLast
Results 101 to 110 of 208

Thread: 3rd Build?! 6 string neck through single cut bass!!!

  1. #101
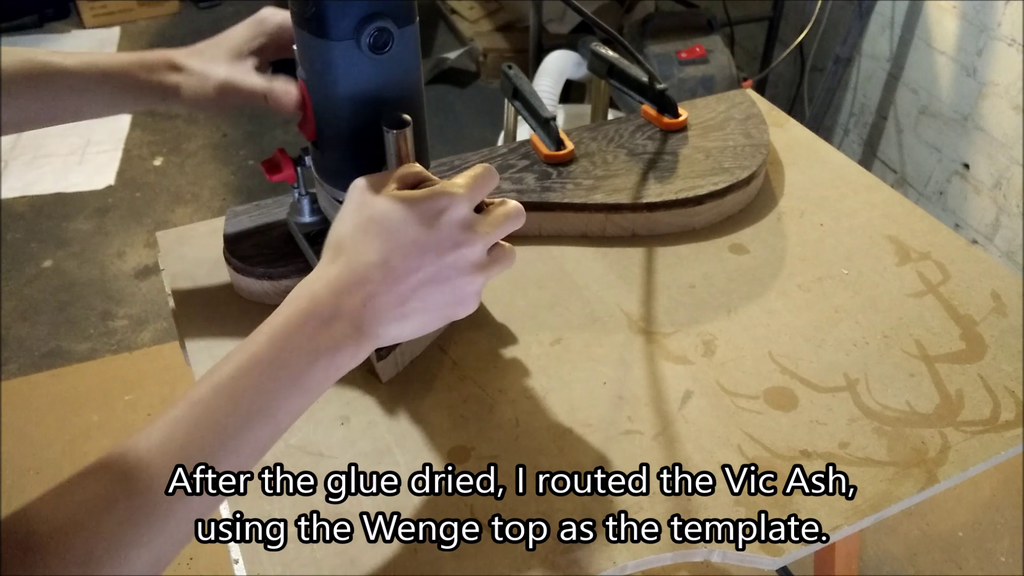
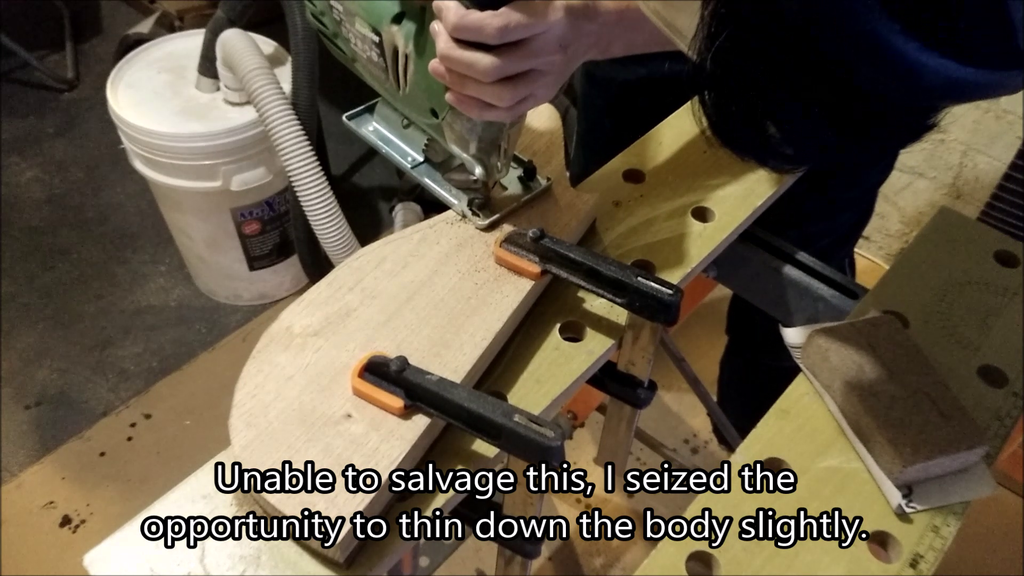
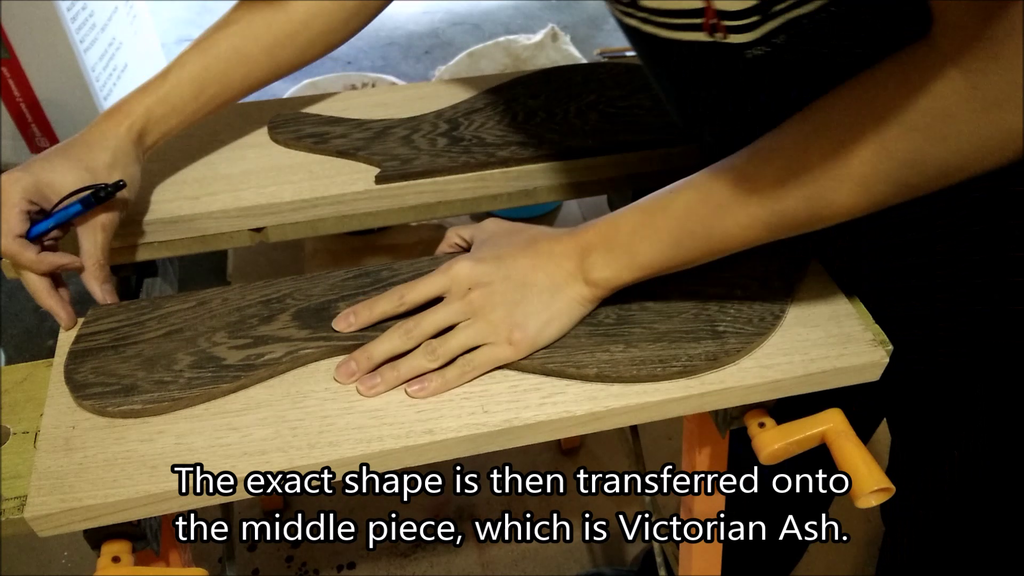
    Once I was happy with the wenge top, I transferred the outline onto the second piece, the Victorian ash.


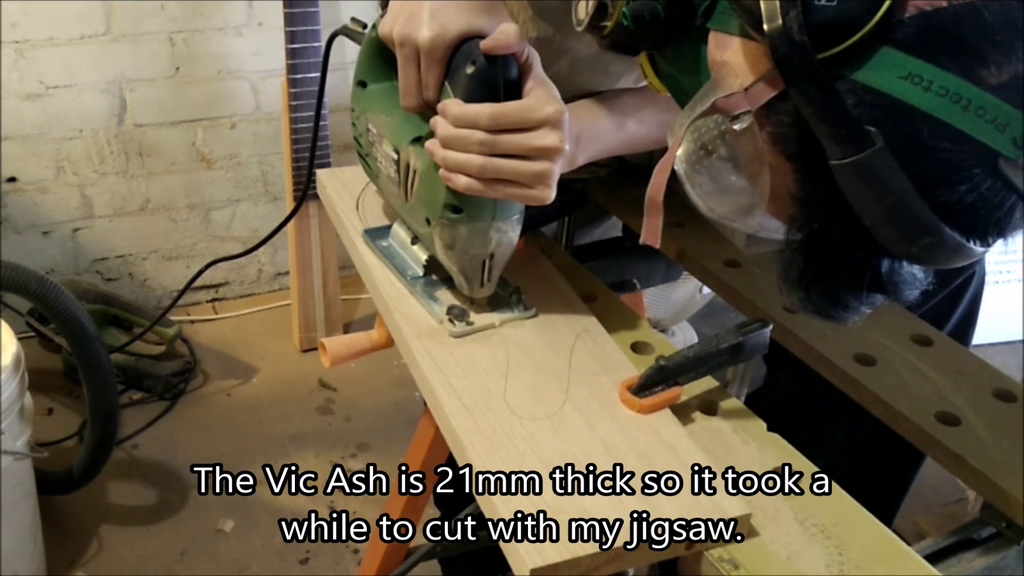
    Then cut it out. The Vic ash is thicker at 21mm so my jigsaw was struggling towards the end. Man I wished I had a bandsaw!


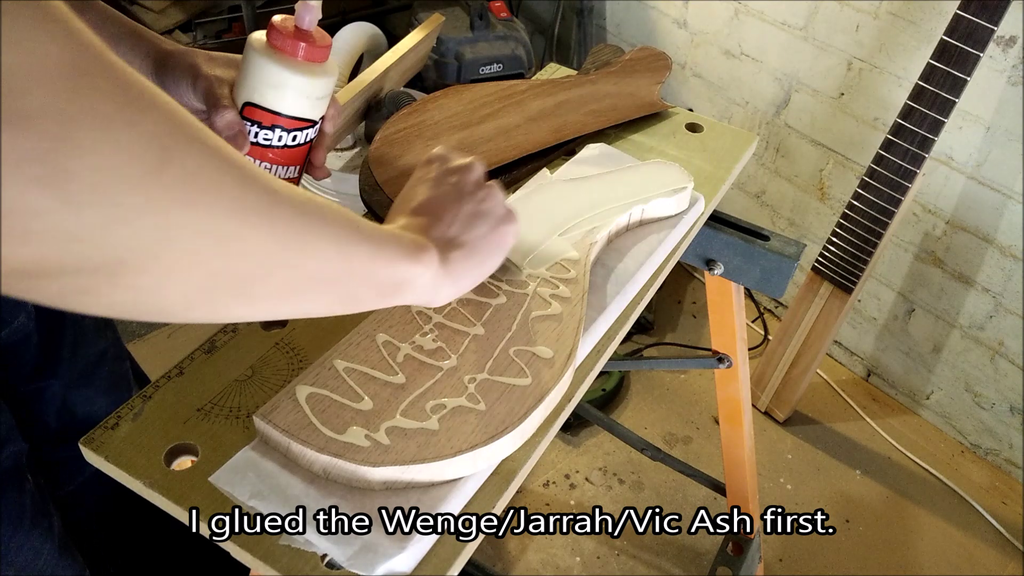
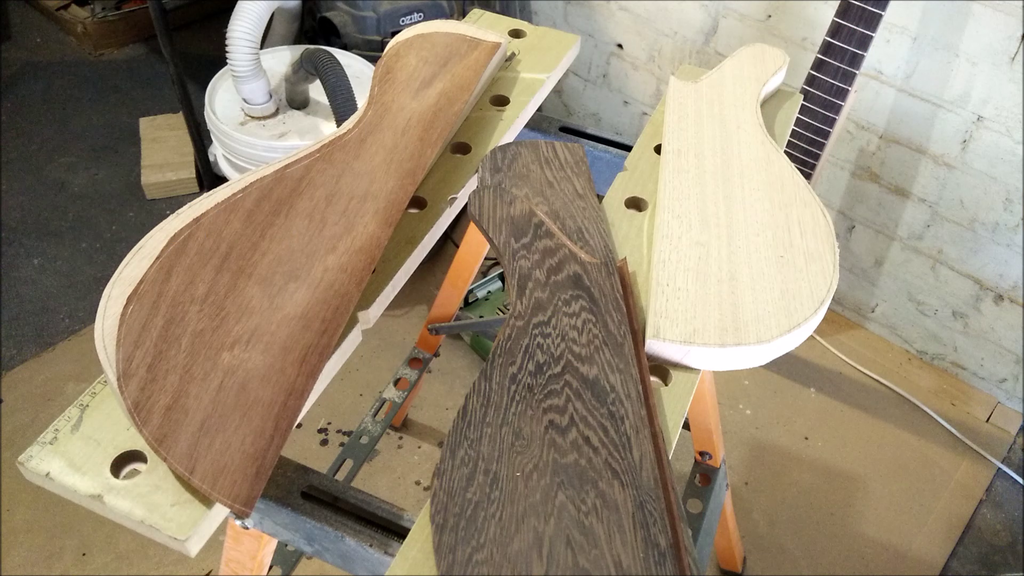
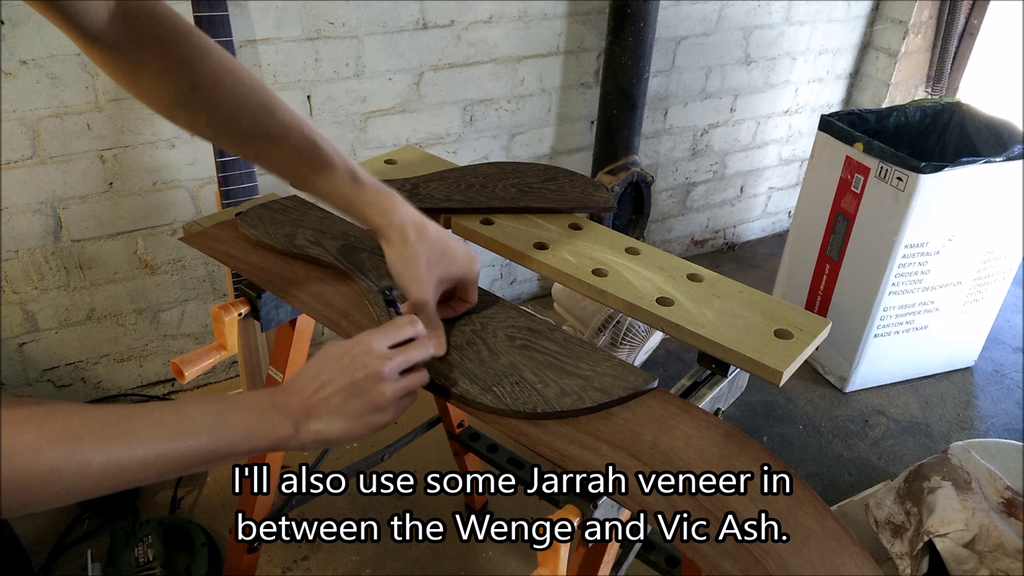
    I also decided to use a Jarrah veneer in between the wenge and the Vic ash. This provides a nice contrast which should hopefully show up once I start carving the top.


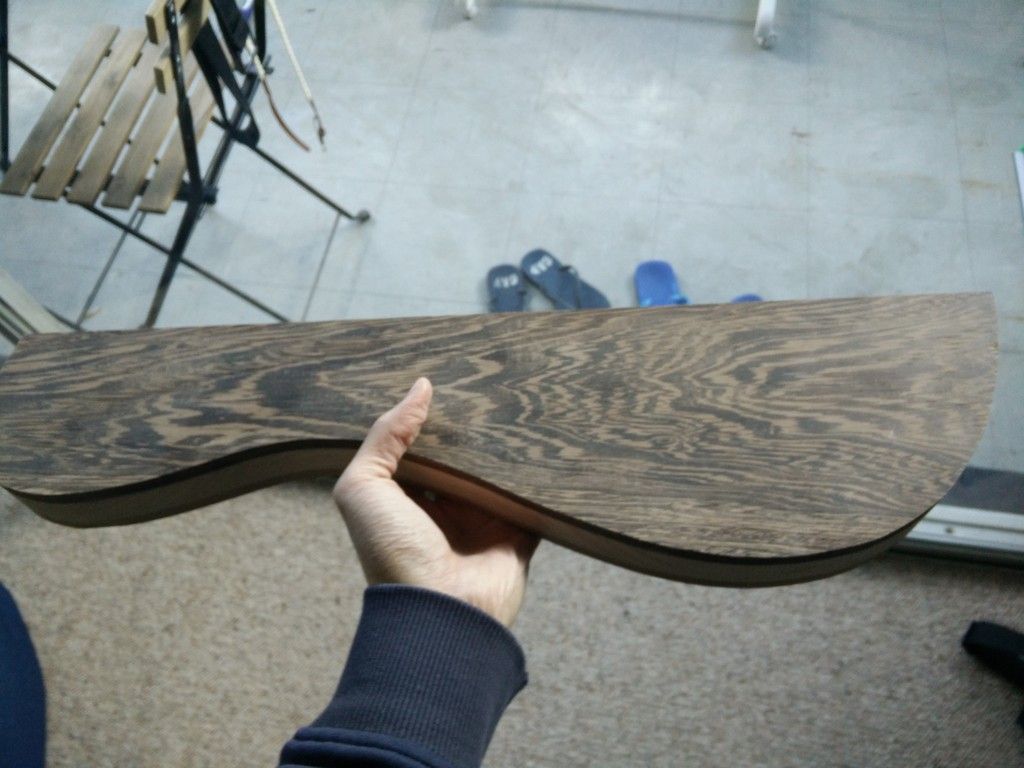
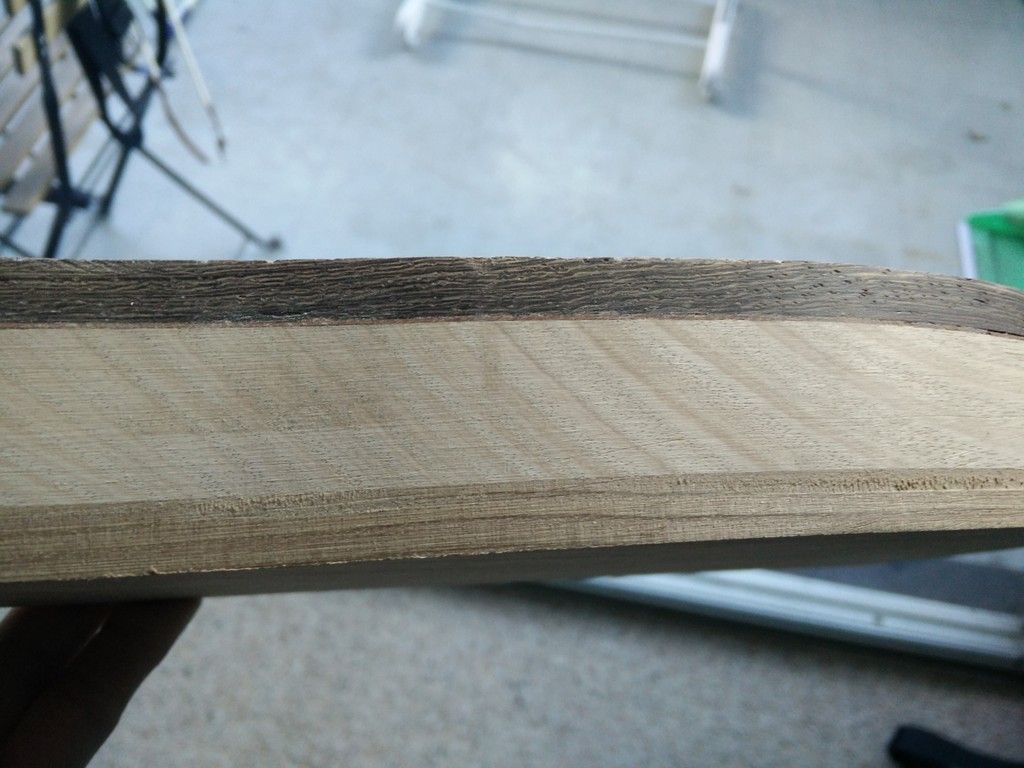
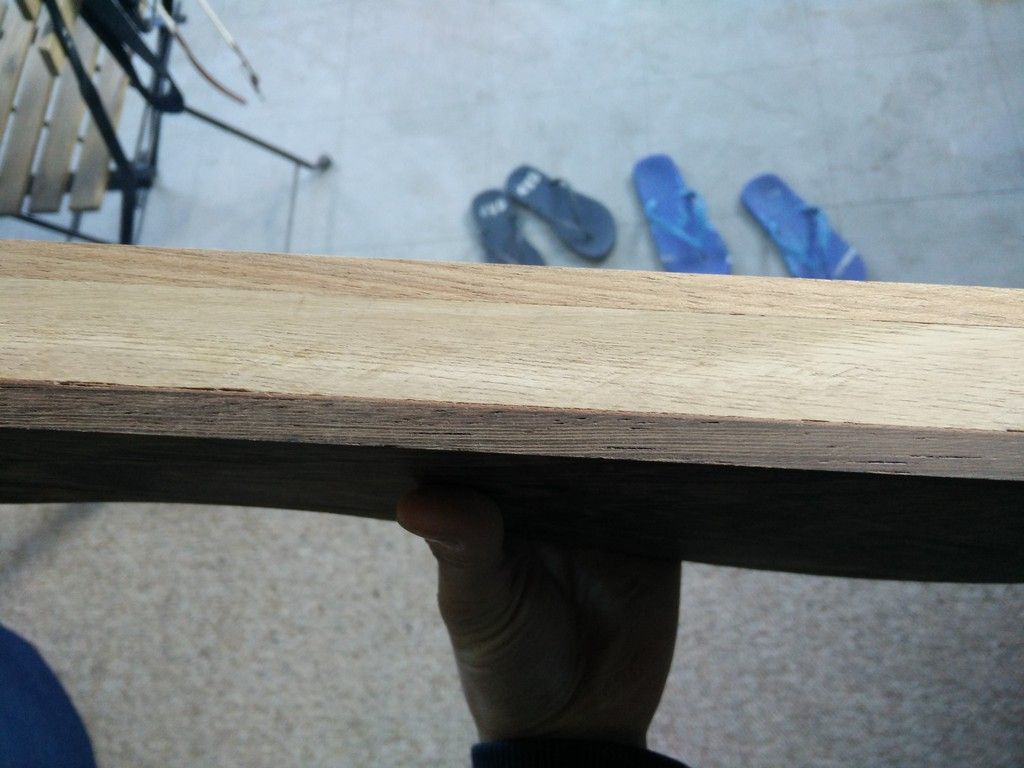
    Here's a pic of the first 3 layers.
    Last edited by SIMpleONe89; 01-07-2016 at 01:15 PM.

  2. #102
    Then I glued the first 3 pieces together.


    I also hate the gluing process because there's a need to rush before the glue settles and so many things can go wrong! I reckon the scariest bit is waiting for the glue to dry, unclamping everything only to see the piece moved out of alignment! This problem can be solved by using alignment screws/pins but I didn't in this case.

    Fortunately, nothing funky happened during the gluing process. I waited for it to dry, then routed the Vic ash out to shape, using the wenge top as the template.


    Then flipped the body over and switched to a flush trim bit with the bearing on the bottom to finish up the cut.

  3. #103
    Lessons learned:
    1. Always have good lighting to see where you're routing.
    2. Don't try to take too much off at once.


    I couldn't glue the pieces back together so I decided to modify the shape a little.


    Then I cut out the last piece, the Tasmanian blackwood, which is similar to Koa and it tears out very easily while I worked with it.

  4. #104
    Then I glued the final piece of the blackwood and now we have a delicious Wenge, Jarrah, Victorian Ash and Tasmanian Blackwood sandwich.


    Yum!


    I had a few gaps where I didn't have enough clamping pressure but this was easily fixed by stuffing pieces of Jarrah veneer into the gaps. Not good practice but it's fixable.

  5. #105
    GAStronomist wokkaboy's Avatar
    Join Date
    Dec 2012
    Location
    Perth WA
    Posts
    13,555
    great progress Simon, bummer about the tear out, yes routers can be brutal to your timber !
    lovely looking wing sandwich, so is the next step gluing the wings to the neck ?
    Current Builds and status
    scratch end grain pine tele - first clear coat on !
    JBA-4 - assembled - final tweaks
    Telemonster double scale tele - finish tobacco burst on body and sand neck

    Completed builds
    scratch oak.rose gum Jazzmaster - assembled needs setup
    MK-2 Mosrite - assembled - play in
    Ash tele with Baritone neck - neck pup wiring tweaks and play in

  6. #106
    Quote Originally Posted by wokkaboy View Post
    great progress Simon, bummer about the tear out, yes routers can be brutal to your timber !
    lovely looking wing sandwich, so is the next step gluing the wings to the neck ?
    Not yet! There are still a few more things to take care of before gluing the wings, because once they are on, it's hard to move the entire heavy bass around so I'll try and do more things first!

  7. #107
    This is how I did a matching control cavity cover. I plan to attach it with magnets so you can easily pop them off without any ugly screws.


    After I cut out the blackwood piece for the lower wing, I cut out a section with my fret saw so that the kerf is smaller and less wood is removed.


    Then I glued the blackwood lower horn to the body and routed it to shape. I stuck the cover onto the back and also routed it to shape.

  8. #108
    Once the cover was shaped, I rounded over the lower wing. The cover also gets rounded over and it blends it nicely with the other blackwood piece.


  9. #109
    I was worried that the cover would warp in the future, so I decided to laminate it with some 3mm aluminium. In hindsight I think it wasn't necessary but I bought the aluminium sheet on impulse so why not. The blackwood had been drying for a long time and was stable enough. But laminating definitely reduces the chances of any warping in future!


    Then I routed out the aluminium piece on the cover.

    Unfortunately I went 1mm too deep so I'll have to make up for the height difference by gluing on some veneers. This also allows me to hide the ugly free-hand route I did for the aluminium.

    To attach metal to wood, I used some epoxy.

  10. #110
    GAStronomist wokkaboy's Avatar
    Join Date
    Dec 2012
    Location
    Perth WA
    Posts
    13,555
    love the rounded edge on the wing sandwich is making me hungry haha

    saw 2 pairs of 3 pluggers thongs lined up to for when you knocked off haha
    Current Builds and status
    scratch end grain pine tele - first clear coat on !
    JBA-4 - assembled - final tweaks
    Telemonster double scale tele - finish tobacco burst on body and sand neck

    Completed builds
    scratch oak.rose gum Jazzmaster - assembled needs setup
    MK-2 Mosrite - assembled - play in
    Ash tele with Baritone neck - neck pup wiring tweaks and play in

Page 11 of 21 FirstFirst ... 9 10 11 12 13 ... LastLast

Posting Permissions

  • You may not post new threads
  • You may not post replies
  • You may not post attachments
  • You may not edit your posts
  •