
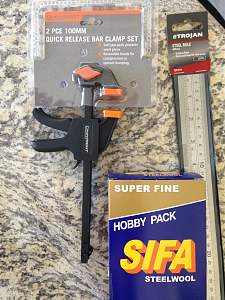
No actual build progress. I am mulling a few things over but I have bought some goodies.
Interested to know if anyone has seen the "3rd hand" jig. Might be handy to hold soldering iron if nothing else


No actual build progress. I am mulling a few things over but I have bought some goodies.
Interested to know if anyone has seen the "3rd hand" jig. Might be handy to hold soldering iron if nothing else

nice collection mate
Build #1 - ST-1 - Completed
Build #2 - LP-1SS - Completed
Build #3 - TLA-1R - Completed
Build #4 - SGD-612 - Completed
Build #5 - ES-1G - Completed
Build #6 - STA-1HT | Completed
Build #7 - ST1JR - Completed
Current Build #8 - JBA-4
Build #9 - Semi-scratch build Tele x 2 - Completed
Current Build #10 - PRS-1H
Current Build #11 - AGJR-1 - Completed
Current Build #12 - ATL-1SB
Current Build #13 - GST-1
Current Build #14 - FBM-1

the helping hand is invaluable. Nice choice
There is always a workaround for glitches, mistakes and other Guitar building gremlins.....

Hi judders,
May I make a suggestion. As its a tele kit and you have your soldering tools. you should be able to put everything together (as the kit is pre-drilled). You can also fit the pick ups and solder all electrics, string her up and give her a strum....raw.... The kit is very easy to de-solder and strip back down (say within 1/2 hour).
I found this technique really valuable on my TLA-1R build for four main reasons:-
1. You can see it all fitting together and figure out what you like and don't like;
2. If you come across and major/minor difficulties or parts of the body/neck you need to modify, you can address those before you start the finish;
3. you get more practice at putting it together, setting the guitar up, intonating and are less likely to scratch/dent the finish with your rad new skillz;
and lastly...
4. It gives you the patience needed to do a good job on the finish. A lot of first timers (me included) have at one time or another rushed the build because you can't wait to her her sing. Once you've already strung her up and had a play for as long as you want, you can then say, now its time to get down to business.
You have this advantage because you have a tele build, you can't do this with other kits as you need to finish the guitar first.
My last build took me 5 months (and I had a lot of time over xmas) and it was rushed a bit. My tele build is going to take longer, because i am not going to rush the finish.
Mate ...just a suggestion, no need to do that, its all up to you, but have fun.
Build #1 - ST-1 - Completed
Build #2 - LP-1SS - Completed
Build #3 - TLA-1R - Completed
Build #4 - SGD-612 - Completed
Build #5 - ES-1G - Completed
Build #6 - STA-1HT | Completed
Build #7 - ST1JR - Completed
Current Build #8 - JBA-4
Build #9 - Semi-scratch build Tele x 2 - Completed
Current Build #10 - PRS-1H
Current Build #11 - AGJR-1 - Completed
Current Build #12 - ATL-1SB
Current Build #13 - GST-1
Current Build #14 - FBM-1

Hey juddernaught,
Great kit you have chosen. You gotta love a tele! Everyone's advice has been spot one. Just take it step by step and ask a lot of questions. Guaranteed you'll love the guitar that comes out the other end! The fretboard will simply need some conditioning at the end of the build - some Dr Ducks axe wax or Dingotone guitar wax. If you decide to fill and re-drill that wonky tuner hole, the fill will be almost covered by the tuner itself as there is only a mm or so adjustment required by the looks of it.. Personally I never worry but I'm always in too much of a hurry.
Enjoy your build and keep us all up to date with your progress!
cheers,
Gav.
--
Build #01: BC-1
Build #02: ST-1
Build #03: JR-1DC
Build #04: ES-2V
Build #05: ESB-4 (GOTM July 2014)
Build #06: RC-1
Build #07: MK-2
Build #08: TLA-1
Build #09: JR-1DC
Build #0A: LPA-1
Build #0B: STA-1 (GOTM April 2015)
Build #0C: MKA-2
Build #0D: LP-1M
Build #0E: JB-1
Build #0F: FS-1
Find me:
https://www.facebook.com/firescreek.guitars/
http://www.guitarkitbuilder.blogspot.com.au/
Thanks for advice guys. I have the beast laid out on the granny flat kitchen bench as I mull things over. One thing I am u sure of is how the bridge pup is attached to the bridge plate. I can't find pics or diagram anywhere but I have what appear to be three unaccounted for screws and springs so I assume they are part of the solution.
At this stage my thoughts are to follow Andy 40s advice and stick it all together, test, dissemble, finish and reassemble. 1st step would be to screw pup to bridge pickup and position neck.
Sent from my iPad using Tapatalk

Judder, I had the same question about how to attach the bridge pup. There are 3 screw holes around the pup cutout in the bridge. Put a bolt through each of the holes in the bridge, put a spring on the bolt, then thread the bolt onto the pup. By doing that you can control the height of the pup by turning the bolt - clockwise to raise, counter-clockwise to lower - the spring compression will keep things from unwanted movement.
Peter is spot on Judders. I tried to find a photo, but i didn't have one. soz but i think you get the idea.
Build #1 - ST-1 - Completed
Build #2 - LP-1SS - Completed
Build #3 - TLA-1R - Completed
Build #4 - SGD-612 - Completed
Build #5 - ES-1G - Completed
Build #6 - STA-1HT | Completed
Build #7 - ST1JR - Completed
Current Build #8 - JBA-4
Build #9 - Semi-scratch build Tele x 2 - Completed
Current Build #10 - PRS-1H
Current Build #11 - AGJR-1 - Completed
Current Build #12 - ATL-1SB
Current Build #13 - GST-1
Current Build #14 - FBM-1
Wonky nut.
Measures as parallel to the first fret but looks way wrong to the shape of the neck. I assume this is cosmetic and that I could sand or file it parallel?

 Reply With Quote

