


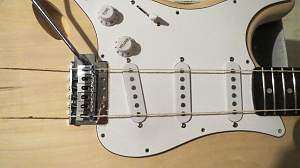
Then its just a matter of moving the scratch plate and bridge around so that the lengths of string coincide with the outermost pickup magnets and the centered bridge saddles are lined up with the blue marks on the strings.
I recommend you initially drill just one pilot hole for the bridge mounting foot and fit just one screw, so you can make any fine adjustments required. Tighten the single screw enough to hold the bridge firmly in place, but not so tight you cant move it.
Then mark and drill the five other holes and fit the other screws. (In normal operation, there screws are loosened off a little to allow the bridge to be wobbled slightly to produce the tremolo effect. This will be described in more detail later).
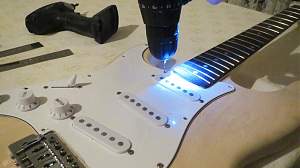
Then similarly mark and drill the scratchplate holes and fit its screws


 Reply With Quote