Hey Gav, just a follow up on the how's, where's and why's of fret slots. (From an absolute rank amateur)
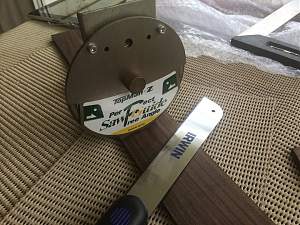
This is the mitre thingie, and the Dovetail pull saw that I will be using
a different angle of the thingie

The saw fits behind the front plate, like so.
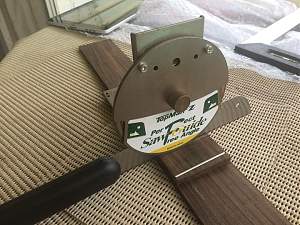
It was originally designed to take a saw blade about twice the thickness of the Dovetail, so accuracy will be a bit problematic.
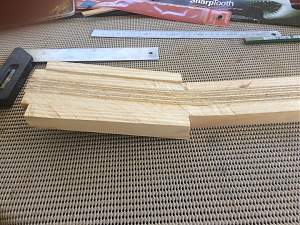
This is the trial I did on the off-cut of the fretboard. Because accuracy is so important I used a very sharp pencil to mark the slot line, but my tired old eyes had trouble seeing it when I positioned the mitre above it. I found the best solution was to use a Stanley knife to score the wood, which made it much easier to see. On the left is a trial cut, next to it is the Stanley knife score line. The fret was hammered home and seems to be quite secure. If there are problems I guess I can always glue them in.

As I said earlier, I will cut the slots into the fretboard while it is still square to make sure they are true 90 degrees to the FB, I will then shape it to the taper of the neck.
Accurately measuring the fret positions will be paramount and will be done and checked, and then checked several more times. According to Mr Google the key is to measure fret positions from the nut so if a mistake is made with one fret it is not compounded as you move along the neck. I will then double check my measurements by measuring the distance between each fret as against measuring from the nut. I think I'm getting paranoid.
I hope to get the slots cut this weekend, I'll let you know how it is goes.
Cheers
rob


 Reply With Quote


