
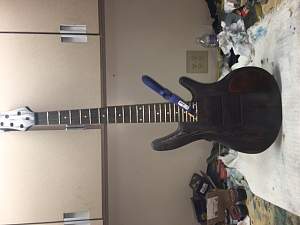
Ok on to #3... I am already halfway with this build but has a few hiccups and thought I should share the pain and progress. This kit did not have the best grain given 3-4 pieces making up the body so I decided to go dark..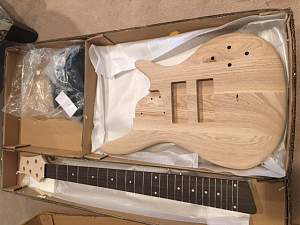


Ok on to #3... I am already halfway with this build but has a few hiccups and thought I should share the pain and progress. This kit did not have the best grain given 3-4 pieces making up the body so I decided to go dark..
Last edited by Drummerdude; 22-06-2017 at 12:29 AM.
So the grain is all over the place and the routing for the pots was very sloppy on bottom side.. but I can fix that...so I did mock build everything fits pretty good. So on to sanding.. found lots of glue at every glue joint so goof off and wire brush and more sanding. Found a couple really low spots on bottom edge so out came the file and more sanding..Also didn't like how pointy the top horn was so made it a little more rounded.

Last edited by Drummerdude; 22-06-2017 at 12:32 AM.
Then on to grain filling. I used the ebony timbermate like on my pbh-4 and then sanded back.. Decided to go for this type of look with a dark amber neck and dark gray black finish...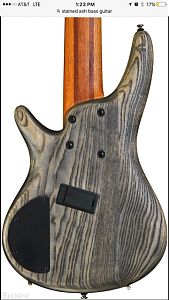
Then on to the stain....
Now to sand back to get the look I want...
Not looking to bad..
Now glue on ash veneer to headstock and stain to match....
Then Stain neck...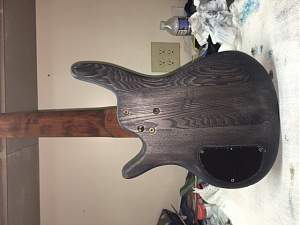
I am gonna rub down neck with some steel wool to lighten a little but getting late and just snapped a couple of pics.
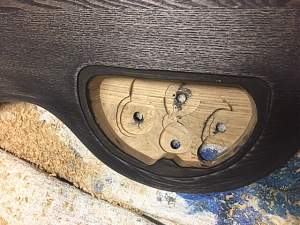
Now on to making the back control cover recessed. And cleaning up the bottom of cavity where pots mount..
And then...... when you are tired and it's 11 pm and you know you should go to bed but you can't seem to put the tools down... I decided to just make the bottom all the same level.. so I set depth on router and start to work...loud noise lot's of inappropriate words and I realized I forgot that I was working on a carved body not a flat top..
Scratched my head threw some tools and decided it was time to go to bed..
Emailed Adam at pitbull and was checking on new body..just gotta say he is great always quick to reply and help out.. first class man.. he has a spare body.. yeah... but then I remember I ordered this in 30" short scale so I measure and the pickup routs too far back I wouldn't be able to get bridge in proper position.. so now order another and wait and wait and wait.. I don't like Waiting... uggg..
so I am spraying another coat of clear on my PBh-4 kit and I get an idea.. what if I inlay a plate over the control cavity with maple stained to match the neck and then make pickup covers out of wood and stain to match maybe I can pull off a design to cover up my major screw up.. so on to the wood shop..
Last edited by Drummerdude; 22-06-2017 at 12:34 AM.
I find a couple pieces of maple 1/8" thick and it even has some flame figure.. now to make it work.. I make a paper mock up and get the shape right.. then cut out the maple and sand into perfect shape.. now I have to rout the cavity on the top. Which ordinary would be a tense moment but not for me I could do much worse... lol.. make it a little small and then hand chisel and sand to get as tight as fit as possible. The rounded body does not make His routing job very easy..but so far so good. Fits nice and I sand and stain it to see what it will look like.. tell me what you think and be honest please.. I think maybe when I get the pickup covers made it will tie it all together..
Last edited by Drummerdude; 22-06-2017 at 12:41 AM.

Yep, that horrid feeling when you hear the router bit break though......bad words at varying volumes.
You could always mount another maple insert and call them accent pieces? If your pup covers are going to match that fill in, then I don't think it will look untoward, especially once you get the controls on it.
It's a pity you'd already done the veneer on the HS, as you could have also matched that to the fill piece.
I ended up overcoming the same issue on my FrankenWashie rebuild by filling in with acrylic resin (way messier), you've created a very tidy solution so perhaps just see how it pans out. If, down the track, it bugs you too much you can always replace the body.
FrankenLab:
Turning tone wood into expensive sawdust since 2016!
I have never worked with the resin before but I should have posted on here and asked for ideas. I hope it will look ok but a new body is not that much money I just didn't want to wait for 2 months to get it to the USA.. I need to check out the frankenwashie and see the repair so I k is for next time I loose my mind..
 Posting Permissions

 Reply With Quote