
Looks pretty good so far.


Looks pretty good so far.
# 1 - EX-5 https://goo.gl/fQJMqh
# 2 - EX-1 https://goo.gl/KSY9W9
# 3 - Non PBG Tele https://goo.gl/W14G5g
# 4 - Non PBG J Bass https://goo.gl/FbBaFy
# 5 - TL-1AR GOTM Aug 2017 https://goo.gl/sUh14s
# 6 - MMB-4 Runner-up GOTM Oct 2018https://goo.gl/gvrPkp
# 7 - ES-1 Runner-up GOTM Aug 2018https://goo.gl/T9BEY8
Wow. That looks killer!
I can't find the blemish you speak of, all I see is a guitar body that's going to look amazing.
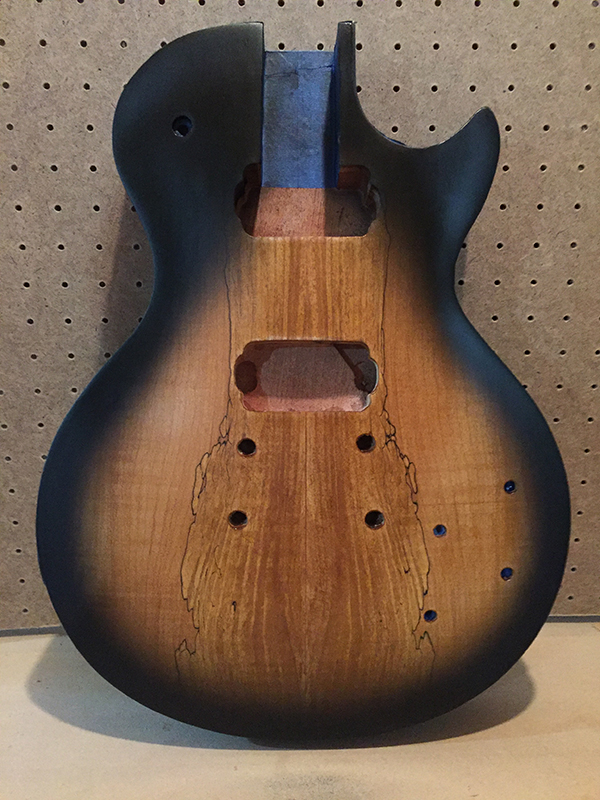
The burst with the spalted maple is gorgeous.
Current Build: RCA-4 http://www.buildyourownguitar.com.au...ead.php?t=8261

I cant wait for part 2! Looking sensational.

Looks lovely. I agree with Simon that some clears will do a lot to even out the touch ups.
Build 1 - Shoegazer MK1 JMA-1
Build 2 - The Relliecaster TL-1
Build 3 - The Black Cherry SG AG-1
Build 4 - The Sonicaster TL-1ish
Build 5 - The Steampunker Bass YB-4
Build 6 - The Howling Gowing ST-1
"What I lack in talent I make up for with enthusiasm"

Thank you for the kind words everyone!
I meant well when I masked the binding, but despite my efforts in the end there was still a lot of scraping and touch-ups!Originally Posted by Simon Barden

Thanks for the tip Simon. I'm not terribly familiar with turpentine or spirits, I actually would have thought that they'd remove the paint all together.
Thanks Sonic! I'm a fan of your builds. It blows me away that you've just about built five guitars in less time than it took me to do one!
AUGUST 2017
One thing I knew I wanted to try and do during this build was inlay a logo into the headstock. I decided to make an overlay for the headstock and inlay into that as opposed to doing it straight into the veneer. I bought a 1/4" maple board, planed it down to 2.5mm thick, and also picked up a 1.5mm thick sheet of pearloid white celluloid
At this point I also started applying a few thin coats of Tru-Oil to the top of the body to protect the finish.
Then it came time for the logo. Although my build is based on a specific branded guitar (am I allowed to say their name here?) I'm not trying to pass it off as one. At first I designed a logo using my surname in their typestyle, but aesthetically it didn't work; it literally didn't fit. So since this is inspired by the Halcyon Les Paul, I just went with Halcyon.
Using a rotary tool with 1/32" bits, a jeweller's saw, various files, X-Acto blades, a few hours and Dog Day Afternoon on in the background (I have no idea why I remember that), I ended up with this

Routed the logo shape into the overlay
Rough cut the overlay to size

At this point I revised the shape of the headstock again, making it slightly curvier at the top and pointier at the base. Pay no mind to the stained sections, I had been experimenting on the veneer earlier before staining the top of the body
Because I didn't want to make the headstock any thicker I had to plane 2.5mm off the face before I could add the overlay. To do this I made a ridiculous jig out of scrap wood and held it together with painter's tape. I then ran that atrocity over a router in a router table to remove the 2.5mm. It probably shouldn't have, but somehow it actually worked

 Posting Permissions

 Reply With Quote