Page 1 of 4 1 2 3 ... LastLast
Results 1 to 10 of 36

Thread: Simon B's GPR-1B build

  1. #1
    GAStronomist Simon Barden's Avatar
    Join Date
    Oct 2016
    Location
    Reading, UK
    Posts
    10,547

    Simon B's GPR-1B build

    I wasn't planning to get another kit, especially as I have two on the go and my previous two still in the wings waiting for better weather. But a combination of a good friend wanting me to build him a guitar and Adam offering me a really great offer on a GPR-1B (one of the kits that got removed as there was a big mismatch between the electronics supplied and the body control holes), saw me sign-up for one more kit.

    So this is it, newly arrived and with the body having been wetted with turps:

    Click image for larger version. 

Name:	GPR 1B neck body small.jpg 
Views:	281 
Size:	335.8 KB 
ID:	25311

    Click image for larger version. 

Name:	GPR 1B body small.jpg 
Views:	288 
Size:	351.8 KB 
ID:	25312

    No obvious glue spots apart from a white line where the veneers meet. I've already had a go with some glue remover on this and will have a couple more goes once my old electric toothbrush is recharged (easier than brushing the join manually!).

    This is definitely the worse condition kit I've yet received. Nothing unsalvageable, just more work to put right.

    There's a bit of a mess in the veneer/binding interface in the bottom cutaway:

    Click image for larger version. 

Name:	bottom horn binding small.jpg 
Views:	292 
Size:	240.4 KB 
ID:	25313

    Hopefully this can be made good with some maple-coloured grain filler.

    The binding in general is quite rough and has a lot of machining marks on it, which will have to be rubbed down smooth. Even the F-hole binding is rough, and I've never had that on the three existing kits I've got with F-holes. Still, its only a bit of scraping and sanding.

    I was less happy with this dent in the side:

    Click image for larger version. 

Name:	side dent small.jpg 
Views:	257 
Size:	249.0 KB 
ID:	25314

    But my first ever go at steaming out a dent worked well (first use of my dedicated for luthiery $15 iron from Amazon) and now you'd never know it was ever there.

    Click image for larger version. 

Name:	dent gone small.jpg 
Views:	264 
Size:	256.5 KB 
ID:	25315

    Apart from a bit of raised grain (and the body needs sanding anyway) it's now fine.

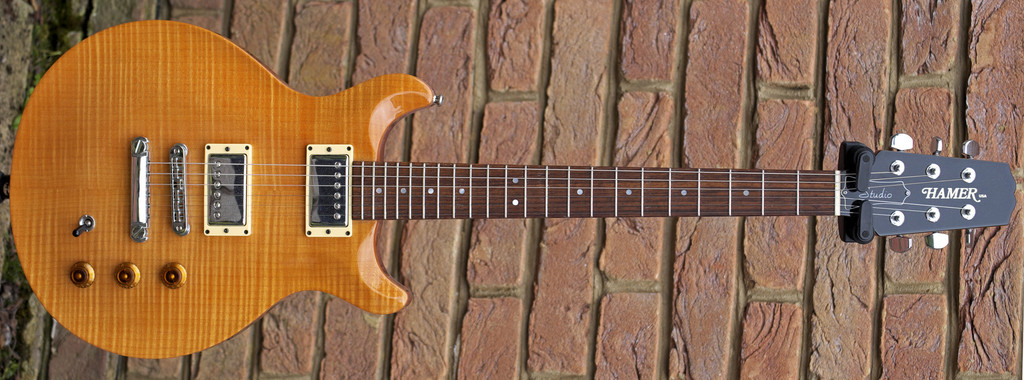
    There's a bit of work that needs doing on the headstock as there's a gouge out of the top on one side of the truss rod dip where the nut meets the headstock. Not quite sure yet what I plan to do with the headstock, so it can wait. But it's going to stop me leaving the headstock with a natural finish. My friend wanted a natural finish for the guitar so it's going to be quite similar to my USA Hamer Studio (which is actually a bit paler than in the photo):


    But I'm tempted to do some light popping. I need to discuss this with him.

  2. #2
    GAStronomist Simon Barden's Avatar
    Join Date
    Oct 2016
    Location
    Reading, UK
    Posts
    10,547
    Obviously it's got no post holes drilled for an Tune-O-Matic bridge or stop tailpiece. The sloping rear means that I can't do the temporary trapeze tailpiece trick to get the TOM position just right, which is pointing me in favour of a different bridge style. Unfortunately the top is gently arched, so a flat-based more Fender hardtail-style bridge won't fit on unless I rout the top flat for it, which is easier said than done!

    Also the neck angle will probably mean that the bridge needs to be sat quite high unless that angle is altered. I shall do some testing and have a ponder.

    Single string bridge pieces might be the way. Now to find some budget-friendly ones!

  3. #3
    GAStronomist Simon Barden's Avatar
    Join Date
    Oct 2016
    Location
    Reading, UK
    Posts
    10,547
    Here's the headstock gouge by the nut. I think I'll stick some veneer over the whole of the top of the headstock, then just do an angled scrape of the edge so just a very small part of the cream binding shows.

    Click image for larger version. 

Name:	headstock scar small.jpg 
Views:	224 
Size:	348.8 KB 
ID:	25316

    Then there's a few more items I've just noticed. This took me back to my first electric guitar, an early '70s Columbus LP copy. Its plywood top also didn't touch the body in a lot of places either.

    Click image for larger version. 

Name:	top gap small.jpg 
Views:	245 
Size:	371.5 KB 
ID:	25317

    The other side of the pocket is a bit better, but still not perfect.

    Click image for larger version. 

Name:	bottom gap small.jpg 
Views:	248 
Size:	314.6 KB 
ID:	25318

    So those gaps are going to need filling with something solid to provide proper support for the pickups.

    The last two sets of fret markers are a bit random in positioning as well.

    Click image for larger version. 

Name:	fretboard markers small.jpg 
Views:	261 
Size:	451.6 KB 
ID:	25319

    The neck is a bit loose in the pocket. It's a slightly wedge shaped pocket, so fits tightly when the neck is pushed back from the body by about 15mm from where it should sit. So a bit of veneer on one side of the pocket should sort that out. But I'll give it a week or so anyway before doing anything about that as the gap may get bigger as the wood settles after its flight to the UK (from experience the fit is normally too tight and gets looser with waiting).

    The good thing about not having pre-drilled post holes for the bridge is that I can position the neck exactly where I want it and then worry about where to put the bridge for correct intonation.

    Apart from the fret markers, there's nothing that cant be fixed. Even the fret markers could be replaced with bigger ones throughout, allowing them all to be centred. But I'm not 100% happy about drilling one of these Blackwood Tek fretboards as they do seem prone to bits splitting off, and I could just make things worse.

  4. #4
    Mentor Marcel's Avatar
    Join Date
    Apr 2017
    Location
    Bouldercombe Qld.
    Posts
    1,168
    This kit will certainly keep you busy over the Summer Simon...

    A little bit of a buggar needing to cover the binding on the headstock, and that gap between the ply and the body is huge....

  5. Liked by: vh2580

  6. #5
    Quote Originally Posted by Simon Barden View Post
    which is easier said than done!
    That's what sets me off on the lemming-like run to disaster.
    I'm sure a knowledgeable chap like thee will produce a winner!

    cheers, Mark.

  7. #6
    Member Wayne.Mumford's Avatar
    Join Date
    Mar 2016
    Location
    CAMPBELLTOWN NSW
    Posts
    236
    Hi Simon, what about glueing and clamping, will that top pull back down or will that warp the shape? It’s a nice looking grain in the top, should be amazing with a light color.
    Build-1 ES-3 June 2016 GOTM.
    Build-2 IB-1S
    Build-3. ES-12G June 2019 GOTM.
    Build-4 Gene Simmons axe bass. 43 year project done.
    Build-5. TL-1S May 2021 GOTM joint winner.

  8. #7
    Mentor Adam Barnes's Avatar
    Join Date
    Feb 2017
    Location
    norah head nsw
    Posts
    613
    Hi simon could you put some expanding foam glue in those gaps it looks more like a bit of veneer missing underneath than the ply wood letting go

  9. #8
    GAStronomist Simon Barden's Avatar
    Join Date
    Oct 2016
    Location
    Reading, UK
    Posts
    10,547
    The treble side looks like it may pull together with a clamp, less sure about the bass side. My experience of the foaming glues is that they are good for small gaps, but where it's been squeezed out of a joint and expanded a lot, the 'glue' is very soft indeed. If I can't manage to clamp the gap tight, then I'll slip some veneer in the gap and glue that in.

  10. #9
    Mentor Adam Barnes's Avatar
    Join Date
    Feb 2017
    Location
    norah head nsw
    Posts
    613
    My stair case guy has got one that comes in a silicone cartridge ive used it to put steel bolts into timber to hold a glass handrail and those bolts are never coming out id have to cut the timber to get them out, i cant remember what it was called but it was an expanding glue not foam

  11. #10
    GAStronomist Simon Barden's Avatar
    Join Date
    Oct 2016
    Location
    Reading, UK
    Posts
    10,547
    Well, expanding glue = foam. It produces a gas as it sets which produce small bubbles in the glue which in turn expand the glue. If it's not constrained from expanding too much by the materials it's sandwiched between, then the gas bubbles will get bigger, reducing the relative amount of glue in the gap and making the bond weaker. So it really needs to be used where gaps are small, and then it is very strong.

Page 1 of 4 1 2 3 ... LastLast

Posting Permissions

  • You may not post new threads
  • You may not post replies
  • You may not post attachments
  • You may not edit your posts
  •