I've got the day off work today, so started on the Maguires polish. It's coming up nicely.
What do people tend to put on after polishing the clear coat? Is waxing the done thing?
I've got some furniture wax in the cupboard, 'Marveer' brand, which is beeswax and carnauba wax. Silicone free. I tested it out on my piece of scrap, and it doesn't seem to have done any harm.
The wax is just for a bit of added protection I assume?
Really the Magiures polish should also leave a protective layer on it - especially the finishing ones which don't have any cut compound in them.
You certainly won't hurt it by waxing over the top, but its probably unnecessary. The Automotive stuff is designed to withstand being out in the elements so its almost overkill for something like this.
I'd leave it as it is. No wax, no point. If it gets a bit dull and lightly scratched in the future, then use wax, but to me it would be a bit pointless waxing an already shiny surface - after you've polished it there shouldn't be any small scratches for the wax to fill.
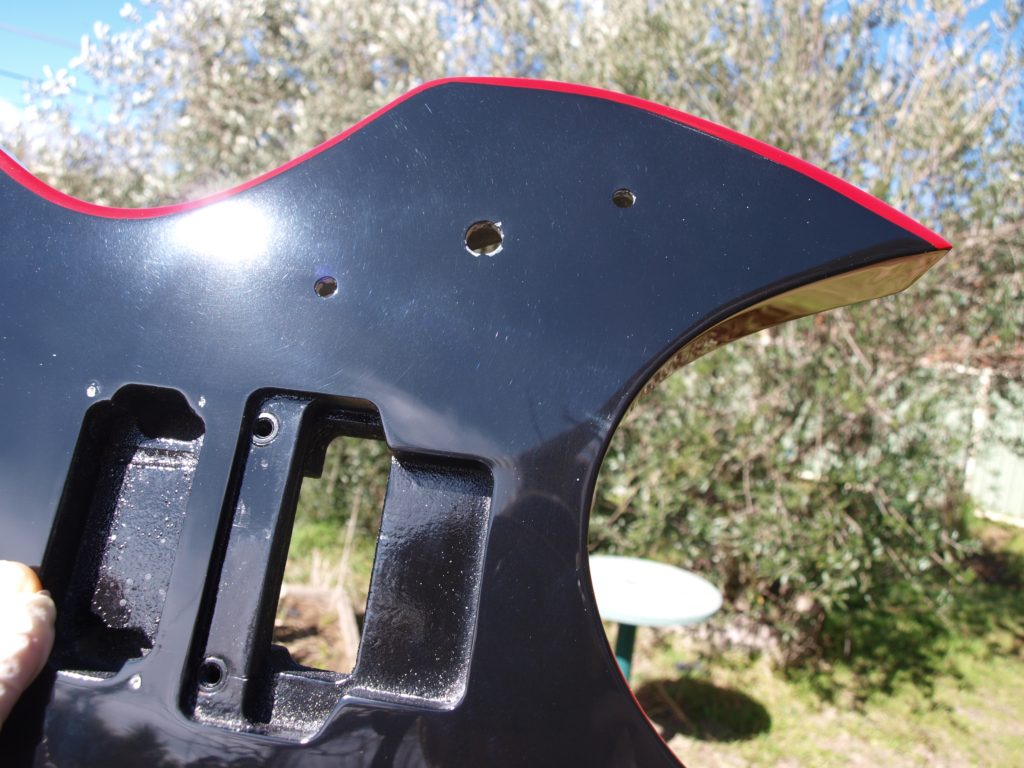
It's highly reflective, and has no trace of the scratches unless you're in full sun at certain angles, and even then it's pretty slight. I'm happy with that.
It picks up fingerprints like no-ones business, so I'll have to learn to not be too precious about it.
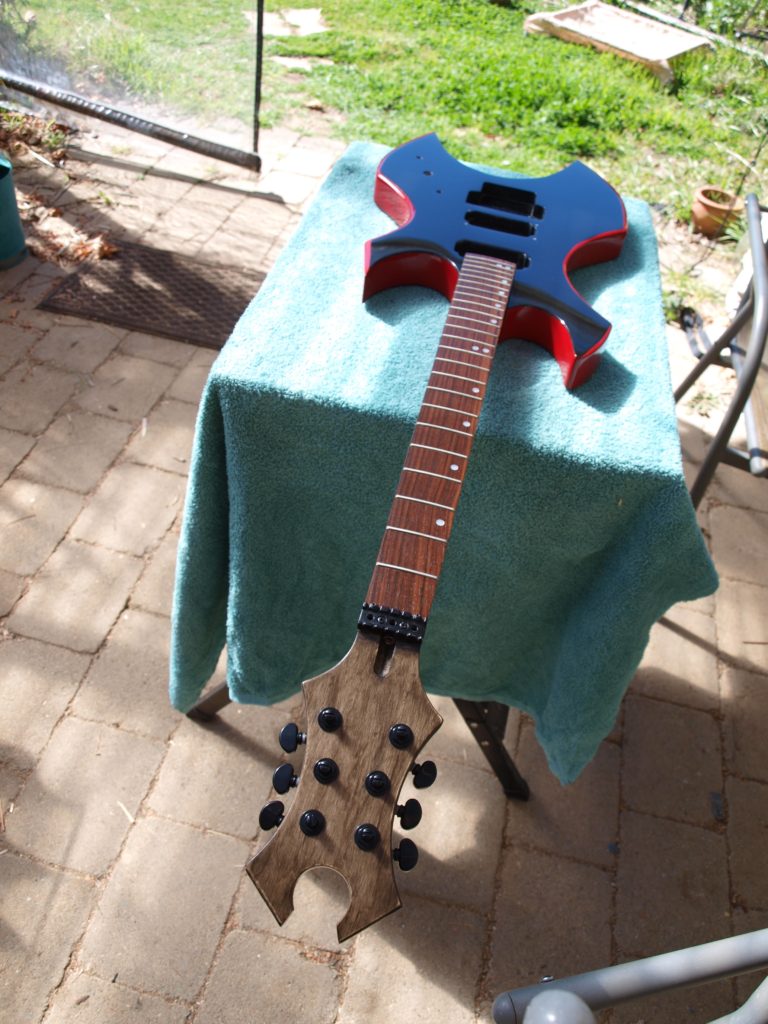
Next fit the neck. It was a really tight fit. I got it in most of the way, then got it properly seated by basically putting my whole body weight onto it, which pushed it down the last bit. Managed to chip a little piece of red off near the neck, dammit. But it's straight, and I don't think it's ever coming out.
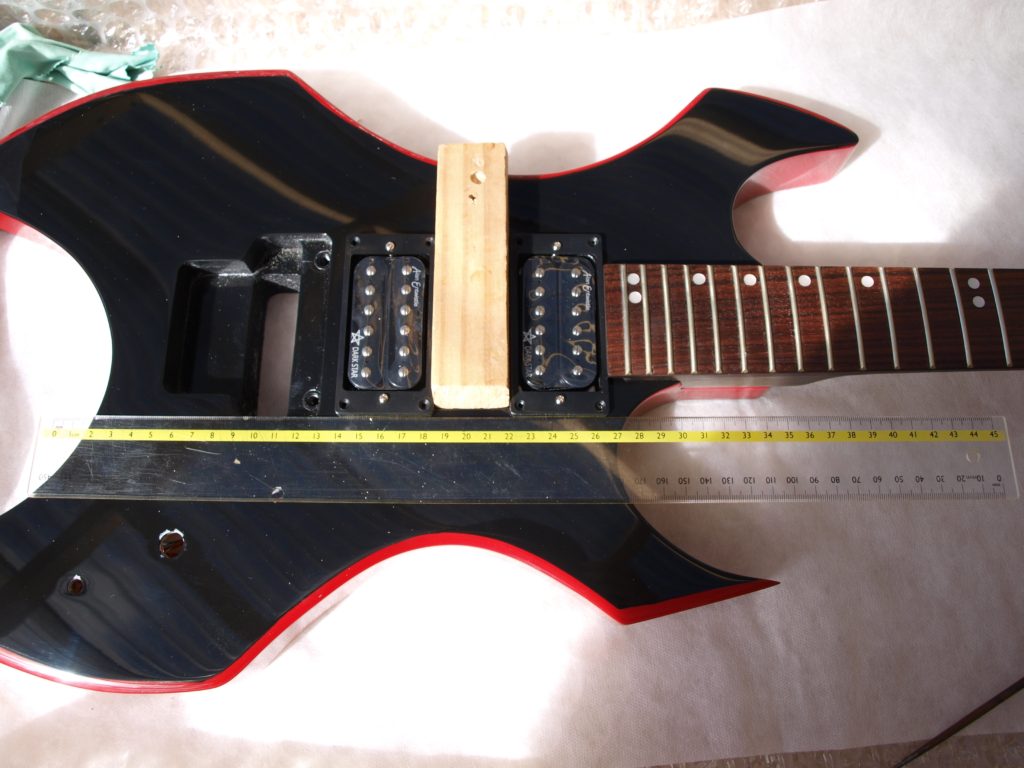
Pickups installed (thanks to a handy ruler and bit of wood to line everything up). Went in no troubles. Did have a moment of horror when I thought the neck pickup wasn't going to fit under the neck. It was all good with some wiggling.
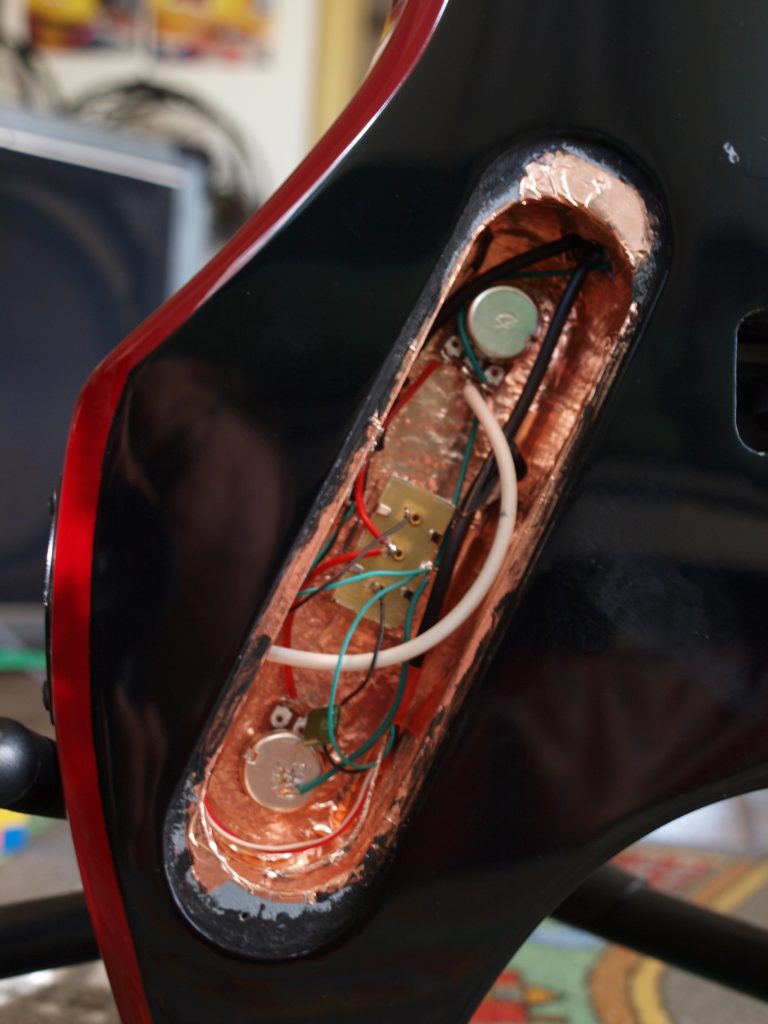
Electronics done. I got the kid to do most of the soldering, then I finished off the few fiddly bits.
Then put on the Floyd Rose bridge. It says it's a licensed copy... but they've spelled it "Floyd Rosd", which makes me wonder. Seems a bit dubious to me. After watching the video on the Pitbull site, it went on without too much drama. There is still some fine adjustment needed, but for now it's playable.
Put on the strings and the kid has given it a go - the DarkStar pickups sound really awesome.
Routing a pick guard, and maybe a new back plate. I might do a truss rod cover, or I might just leave it bare. *gasp*
Getting the tuning perfected. I still need to put some more tension on the springs, and might have to adjust the height of the nut and bridge a bit. Then intonation, which looks scary on that bridge.
Fit the strap buttons. Where the hell do you put them on a body shape like this? I'm thinking they may have to go on the back?
I might also buy a string retainer for the head... the 3rd and 4th strings are angled to almost touching the 2nd and 5th. There wasn't one included in the kit.
A big round of applause, mate. You've done a lovely job on it and your kid looks really happy. Great that you involved him in the build and hopefully he'll persevere with the playing.
I'd locate the strap buttons in a similar place as on a real Warlock. It's actually been hard to find a picture of the back of one, but I found this, which should provide enough information for you:
Just don't put them too near an edge. I'd also suggest using a dab of PVA or Titebond glue on the screws as it helps keep them in place. Because of the strap button locations, I'd suggest swapping the standard buttons to straplocks, as there's going to be a bit of a twist on the strap when it's on the buttons, and you don't want to see it falling off.


 Posting Permissions

 Reply With Quote