Page 7 of 9 FirstFirst ... 5 6 7 8 9 LastLast
Results 61 to 70 of 90

Thread: EX-1 with alder body build

  1. #61
    GAStronomist Simon Barden's Avatar
    Join Date
    Oct 2016
    Location
    Reading, UK
    Posts
    10,547
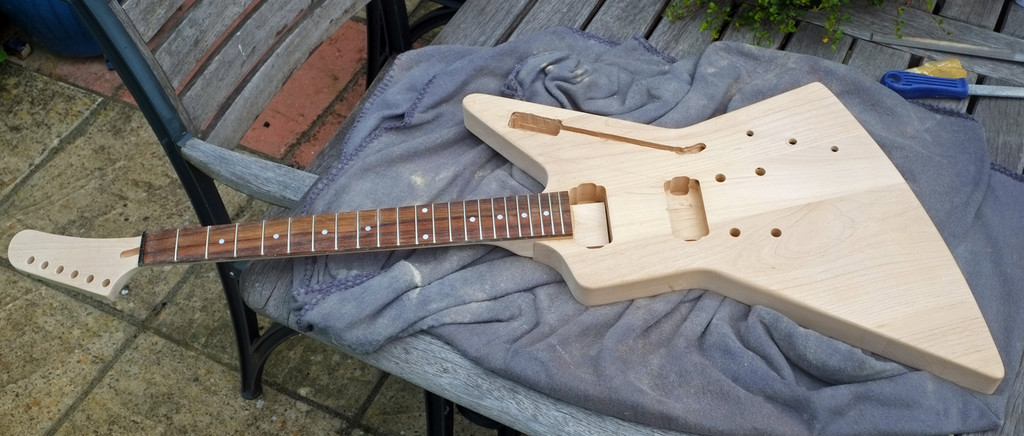
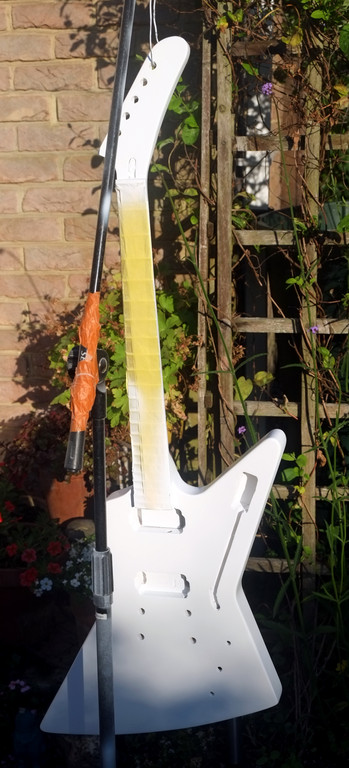
    I finally got round to routing out a cavity and channel for the pickup switch, and also filling in the old selector switch hole and drilling it out for another pot. It's not the cleanest routing as a lot of it was done by hand without any guides but also my new palm router wouldn't hold the router bit firmly and it kept coming loose, which didn't help as channels got deeper and shallower as I moved along them.

    Click image for larger version. 

Name:	ex1 routed.jpg 
Views:	182 
Size:	859.8 KB 
ID:	26586

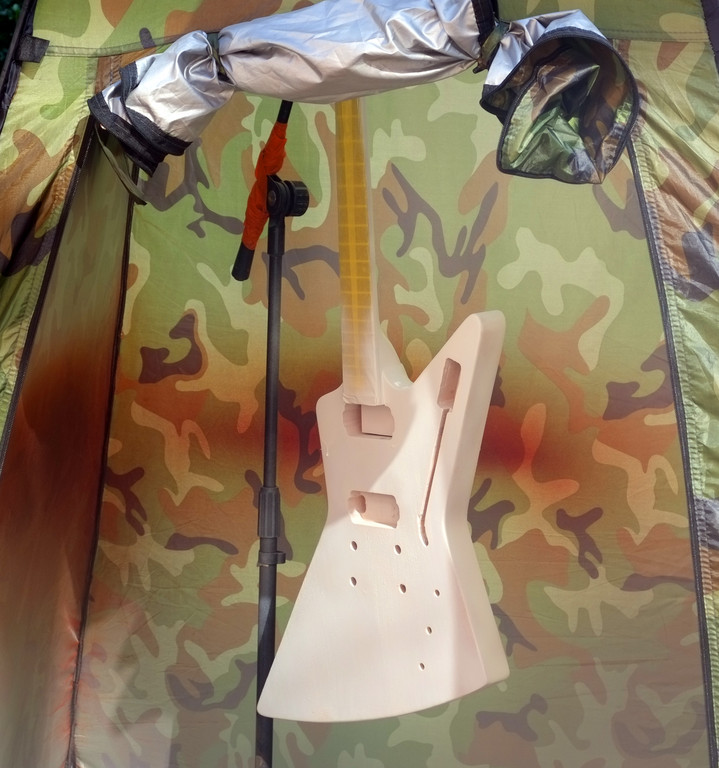
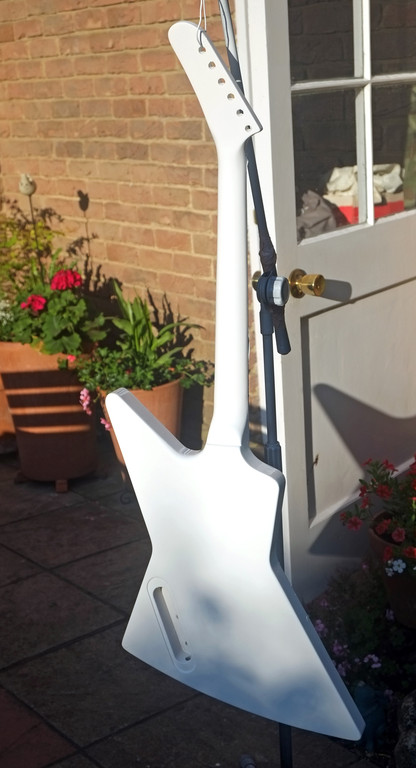
    I've now decided to keep this one simple as I don't seem to have much luck with anything complicated at the moment, so it's going to be a nice simple white guitar with a black headstock and no flashy graphics.

  2. #62
    Member trv's Avatar
    Join Date
    Apr 2018
    Location
    Winnipeg, Canada
    Posts
    131
    I've been looking forward to seeing an update on this one! The rout looks just fine

    White is a great colour for explorers, how do you plan to do the application? Also, will you be doing an inlay in the headstock?

  3. #63
    GAStronomist Simon Barden's Avatar
    Join Date
    Oct 2016
    Location
    Reading, UK
    Posts
    10,547
    Sprayed nitro finish. I've already got all the lacquer. And yes, a bit of my 'inlay' on the headstock for a logo.

  4. #64
    Member CascadiaGuitarGeek's Avatar
    Join Date
    Jan 2017
    Location
    British Columbia, Canada
    Posts
    239
    It's nice to see this project back in business Simon. I always get Explorer envy when I see everyone's builds.

  5. #65
    Member Spychocyco's Avatar
    Join Date
    Sep 2017
    Location
    Louisiana, USA
    Posts
    84
    Thinking about an Explorer for my next build (promised myself I'll get the two currently on the bench done first, though). No way would I have the confidence to do that mod.

  6. #66
    GAStronomist Simon Barden's Avatar
    Join Date
    Oct 2016
    Location
    Reading, UK
    Posts
    10,547
    This is the only Pit Bull guitar I've progressed with this summer. Unfortunately a long series of mishaps with finish damage slowed me right up. I kept having to stop and let things dry hard enough before fixing stuff and respraying. And now when it was pretty close to just needing some clear coats, the weather changed and it's all going to be seven months time before I'm likely to restart.

    I decided to pick the EX-1 to continue work on as it was all pretty straightforward as I'd decided on all-white with no special artwork.

    I glued the neck on and then got to work on the area around the neck joint to remove sharp corners and smooth the rear of the bottom cutaway to make for easier upper fret access.


    I then went a bit further in the rounding of that area than the photos show. This was followed by applying some filler to get the body/neck join nice and smooth and then the ubiquitous sanding. It's not a huge amount that I've taken off, but it's amazing how much a bit of extra rounding can aid access and greatly improve the feel.

    The body had picked up quite a few very minor dings since I'd received it, so I decided to first spray it with a white primer/filler. I was using my pop-up toilet tent spray booth, which could do with being that bit larger for spraying complete guitars. It's OK for bodies and necks alone, but a bit too compromised for full guitar spraying. So I think I'll be on the lookout for something a bit bigger for next year.


    You can see an old mic stand has been pressed into service for hanging up the guitar. Again, I really need something more solid and bespoke, so I'm thinking of making a wooden hanging stand with a swivel hanger over the winter. The bodge repair work with masking tape to keep the arm in place worked wonderfully, but some of the standard fittings sagged a bit, resulting in the wet guitar touching the tent sides, or dropping on the floor. I was not a happy bunny when this happened, and it happened quite a few times, both in this primer stage, and later.

    After waiting for the primer to dry for a while, I sanded it flat, removed paint from fretboard and masked up again for the gloss. Again, more annoying handling and stand errors, and more remedial work, I left the body to dry for a few weeks whilst I was on holiday and working on other things. This is with the first gloss coats on:


    Then it was sanding time again. And that annoying time when you over-sand and break through to the primer in a few places.

    So it was more full-body spraying. more annoying self-inflicted dents in the bodywork and some manual paintbrush touching up. Not ideal with nitro, but I wasn't getting the spray-gun out for a few small areas.

    I was all ready to add a headstock logo transfer and spray on a few coats of clear lacquer, when I discovered that my previously unopened big tin of clear lacquer wasn't clear at all. but pretty heavily amber tinted. I didn't want a yellowish guitar. So it was new lacquer ordering time, which held things up for a couple of days, by which time the weather had changed. Not rain, but very high winds which made spraying, even within the tent, impossible. And then the rain came. So that's pretty much it on the guitar for this year (being in the UK).

    There's a few bits of tidying up I can do to get the last little bits of paint off the fretboard, and then it's waiting for the start of decent warm weather next year to apply the transfer, the gloss lacquer, the rubbing down and polishing and then fitting the hardware.

  7. #67
    Overlord of Music fender3x's Avatar
    Join Date
    Jan 2016
    Location
    Miami, FL, USA
    Posts
    2,199
    Finishing is the bane of existence. I have managed to scratch and dent every finish I have attempted so far. I don't know if this will be of help to you, but on my current project I am using MTN 94 rattle cans for color. It looks like you are using spray equipment, and I don't know if they make this for spray guns. But I am guessing there are other paints with similar features. It's an acrylic paint with a LOT of solids. I am in Miami, and in the summer it is hot, humid and can rain at any moment. It went on grainy at times. It splatters a bit. I once got raindrops on it once. But it always sanded out beautifully. The solids filled in small dents. I don't know this for a fact, but I am guessing that a part of why it worked in my wet climate is that it's water based.

    As a clear coat, I have been using General Finishes High Performance top coat. Again, water based, and recommended by Stew Mac. I put it on with a brush, virtually no VOCs so I could do it inside. The mfg recommends spraying if you have the equipment. I am still sanding it out, but I have a finished neck, and it just looks great. No discernible yellowing, and finishes pretty hard. It's acrylic, and most reviews suggest it's not going to flatten as well as oil based finishes...but it seems to do well in my wet climate. It may not be idiot proof, but so far it's working for this idiot.

  8. #68
    GAStronomist Simon Barden's Avatar
    Join Date
    Oct 2016
    Location
    Reading, UK
    Posts
    10,547
    I'd hoped to have finished this by now, as most of the work was done last year. But various knock and sand-throughs meant that I've been doing various bits of touching up by hand. Nothing exciting so no photos of that. I am now almost there.

    The fretboard had suffered from paint dust getting in the cracks when I'd been wet sanding, and small amounts of overspray where the masking tape had peeled away slightly. So today I got down to clearing that up with thinners and got back to just wood instead of wood with a dusty white look to it:


    But it was rather light in colour, It went darker with Lemon Oil on it, but this board just soaks up the stuff and quickly goes light again very quickly. So out came some mahogany spirit stain and it's now looking a lot more like a rosewood board. I could go darker still, but I'm happy with this:


    Just re-doing a couple of spots where I knocked the guitar (The Explorer shape is very awkward to handle and I seem incapable of moving it without hitting something in my path that I failed to move away) and the edge of the fingerboard had become a bit ill-defined, so I've got the masking tape out again and am just tidying up the edges to get back to nice straight lines.

  9. #69
    GAStronomist Simon Barden's Avatar
    Join Date
    Oct 2016
    Location
    Reading, UK
    Posts
    10,547
    Yesterday was spent sanding and polishing the finish on the EX-1.

    Click image for larger version. 

Name:	7D21EAB5-DD81-4CB4-8C4C-E2DBEC01611A.jpeg 
Views:	139 
Size:	394.6 KB 
ID:	37867

    It took three goes at sanding flat before I was happy and any slight orange peel went, but now it’s all polished up and shiny, so it’s all ready to start fitting the hardware.

    After I drill a bridge grounding hole as it’s yet another kit without one (that’s 3 out of 5) and modify the pickup rout cable holes to be lower so the cables don’t get in the way of the pickups (again).

  10. #70
    Mentor Trevor Davies's Avatar
    Join Date
    May 2020
    Location
    Perth
    Posts
    1,377
    Looking good. The fret board has a real red colour in the picture - nice.
    Are you painting the head stock face black or using a laminate like with the SG?
    PitBull Builds: FVB-4, LP-1SS, FBM-1, AG-2, TB-4, SSCM-1, TLA-1, TL-1TB, STA-1HT, DSCM-1 Truckster, ST-1, STA-1, MBM-1.

    Scratch Builds: Pine Explorer, Axe Bass, Mr Scary, Scratchy Tele's.

    The little voices in my head keep telling me "build more guitars"

Page 7 of 9 FirstFirst ... 5 6 7 8 9 LastLast

Posting Permissions

  • You may not post new threads
  • You may not post replies
  • You may not post attachments
  • You may not edit your posts
  •