Results 1 to 9 of 9

Thread: Frankenbacker - an RC-4 build

  1. #1
    Member
    Join Date
    Nov 2016
    Location
    Finland
    Posts
    9

    Frankenbacker - an RC-4 build

    Hell-o!

    This will be the story of my very first build, an RC-4 kit which I chose over the RCA-4 kit just because I liked the grain and colour of the RC-4 wood better. So, the parcel arrived today and I was anxious to get my hands on it.
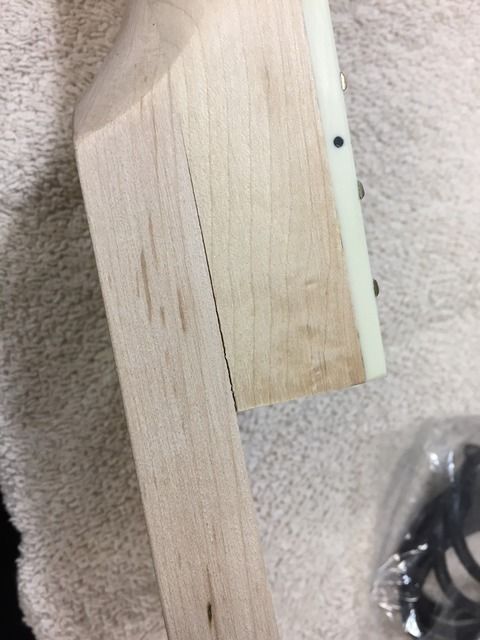
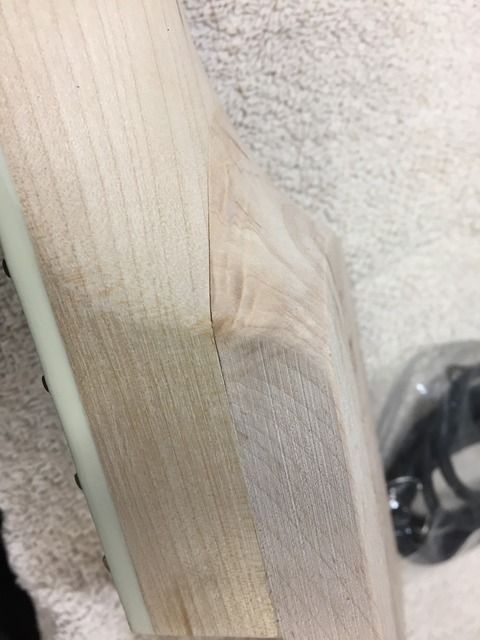
    After a closer inspection, a few flaws were found:


    I emailed Adam about these but he told me that glue would fix them. I sure hope so...

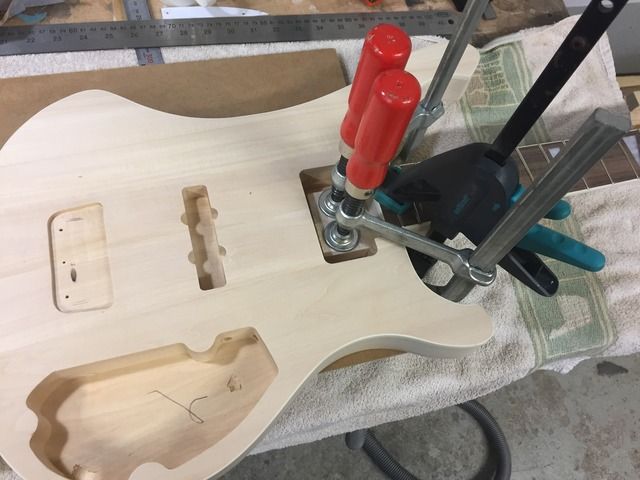
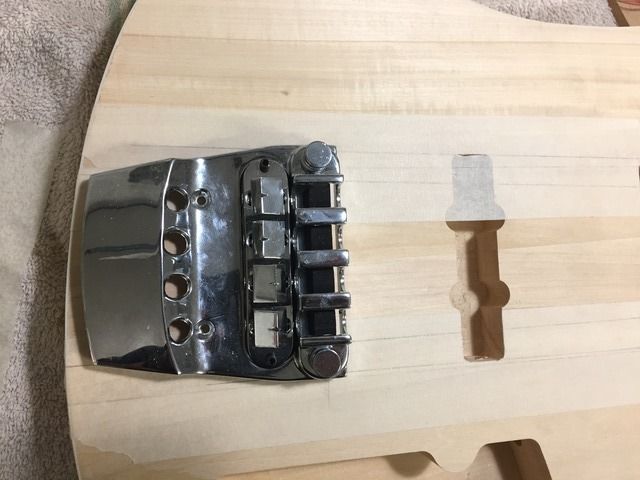
    Anyway, I glued the cracks and clamped the hell out of it. Then I started working on the Allparts tail piece positioning.


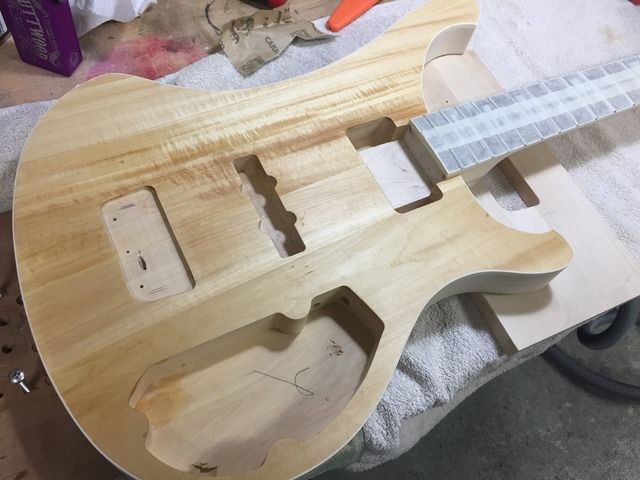
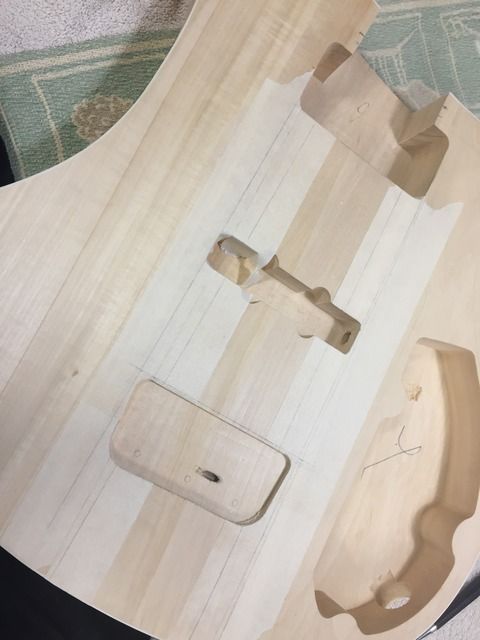
    After a hundred and one measurements, I grabbed the router and made a cavity for the tail piece.


    The journey continues tomorrow (hopefully)!

  2. #2
    GAStronomist Simon Barden's Avatar
    Join Date
    Oct 2016
    Location
    Reading, UK
    Posts
    10,547
    I hope you have good luck with it. Presumably you went by the neck angle when inserted, in order to draw the lines rather than just go by the pickup cavity routs. They should line up, but if slightly out then you'll either gave to engineer the neck fitment so that it lines up with the bridge, or else do some more routing and shift the bridge and pickup cavities slightly.

  3. #3
    Member
    Join Date
    Nov 2016
    Location
    Finland
    Posts
    9
    Yes, the neck angle was the main measuring point. The pickup cavity lines were drawn just out of interest and acted as a secondary measuring point since they lined up so well with the neck angle.

  4. #4
    Member
    Join Date
    Nov 2016
    Location
    Finland
    Posts
    9
    Time to glue the neck to the body.


    I let it dry for 8 hours, took the clamps off and gave it a final sanding, then it was ready for the 1st coat of finishing oil.


    Now I'll have to let it dry for 24 hours before I can rub it with fine steel wool and apply a 2nd coat of oli. It'll be loooong days between the coats

  5. #5
    Overlord of Music
    Join Date
    Aug 2012
    Location
    Brisvegas
    Posts
    3,356
    A little late now, but did you check to see if you needed to shim the neck angle? All the builds Of the RC-4 I've seen so far that use this bridge have needed to do so.
    'As long as there's, you know, sex and drugs, I can do without the rock and roll.'

  6. #6
    Member
    Join Date
    Nov 2016
    Location
    Finland
    Posts
    9
    Of course I didn't. It seems I'm in a world of trouble

    Edit: I had to call in sick so I could go and check this issue immediately
    Seems that when I clamp the tail piece in its place and pull a string between it and the nut, even with the bridge in its lower position, there's still 2,5mm between the string and the end of the fretboard. So I think I'm able to avoid the disaster.
    Last edited by Janitor; 04-11-2016 at 02:33 PM.

  7. #7
    GAStronomist stan's Avatar
    Join Date
    Aug 2013
    Location
    Geelong, Vic
    Posts
    5,290
    perhaps not, maybe a deeper rout might help.
    if you used titebond to glue the neck, you can steam it off if you need to

  8. #8
    Member
    Join Date
    Nov 2016
    Location
    Finland
    Posts
    9
    Stan, I edited my previous post

  9. #9
    GAStronomist Simon Barden's Avatar
    Join Date
    Oct 2016
    Location
    Reading, UK
    Posts
    10,547
    So are you saying that there's 2.5mm height between the end of the fretboard and the strings when the bridge is at its lowest position? This may be fine for you and the way you have your basses set up, but if you feel you want a lower action, then there's currently nowhere to go. When finished, with the strings up to tension and some neck relief set, this distance may increase slightly. Also, I don't know anything about that bridge, but if it's at its lowest setting, is there a good break angle for the strings over the saddles?

    I once had a custom made super-Strat with a Kahler trem. I had to get the trem inset in the body by a couple of mm to get a decent string break angle over the saddles before it started playing and sounding really good (changing the neck pitch would have caused too many problems with pickup heights as they were directly screwed into the body).

    I'd just check as well as you can that everything is OK in these areas before carrying on.

Posting Permissions

  • You may not post new threads
  • You may not post replies
  • You may not post attachments
  • You may not edit your posts
  •