
route slightly lengthened, fits better now....
Must be fingerboard time. At this I can afford to mess this up, unlike the guitar


route slightly lengthened, fits better now....
Must be fingerboard time. At this I can afford to mess this up, unlike the guitar
Stan's LP Build for my Sister: http://www.buildyourownguitar.com.au...ead.php?t=3146
Benson Pickup Strat mod: http://www.buildyourownguitar.com.au...ead.php?t=5229
Epiphone LP headstock fix: http://www.buildyourownguitar.com.au...ead.php?t=3410
Martin Backpacker Repair: http://www.buildyourownguitar.com.au...?t=5038&page=3
'57 Harmony Jazz guitar project: http://www.buildyourownguitar.com.au...ead.php?t=2972

nice one Stan, sure the fingerboard will turn out fine.
Only 3 posts for the Overlord !
Current Builds and status
scratch end grain pine tele - first clear coat on !
JBA-4 - assembled - final tweaks
Telemonster double scale tele - finish tobacco burst on body and sand neck
Completed builds
scratch oak.rose gum Jazzmaster - assembled needs setup
MK-2 Mosrite - assembled - play in
Ash tele with Baritone neck - neck pup wiring tweaks and play in
Cheers Woks, I'll simply use the old one as a template and have a Stew Mac radius block
Overlord, eh: why thanks for pointing that out, here's another!
Stan's LP Build for my Sister: http://www.buildyourownguitar.com.au...ead.php?t=3146
Benson Pickup Strat mod: http://www.buildyourownguitar.com.au...ead.php?t=5229
Epiphone LP headstock fix: http://www.buildyourownguitar.com.au...ead.php?t=3410
Martin Backpacker Repair: http://www.buildyourownguitar.com.au...?t=5038&page=3
'57 Harmony Jazz guitar project: http://www.buildyourownguitar.com.au...ead.php?t=2972
more pics, because we love them.
fretboard building time.
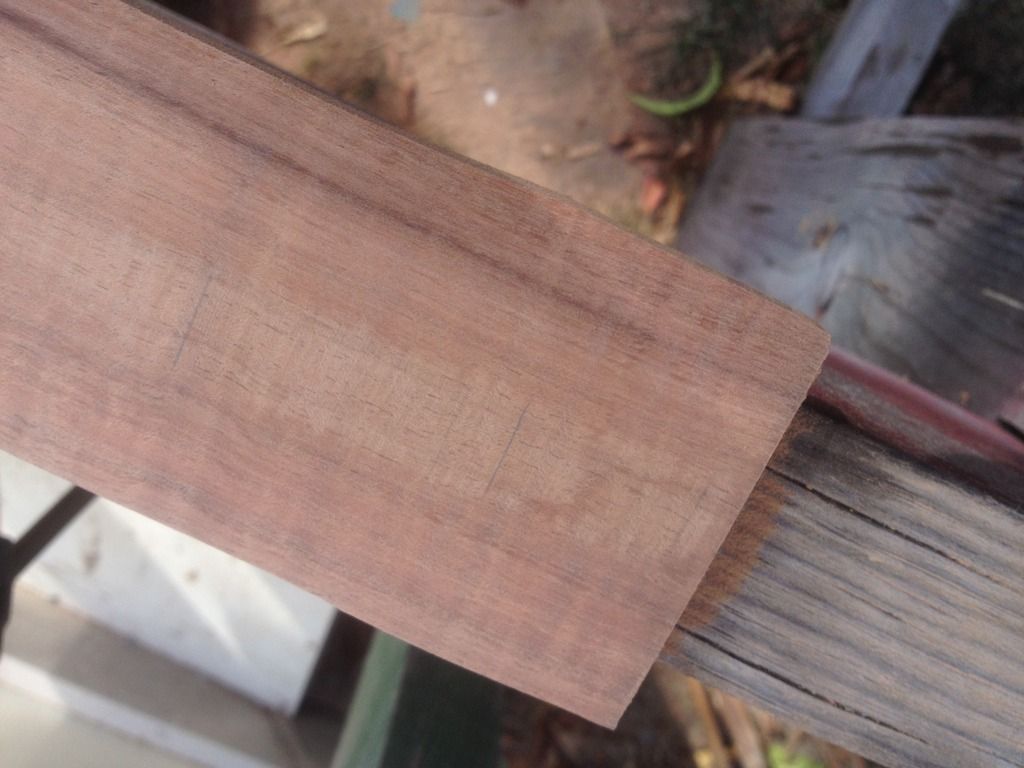
Piece of blackwood fretboard blank from the interweb, ALS I think.
Stewmac 12" radius sanding block and 120, 270, 400 and 800 auto quality glass paper
Blank is taper cut with a jigsaw to approx shape, and stuck with double sided tape to the top edge of my home made saw horse.
Then sand until you get a fretboard - easy!
Note the use of pencil lines across the blank, as it is sanded the edges of the lines get sanded off, leaving the section in the centre. When the line is gone, the blank is completely sanded all the way across. Also the section of line left in the centre shows of the sanding is even.
After initial sanding with 120 the blank slowly takes shape. Note the lighter section in the centre where the centre of the block is yet to touch the blank. Here you can see pencil line sections in the centre and you can make out the unsanded section:
Last edited by stan; 04-04-2015 at 05:15 PM.
Stan's LP Build for my Sister: http://www.buildyourownguitar.com.au...ead.php?t=3146
Benson Pickup Strat mod: http://www.buildyourownguitar.com.au...ead.php?t=5229
Epiphone LP headstock fix: http://www.buildyourownguitar.com.au...ead.php?t=3410
Martin Backpacker Repair: http://www.buildyourownguitar.com.au...?t=5038&page=3
'57 Harmony Jazz guitar project: http://www.buildyourownguitar.com.au...ead.php?t=2972
This is simply my take on how to do it: there might be better ways to do it by hand, like making a jig or whatever, but this works fine...
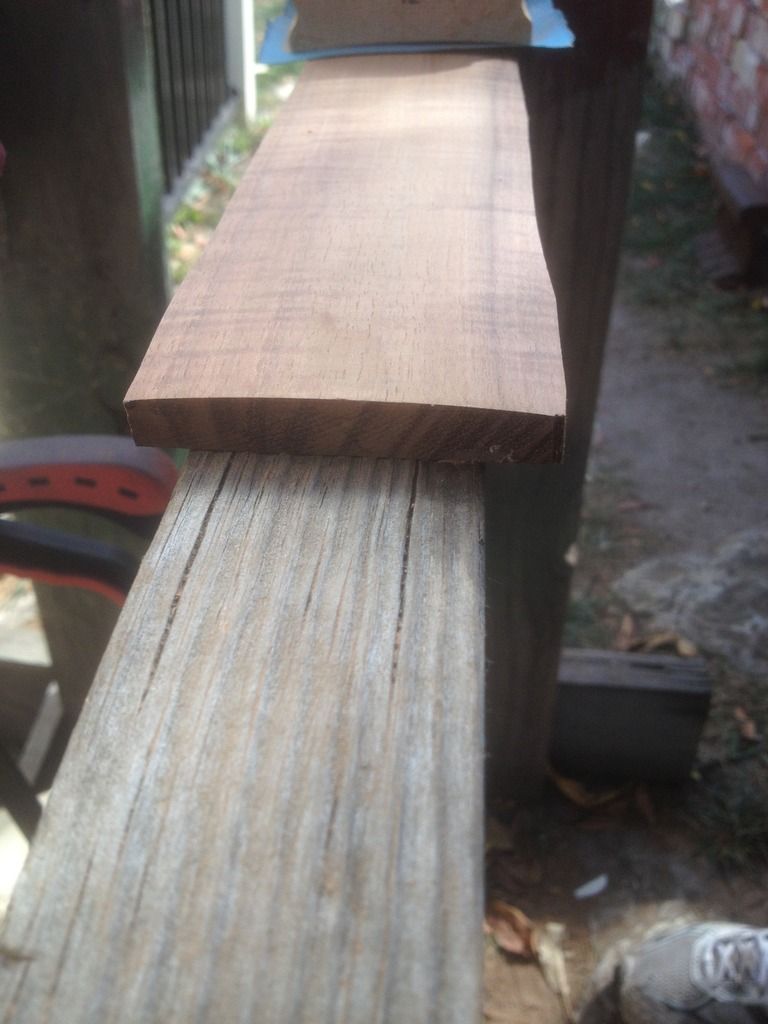
When the lines are fully gone, time to go up through the grits 270, 400 and 800
without the sandpaper, you can check the radius of the board with the block:
nice radius:
Stan's LP Build for my Sister: http://www.buildyourownguitar.com.au...ead.php?t=3146
Benson Pickup Strat mod: http://www.buildyourownguitar.com.au...ead.php?t=5229
Epiphone LP headstock fix: http://www.buildyourownguitar.com.au...ead.php?t=3410
Martin Backpacker Repair: http://www.buildyourownguitar.com.au...?t=5038&page=3
'57 Harmony Jazz guitar project: http://www.buildyourownguitar.com.au...ead.php?t=2972
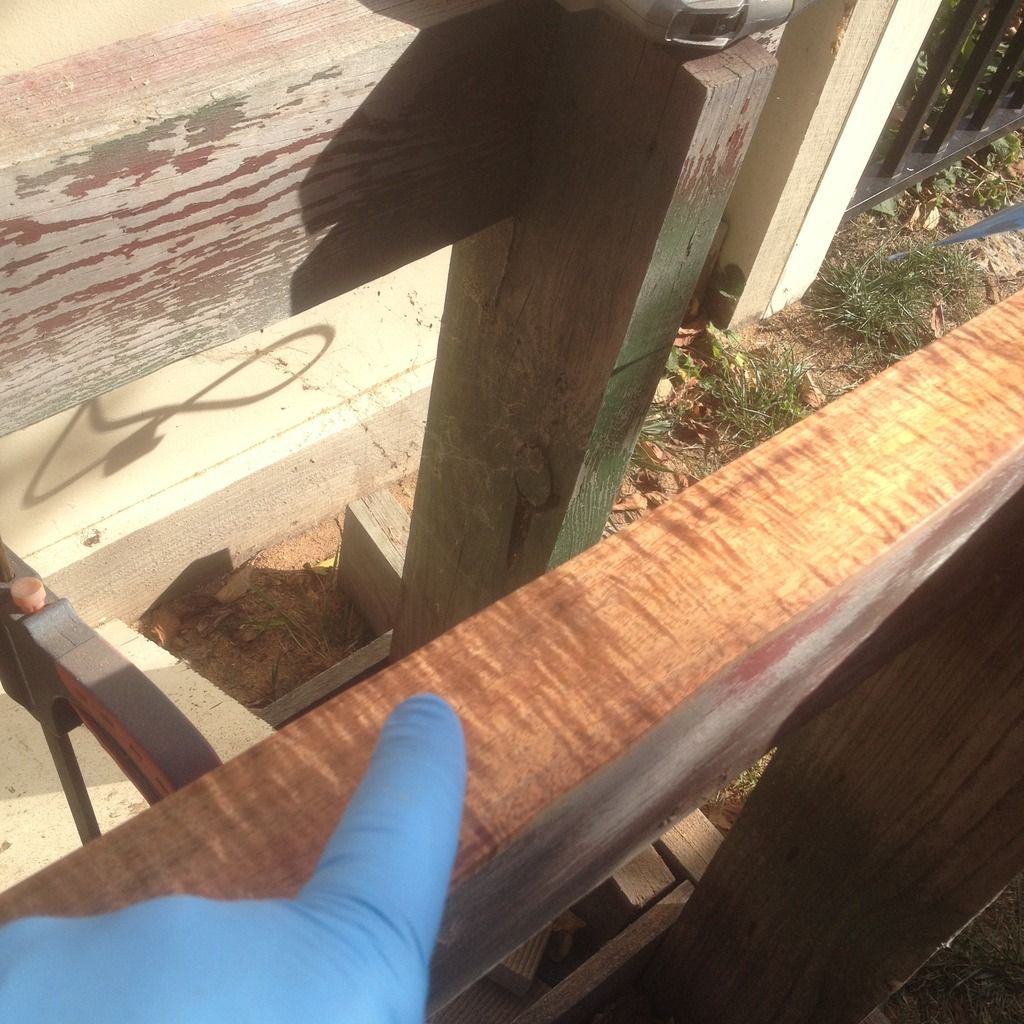
nice figure in the blackwood too!
with the sanding mostly done, I noticed these small voids in the timber that were partially filled with sanding dust...
I smeared the whole fretboard with CA (super ) glue. It mixes with the dust and locks it into the voids and acts like filler.
It also brings out the grain:
Stan's LP Build for my Sister: http://www.buildyourownguitar.com.au...ead.php?t=3146
Benson Pickup Strat mod: http://www.buildyourownguitar.com.au...ead.php?t=5229
Epiphone LP headstock fix: http://www.buildyourownguitar.com.au...ead.php?t=3410
Martin Backpacker Repair: http://www.buildyourownguitar.com.au...?t=5038&page=3
'57 Harmony Jazz guitar project: http://www.buildyourownguitar.com.au...ead.php?t=2972
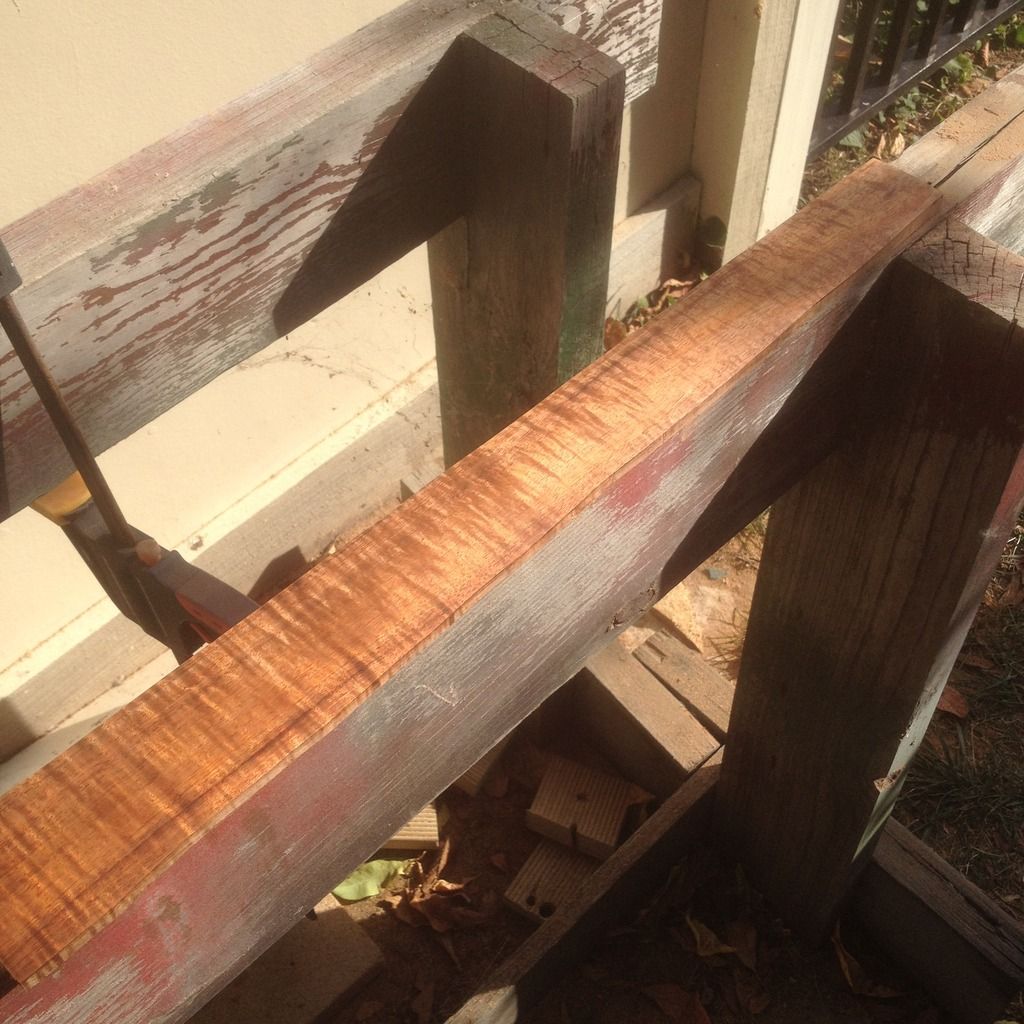
After drying, sand again.
This has mineral turps on it to show up the figure after all the sanding is done:
Stan's LP Build for my Sister: http://www.buildyourownguitar.com.au...ead.php?t=3146
Benson Pickup Strat mod: http://www.buildyourownguitar.com.au...ead.php?t=5229
Epiphone LP headstock fix: http://www.buildyourownguitar.com.au...ead.php?t=3410
Martin Backpacker Repair: http://www.buildyourownguitar.com.au...?t=5038&page=3
'57 Harmony Jazz guitar project: http://www.buildyourownguitar.com.au...ead.php?t=2972
lets see how it might look:
mmm, I like it.
Time for final shaping, fret slots and wire.... some builders slot before shaping, some after, opinion is pretty much split on this one.
Total sanding time was about an hour to 75 mins, not too bad and all by hand
Stan's LP Build for my Sister: http://www.buildyourownguitar.com.au...ead.php?t=3146
Benson Pickup Strat mod: http://www.buildyourownguitar.com.au...ead.php?t=5229
Epiphone LP headstock fix: http://www.buildyourownguitar.com.au...ead.php?t=3410
Martin Backpacker Repair: http://www.buildyourownguitar.com.au...?t=5038&page=3
'57 Harmony Jazz guitar project: http://www.buildyourownguitar.com.au...ead.php?t=2972

Stan that grain on the fretboard looks amazing! Awesome job with the radius block!
cheers,
Gav.
--
Build #01: BC-1
Build #02: ST-1
Build #03: JR-1DC
Build #04: ES-2V
Build #05: ESB-4 (GOTM July 2014)
Build #06: RC-1
Build #07: MK-2
Build #08: TLA-1
Build #09: JR-1DC
Build #0A: LPA-1
Build #0B: STA-1 (GOTM April 2015)
Build #0C: MKA-2
Build #0D: LP-1M
Build #0E: JB-1
Build #0F: FS-1
Find me:
https://www.facebook.com/firescreek.guitars/
http://www.guitarkitbuilder.blogspot.com.au/
Thanks Gav, yep sure lucked out on this chunk of wood, might have to do this one in Dingotone!
Stan's LP Build for my Sister: http://www.buildyourownguitar.com.au...ead.php?t=3146
Benson Pickup Strat mod: http://www.buildyourownguitar.com.au...ead.php?t=5229
Epiphone LP headstock fix: http://www.buildyourownguitar.com.au...ead.php?t=3410
Martin Backpacker Repair: http://www.buildyourownguitar.com.au...?t=5038&page=3
'57 Harmony Jazz guitar project: http://www.buildyourownguitar.com.au...ead.php?t=2972

 Reply With Quote


