LOL. Way ahead of you Lawry. Mullet? Perish the thought! It's a 60s "pudding" bowl cut (or whever they are called). Maybe for the sound demo?? :P
chers,
Gav.


LOL. Way ahead of you Lawry. Mullet? Perish the thought! It's a 60s "pudding" bowl cut (or whever they are called
chers,
Gav.
--
Build #01: BC-1
Build #02: ST-1
Build #03: JR-1DC
Build #04: ES-2V
Build #05: ESB-4 (GOTM July 2014)
Build #06: RC-1
Build #07: MK-2
Build #08: TLA-1
Build #09: JR-1DC
Build #0A: LPA-1
Build #0B: STA-1 (GOTM April 2015)
Build #0C: MKA-2
Build #0D: LP-1M
Build #0E: JB-1
Build #0F: FS-1
Find me:
https://www.facebook.com/firescreek.guitars/
http://www.guitarkitbuilder.blogspot.com.au/
Hi guys,
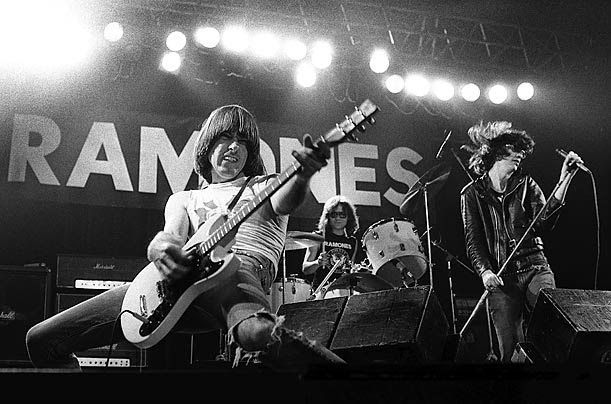
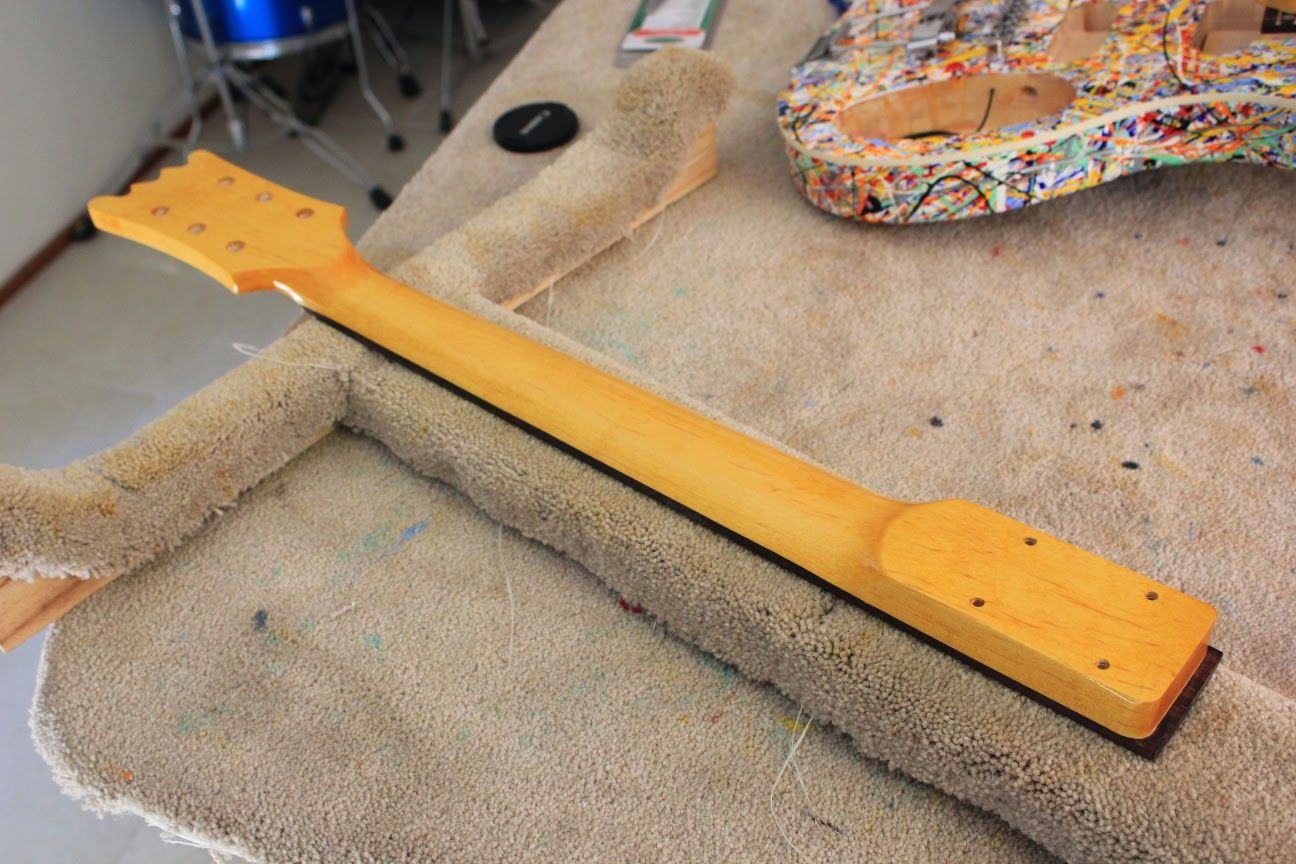
A bit more progress on the Johnny Ramone Mosrite Ventures II. I have stained the neck with Colortone Vintage Amber dye and started layering it with Tru-Oil. I'm up to 5 coats now and it's looking really nice - the Tru-Oil gives such a depth to the finish. I love the way it looks on necks. I'm steel wooling in between each coat and soon I'll do a bit of wet sanding in between coats to get it even smoother. I reckon I'll need about 8 coats for a silky neck.
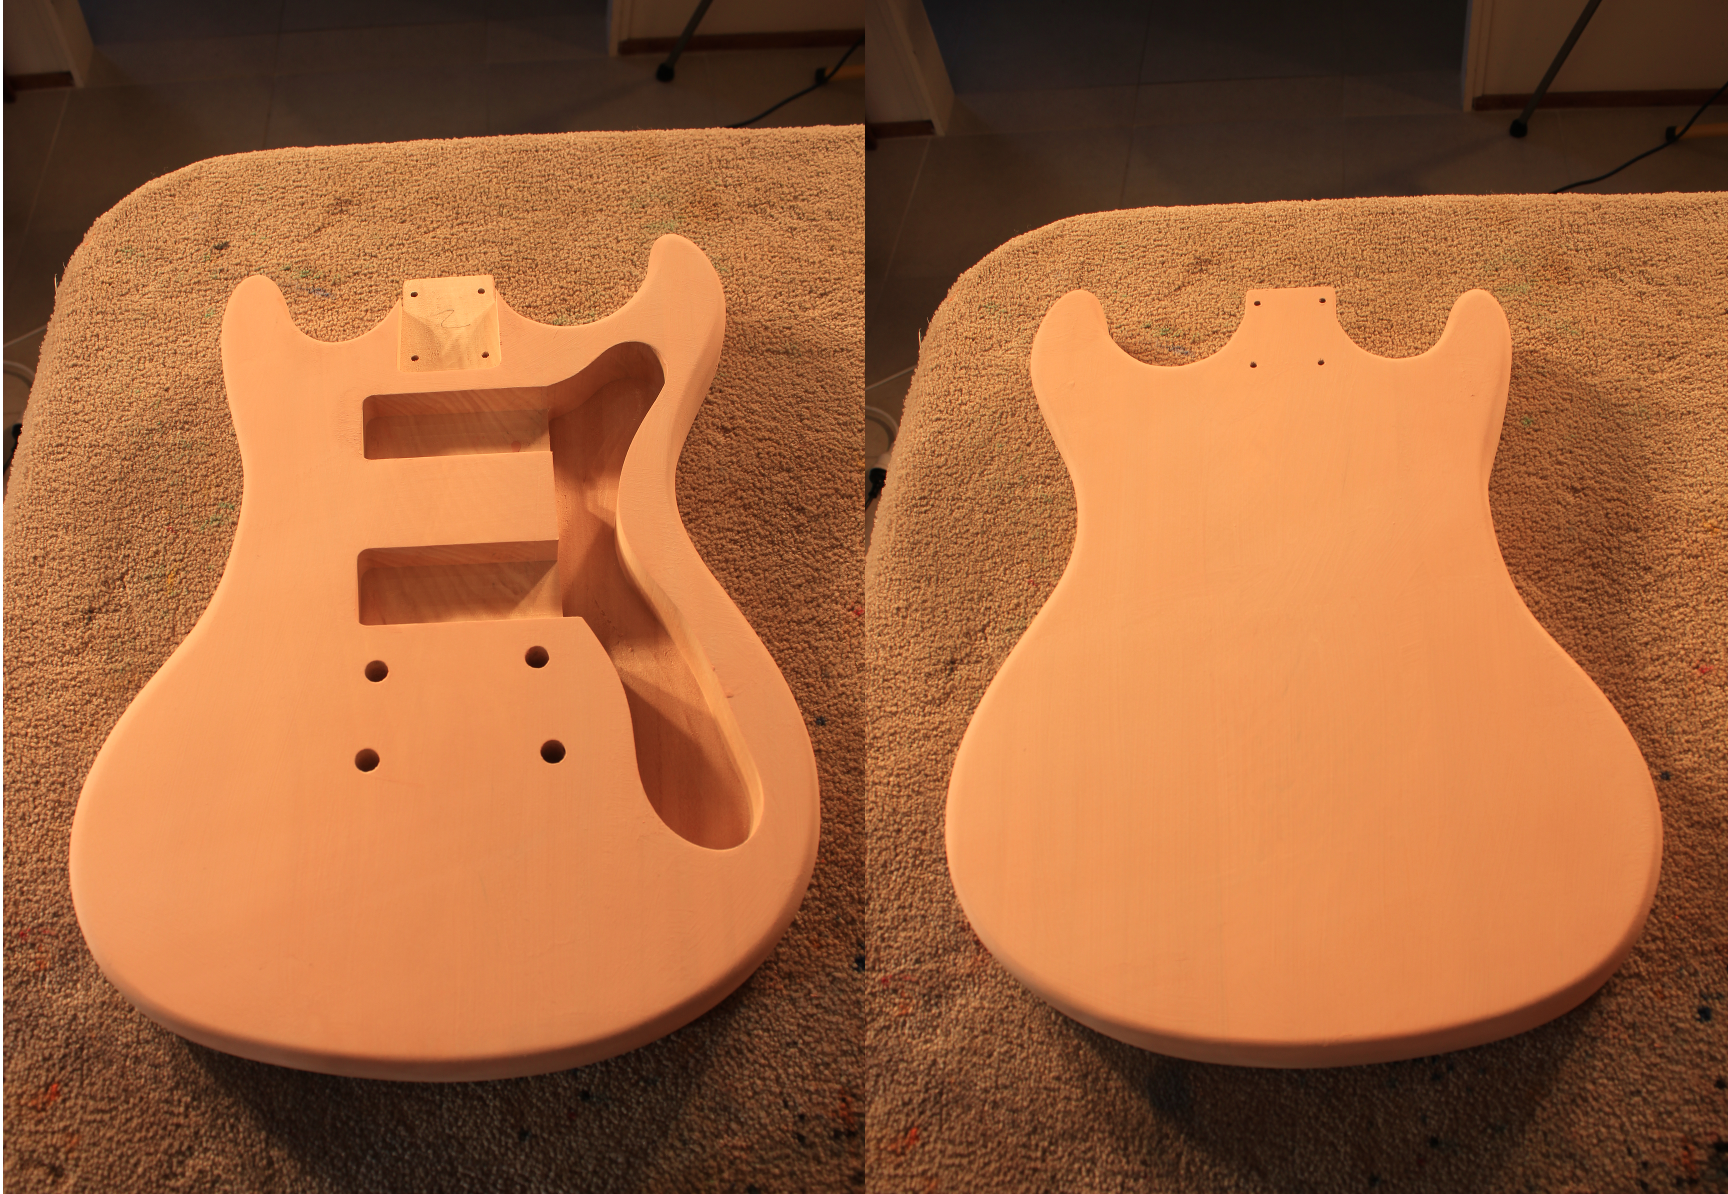
I'm also sanding the body. I've givin it a good goimg over with 180 and 240 grit, then proceeded to 360 grit and filled the pores with a slurry of Timbermate.
After sanding the Timbermate back with 400 grit the basswood looks really nice. This would have made a really nice stained finish! But alas, it's solid white for this bad boy. Next job is to give it a lick of 600 and 800 grits before spraying with primer.
chers,
Gav.
--
Build #01: BC-1
Build #02: ST-1
Build #03: JR-1DC
Build #04: ES-2V
Build #05: ESB-4 (GOTM July 2014)
Build #06: RC-1
Build #07: MK-2
Build #08: TLA-1
Build #09: JR-1DC
Build #0A: LPA-1
Build #0B: STA-1 (GOTM April 2015)
Build #0C: MKA-2
Build #0D: LP-1M
Build #0E: JB-1
Build #0F: FS-1
Find me:
https://www.facebook.com/firescreek.guitars/
http://www.guitarkitbuilder.blogspot.com.au/

looking slick Gav, another great axe from you coming up...
Stan's LP Build for my Sister: http://www.buildyourownguitar.com.au...ead.php?t=3146
Benson Pickup Strat mod: http://www.buildyourownguitar.com.au...ead.php?t=5229
Epiphone LP headstock fix: http://www.buildyourownguitar.com.au...ead.php?t=3410
Martin Backpacker Repair: http://www.buildyourownguitar.com.au...?t=5038&page=3
'57 Harmony Jazz guitar project: http://www.buildyourownguitar.com.au...ead.php?t=2972
hi guys,
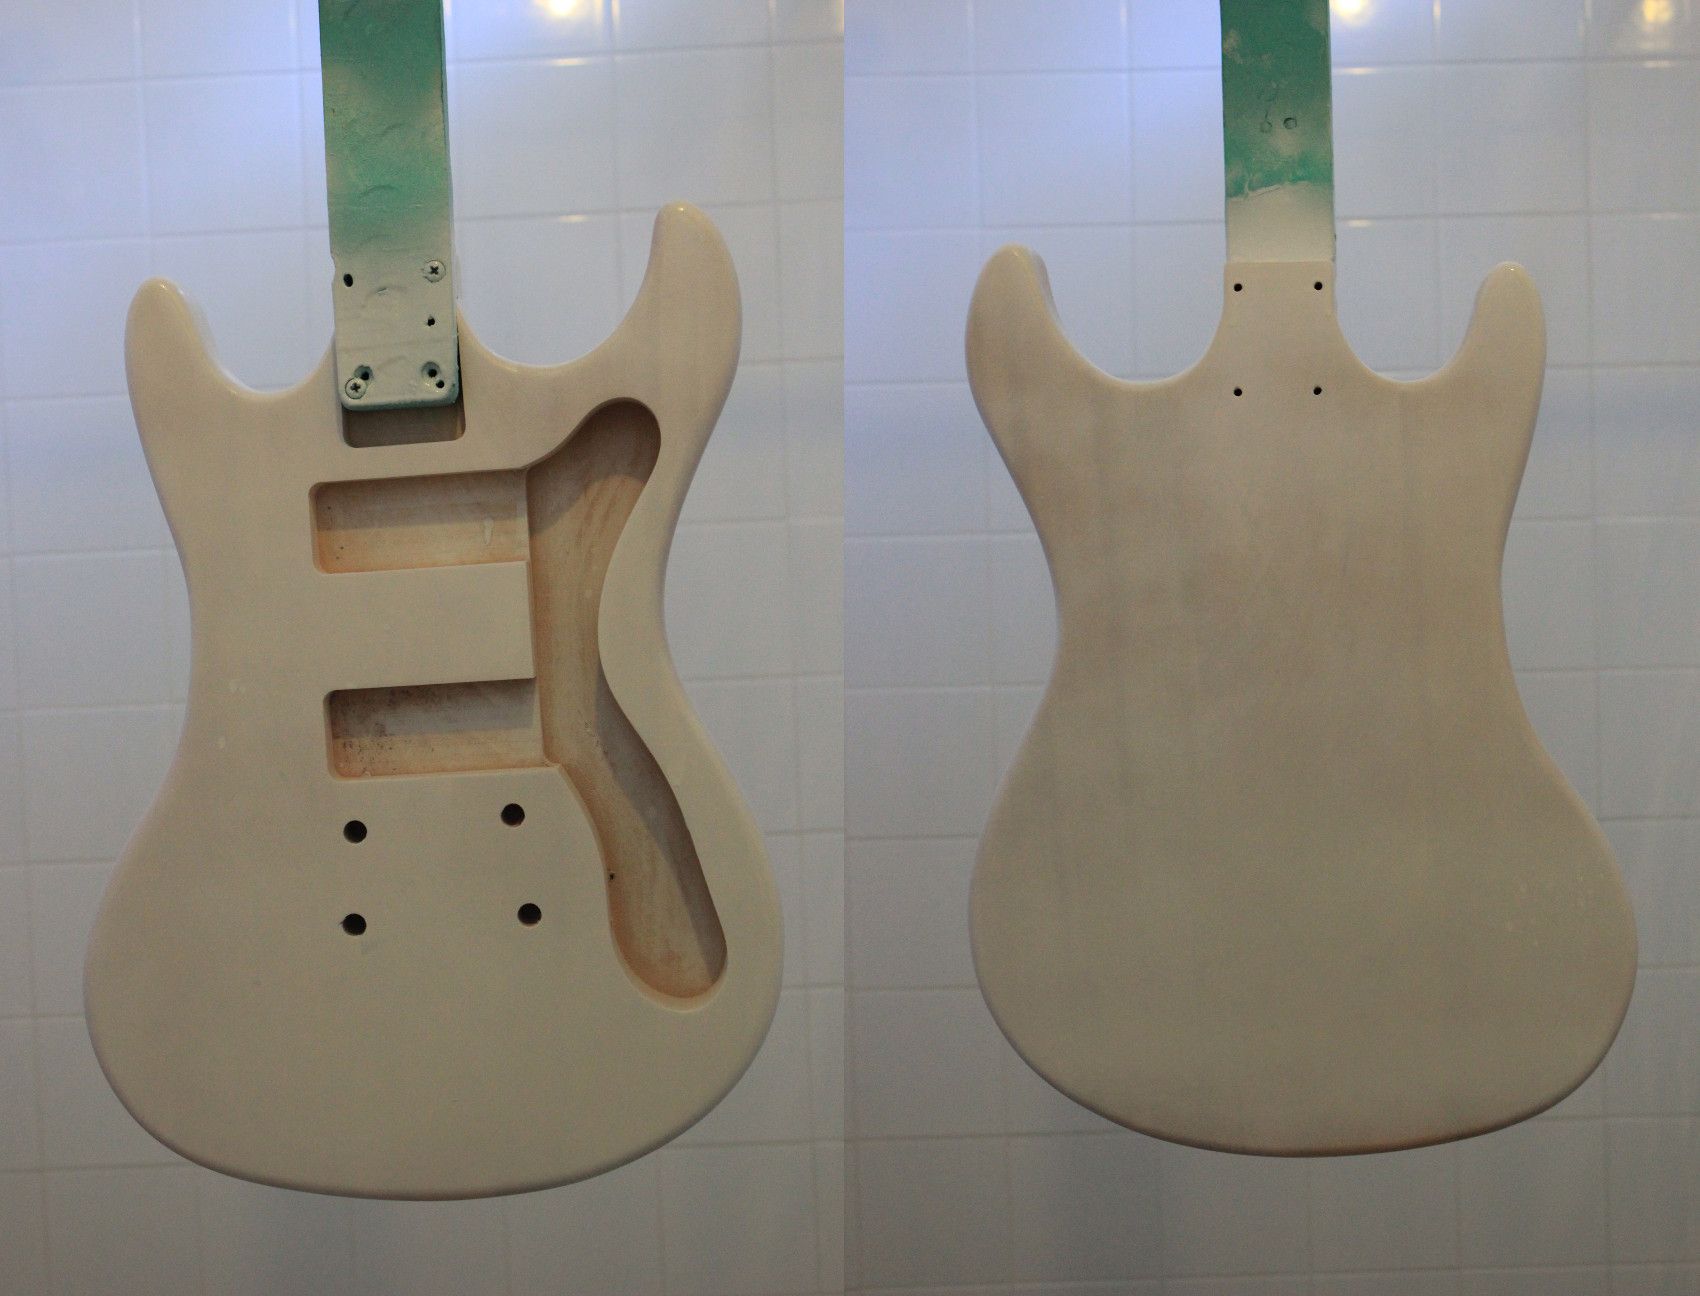
More progress finally. I have sanded the pore filled body to 600 grit and raised the grain a cuple of times. The paint finally came out and the first coat of primer is on. The primer spat a little coming out of the can so it'll need to be sanded with 800 grit before the next coat goes on.
Starting to look more like Johnny's axe now..
cheers,
Gav.
--
Build #01: BC-1
Build #02: ST-1
Build #03: JR-1DC
Build #04: ES-2V
Build #05: ESB-4 (GOTM July 2014)
Build #06: RC-1
Build #07: MK-2
Build #08: TLA-1
Build #09: JR-1DC
Build #0A: LPA-1
Build #0B: STA-1 (GOTM April 2015)
Build #0C: MKA-2
Build #0D: LP-1M
Build #0E: JB-1
Build #0F: FS-1
Find me:
https://www.facebook.com/firescreek.guitars/
http://www.guitarkitbuilder.blogspot.com.au/

looking good Gav, I've barely made a start on mine yet, too many other projects to try and wind up and I just ordered a LP-1M Sunday special axe.
Current Builds and status
scratch end grain pine tele - first clear coat on !
JBA-4 - assembled - final tweaks
Telemonster double scale tele - finish tobacco burst on body and sand neck
Completed builds
scratch oak.rose gum Jazzmaster - assembled needs setup
MK-2 Mosrite - assembled - play in
Ash tele with Baritone neck - neck pup wiring tweaks and play in
great progress Gav
Stan's LP Build for my Sister: http://www.buildyourownguitar.com.au...ead.php?t=3146
Benson Pickup Strat mod: http://www.buildyourownguitar.com.au...ead.php?t=5229
Epiphone LP headstock fix: http://www.buildyourownguitar.com.au...ead.php?t=3410
Martin Backpacker Repair: http://www.buildyourownguitar.com.au...?t=5038&page=3
'57 Harmony Jazz guitar project: http://www.buildyourownguitar.com.au...ead.php?t=2972
hi guys,
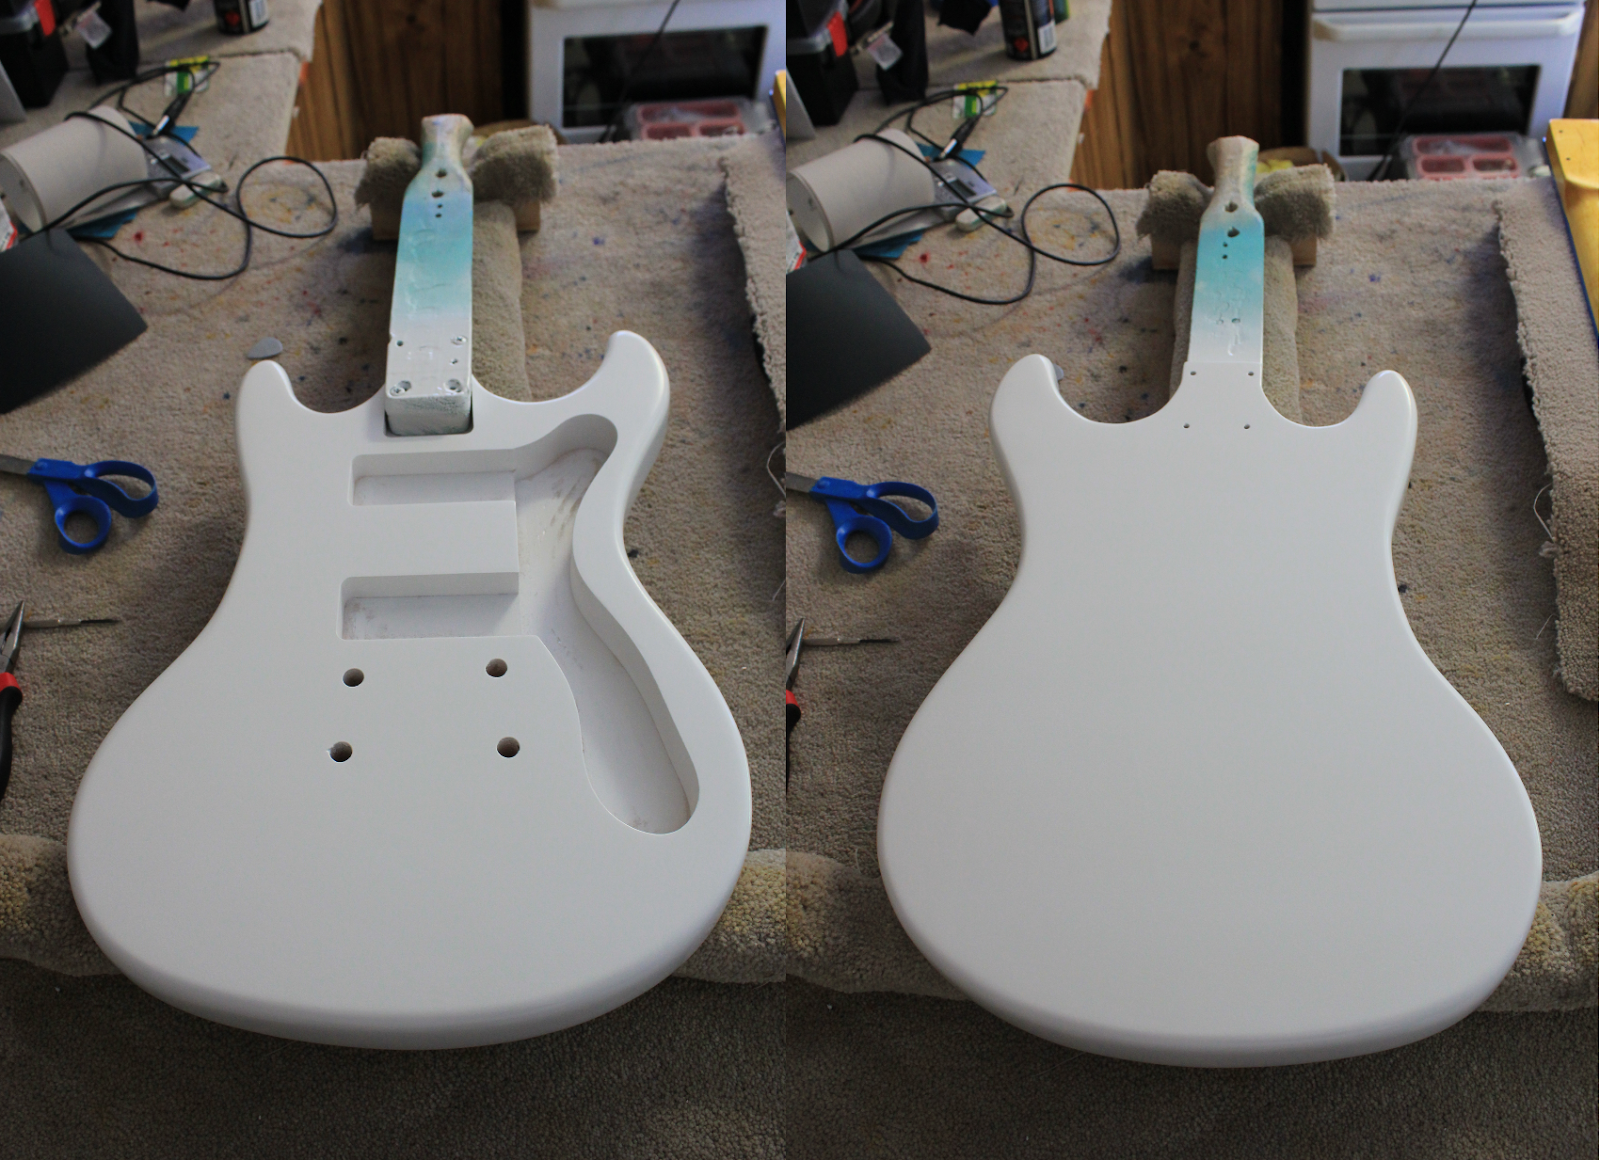
Well the paint went on today. After 4 coats of primer (light 800 sanding in between) I laid down two coats of acrylic white gloss. The amazing this is, no insects got stuck in it! Bonus! Anyway I've got 8 thin coats of Tru-Oil on the neck and she's really starting to come together now. I'm just praying for no fails during clear coats...
cheers,
Gav.
--
Build #01: BC-1
Build #02: ST-1
Build #03: JR-1DC
Build #04: ES-2V
Build #05: ESB-4 (GOTM July 2014)
Build #06: RC-1
Build #07: MK-2
Build #08: TLA-1
Build #09: JR-1DC
Build #0A: LPA-1
Build #0B: STA-1 (GOTM April 2015)
Build #0C: MKA-2
Build #0D: LP-1M
Build #0E: JB-1
Build #0F: FS-1
Find me:
https://www.facebook.com/firescreek.guitars/
http://www.guitarkitbuilder.blogspot.com.au/
excellent Gav, can't wait to see it with gloss on the body and hardware on. Are you using acrylic clear with the spray gun ?
Current Builds and status
scratch end grain pine tele - first clear coat on !
JBA-4 - assembled - final tweaks
Telemonster double scale tele - finish tobacco burst on body and sand neck
Completed builds
scratch oak.rose gum Jazzmaster - assembled needs setup
MK-2 Mosrite - assembled - play in
Ash tele with Baritone neck - neck pup wiring tweaks and play in
@Wokka - thanks dude. yep acrylic clear again. I've been having successes recently with my scratchy, so I'm hoping it will go straight over this acrylic gloss without an issue. Fingers crossed!!
cheers,
Gav.
--
Build #01: BC-1
Build #02: ST-1
Build #03: JR-1DC
Build #04: ES-2V
Build #05: ESB-4 (GOTM July 2014)
Build #06: RC-1
Build #07: MK-2
Build #08: TLA-1
Build #09: JR-1DC
Build #0A: LPA-1
Build #0B: STA-1 (GOTM April 2015)
Build #0C: MKA-2
Build #0D: LP-1M
Build #0E: JB-1
Build #0F: FS-1
Find me:
https://www.facebook.com/firescreek.guitars/
http://www.guitarkitbuilder.blogspot.com.au/
hi guys,
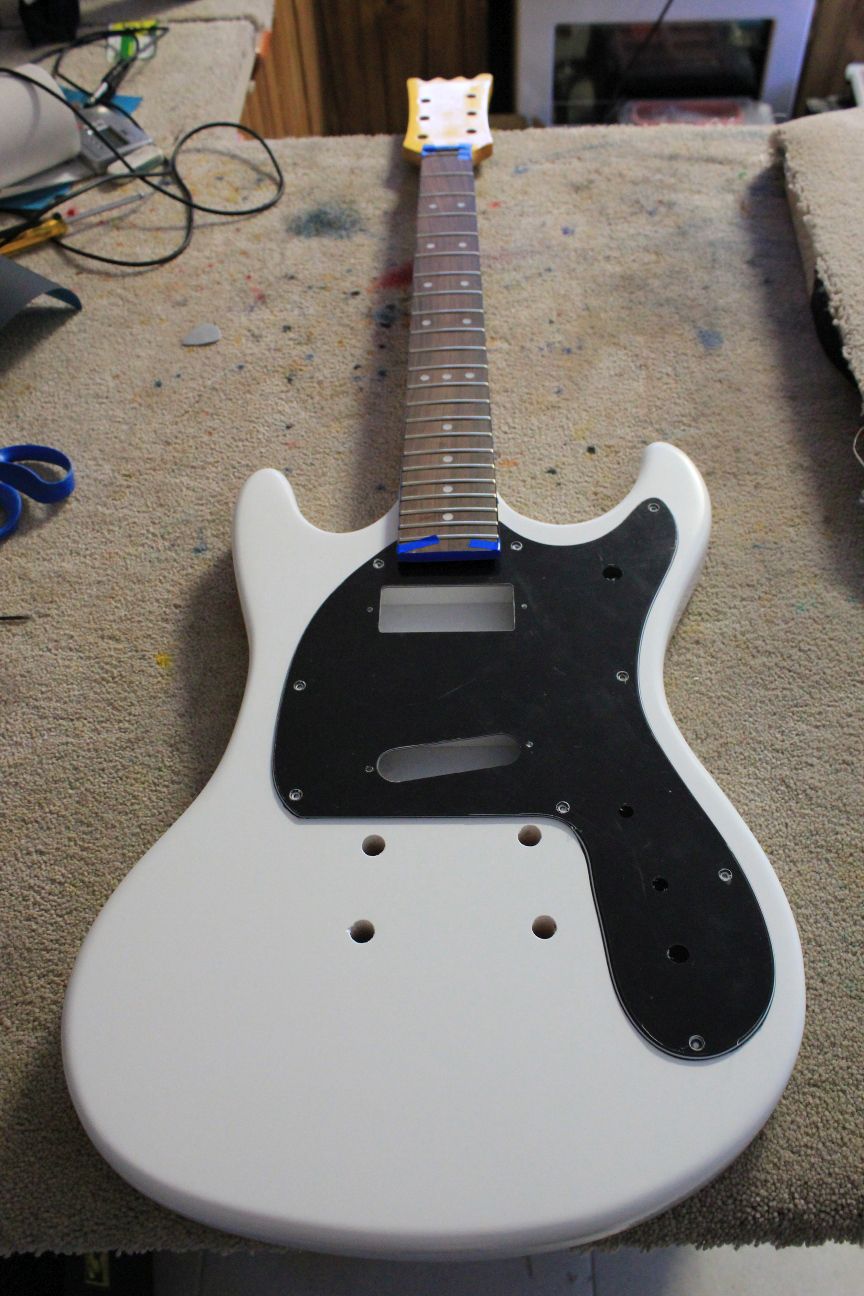
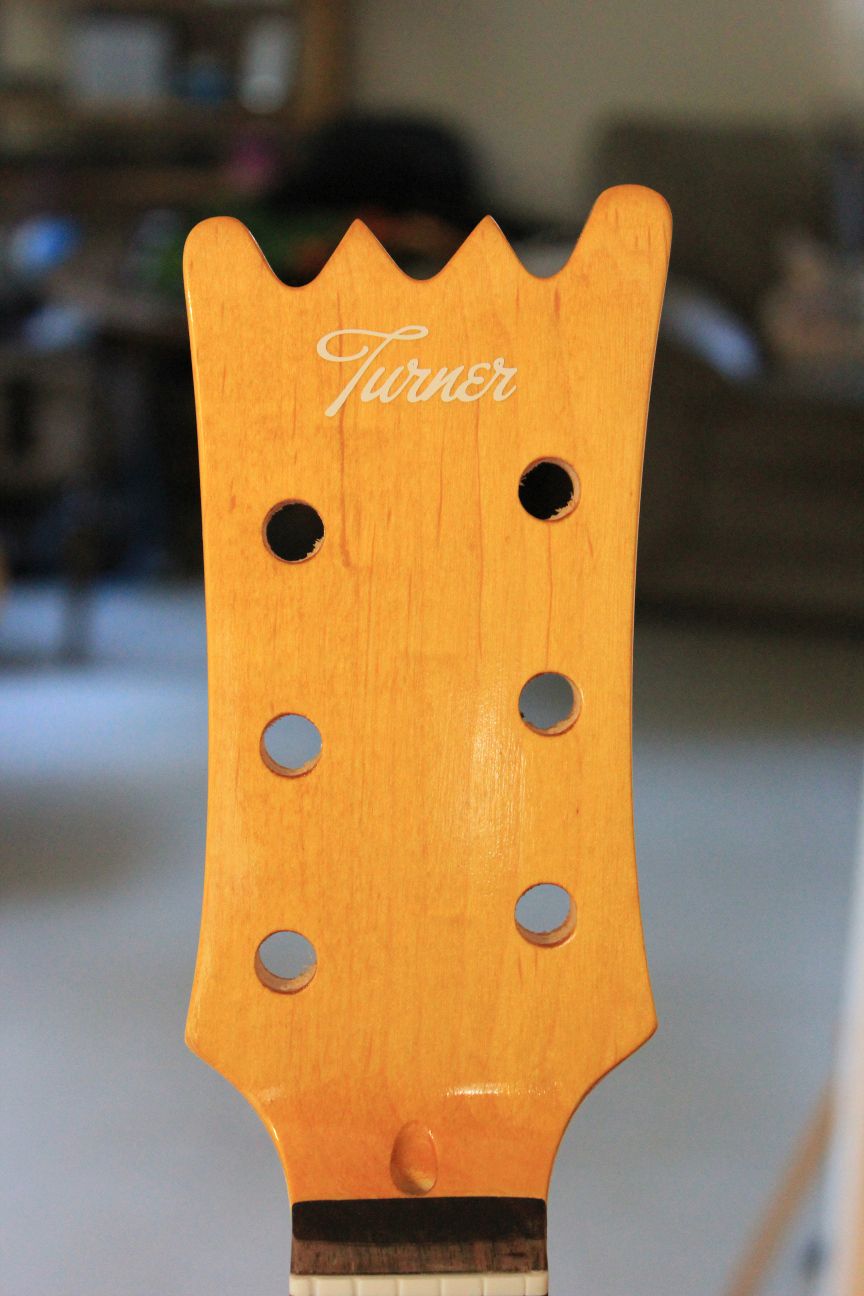
The decal went on to the headstock today. Thanks to Andy yet again.
I also got the first coats of acrylic lacquer on the body. So far so good! Just 3 more spray-days to go and this bad boy can sit and cure. That's if I don't go and get a heat lamp from the big green shed like DB did ha!
cheers,
Gav.
--
Build #01: BC-1
Build #02: ST-1
Build #03: JR-1DC
Build #04: ES-2V
Build #05: ESB-4 (GOTM July 2014)
Build #06: RC-1
Build #07: MK-2
Build #08: TLA-1
Build #09: JR-1DC
Build #0A: LPA-1
Build #0B: STA-1 (GOTM April 2015)
Build #0C: MKA-2
Build #0D: LP-1M
Build #0E: JB-1
Build #0F: FS-1
Find me:
https://www.facebook.com/firescreek.guitars/
http://www.guitarkitbuilder.blogspot.com.au/
 Posting Permissions

 Reply With Quote