In this thread, Dingobass and Gavmeister will be sharing with you the step by step process to building your guitar. To maintain the structure of the thread we ask that you refrain from posting any comments on the thread so that those who seek help with their build can follow each step without having to page through hundreds of posts. It is our intention that this thread will serve as a definitive "how to"! If you do want to post encouragement or suggestions on the thread, you can do so, but please don't be offended when the moderators clear these from the thread!
Tools You'll Need For Building An Electric Guitar
We thought it might be helpful to list the tools you'll need for building a Pit Bull Guitar Kit. DB and I have divided the list into Three categories, which are What you can get away with, Nice to Have and Really Nice to Have.
What you can get away with tools
You can build one of these kits with a few basic tools
file or fine rasp
Pit Bull Sandpaper (180 grit to 240 grit)
Steel wool
Drill
Drill bits, from 2mm and 3mm
Clamps, G type or Irwin Quick Grip
Pit Bull Wood glue (for set neck kits)
Screw drivers, both phillips and flat head
Long straightedge (600mm rule) and tape measure
Soldering iron
Electronic solder
Clean rags
Pencil
Eye protection
Wire cutters
Small allen keys for bridge
Tuner
If it is your intention to only build one or two kits with the most basic of tools and without outlaying funds on specialist tools then skip forward to the next section on this thread.
However, if you want to get the absolute best out of your kit, and particularly if you want to turn this into a hobby you might want to acquire the following:
Nice to have:
Random orbital sander
Drill press
1" x 2" sanding drum
Helping hands alligator clamps
Portable clamping workbench
Clamp lamp
Digital callipers
Multi meter
StewMac string rule for nut building
Really nice to have
12" Radius sanding block
Fret crowning file
Set of nut files
4" x 36" bench top belt sander
Oscillating spindle sander
Dust extraction system
Buffing station
Large workbench with a vice for holding small parts
Beginning and managing your Build
If you keep the following in mind from the start you will be less likely to encounter issues that will delay you finishing your build. This is true no matter which kit you ultimately decide on, which finish you opt for (Pit Bull Guitars recommend Wudtone) or your choice of hardware and other components.
1. Unpack the kit and check that you have the correct guitar, correct parts and item quantities. Importantly, noting which screws go with each component or part of the guitar as this is a common mistake for first time builders.
2. Prepare a mock build of your new kit, testing all the major components like the neck fitting into the body neck cavity and placing the bridge into its position. Check the pick guard, pickups, and the tuners will fit properly!
3. DB's mantra is Sand, sand, sand again. When you think you have sanded enough, sand it some more
4. Finish the body and neck wood surfaces first and allow the Wudtone or other paint to cure and harden properly before finally assembling the guitar. This is a process that if you are patient will reap the reward of a sensational finish.
5. Do the shielding of the pickup cavities, switch, volume and tone control cavities as applicable.
6. install the neck, tuners and bridge first, only then proceed to wiring up the electronic components. Install the pick guard. Ensure you install grounding wires from the bridge to the pots, between the pots, switch (only if necessary) and the output Jack.
7. the final step being to put on the strings and set up and adjust string heights, intonation, action, pickup heights and refining of the nut.
With the body of the guitar it is vitally important if you would like to obtain a great result that the body is prepared with due care and patience.
If you rush any stage of the preparation it will show up in your finish either as scratches in the wood because you did not sand properly or as swirls because you forgot to use steel wool at the appropriate time.
Additional things to watch out for particularly if your guitar has binding but also if your kit has a cap are glue spots.
These can be a bit of a pain to get rid of, but the job is made a lot easier if you follow our suggestions in this thread.
Also be aware that wood fibres compress and expand and sometimes, by sandpapering over a particular spot you can create area where you will have over polished spots.
These compressed wood fibre spots will refuse to take a stain finish.
The best way to discover these spots is to use a damp rag (water) and wipe the guitar body.
Not only is this a great idea to get rid of fluffy fibres with Basswood but it will highlight any glue or polished issues BEFORE you start applying the finish to your guitar.
If you discover these polished areas, a gentle scrub with a small wire brush will loosen the fibres and allow the finish to penetrate.
Pit Bull do not recommend Generic Hardware Store Sandpaper, it is generally of poor quality for sanding guitar bodies.
You can get professional grade sandpaper from Pit Bull Guitars here http://pitbullguitars.com/?product=p...lity-sandpaper
If you have a basswood body, wet it with a damp cloth before sanding.
This raises the uneven fluffy wood fibres and while these are raised cut them down with your 180 grit sandpaper. Repeat this process with each grade of sand paper.
Other bodies, skip this damp cloth step.
Start your sanding with 180 grit and go over the body and neck thoroughly checking regularly to make sure you are getting rid of any scratches or swirls.
If you have binding or a cap (flamed maple, spalted maple, for example) be extra careful that you do not sand the cap away at the edges where the cap is thinnest.
Further, be careful with binding as it is plastic and will scratch easily and is also capable of being sanded too thin very quickly.
After the 180 grit Pit Bull Guitars highly recommend giving the body a good sand with the 220 and 240 grit making sure to check that any major scratches are removed as you proceed.
Then go over the body again with Super Fine '0000' steel wool.
This will prepare the body nicely to absorb the finish, particularly if you are using Dingotone and your finish has a stain colour coat, this needs to be applied before applying the intensifying coat.
Always make sure you follow the instructions to the letter with your application of Wudtone giving each coat plenty of curing time between coats and where required always make sure you use the steel wool to get rid of dust particles that decide to stick to your finish whilst it was wet, as well as any swirls.
The rubbing with steel wool also has the effect of keying the surface to give it teeth for the next coat of Dingotone to adhere to.
Additional comments from DB
"As for the fluffing up after damp ragging, that is normal and if you were preparing for a French Polish would be desirable, but for Dingotone not so...
I have found on the kits that I have done that 400 grit is more than enough, you need to leave a reasonable tooth for the Dingotone to grip.
I start my sanding process with 220 then 320 followed by 400.
This gives me a nice surface without any deep scratches.
As Gavin said, super fine steel wool between each coat to remove any streaks or swirls and to create a key for the next coat".
Preparing the Binding BEFORE applying Dingotone
If your guitar has binding you will spend ages removing paint from a 'keyed' binding surface if you do not prepare the binding before painting.
I learned this trick from my good mate and fellow author on this thread DB, here is his trick for keeping the binding clean..
After sanding, grab some 400 wet and dry and VERY carefully give the bindings a polish.
Then break out the 600 and repeat.(If you don't have 600 grit, you can polish the binding with steel wool) Then let the Dingotoning begin!
When you have let each coat dry, a light and VERY careful rub with the steel wool will remove any Dingotone and add to the polish on the binding.
Do this after each coat and by the time you are at the final coat stage, you wont have to worry as the binding will be as smooth and shiny as a *censored, censored*..... you get the idea!
The way to shape your headstock using a template from the above library is to print it out on your printer. Be mindful that you may have to enlarge or reduce your print size to line up with the tuners on the actual headstock shape. Bear in mind that the shape of the headstock when viewed from above does differ from the shape when viewed from below.
Shielding
I want to acknowledge StewMac as the source for this great article on shielding www.stewmac.com
Shielding allows you to substantially reduce all unwanted interference and hum.
Basic skills required
Unless you feel completely competent in soldering, desoldering, and a basic understanding of guitar wiring, you should take your instrument to a qualified luthier or repairperson. If you wish to learn more about guitar wiring and electronics, we recommend #0548 "Guitar Electronics For Musicians" by Donald Brosnac and #0570 "The Guitar Player Repair Guide" by Dan Erlewine. Any shop doing guitar wiring and setup should have these books in its reference library.
Tools required
Notepad and pencils
Permanent marker
Heat-shrink tubing and/or black tape
Masking tape
Sharp scissors
Hobby knife and/or wire stripers
Soldering Pencil (25-40 watt)
60/40 Flux core solder (thin)
Window cleaner
Lint free rag
Adjustable jaw wrench, socket set, or nut drivers
Pliers (needle nose and regular)
Volt/Ohm meter
Overview
If you have already installed all your Pitbull Guitar electronic components to now completely shield your guitar you will have to dismantle and desolder a majority of the guitar's components. It is highly recommended that you make detailed notes on how every component was wired, as well as marking specific wires and solder points with tape labels to help in rewiring the instrument. Be very thorough. One mislabeled or unlabeled wire could cause a great deal of confusion when you are rewiring the system.
All of the shielding must be in contact with ground. There are several ways to apply a ground to a shielding network; when dealing with copper shielding foils, the ground wire can be soldered directly to it. If your volume pot housing is in contact with the foil, a ground jumper is not necessary.
Shielding paint can alsobe useful for shielding control cavities, pickup routs, and drilled holes. The paint is very easy to apply in small, tight areas. A shortcoming of the self-adhesive foils.
Applying ground to a Strat type guitar is very simple. Bring the foil over the top of the body in the area that would be under the pickguard and around the pickguard screw below the bottom tone pot. The foil on the pickguard should surround this screw hole so, when the pickguard is screwed into place, the grounded foil on the pickguard will come in contact with the cavity shielding.
Another method is using a solder lug screwed into the cavity's side wall. Make the solder lug out of a scrap of brass and use a small wood screw to affix it to a cavity's side wall. Just solder a wire from the volume pot's casing to this lug for a good ground.
Single coils
A great deal of the hum and buzz associated with single coil pickups can be eliminated by using shielding as you will shield the coil as well as the output wire. The shielding of the output wire also allows you to switch the phase of the pickup (swap hot for ground) while still maintaining your shielding network. There is more on this on the StewMac website but this is enough infor for our purposes.
Humbuckers
Depending upon the type of humbucker(s) in the instrument, you may not need to do any additional shielding. For example, Gibson-type humbuckers with their metal covers in place do not require any extra shielding. A Precision bass which uses a split humbucker and plastic covers could benefit from additional shielding.
P-bass pickups generally do not have a shielded output wire, so you will want to replace it the same as outlined in the single coil instructions. Most other humbuckers have a shielded output wire, so the only additional shielding will be around the coils and/or in the covers. If you have a Gibson type humbucker without a cover, you may want to obtain metal or plastic covers for them. The metal covers are soldered in place to the frame or base plate of the humbucker. Plastic covers require the same treatment a Strat type single cover would get.
Control cavities
Before shielding the instrument's cavities, remove all of the electrical components, pickups, pots, switches, jacks, etc. Be sure to make notes on how these parts were oriented and hooked up. Start by applying some of the copper foil to the bottom of the cavity. To size the piece, lay the foil on top of the cavity and drag your finger around the edge of the rout. This will crease the foil and give you a guideline for cutting a properly sized piece. Cut the foil 1/4" outside your crease mark. This will give you some foil that will extend up the sides of the cavity and will be overlapped by the foil applied to the sidewalls. Make several cuts from the outside edge of the foil to the crease mark in the areas that will be in corners or curved portions of the rout. They will allow the foil to go down smoothly on both the bottom and the sidewalls. Before you stick the foil down, remove any excess dust or debris from the rout with compressed air and/or a clean rag and window cleaner.
After you apply the bottom foil, you are ready to affix foil to the sidewalls. Use the 1/2" wide copper foil on the walls of the rout. Three strips is usually enough to cover the sidewalls and be sure to slightly overlap the strips so that the shield is complete. Lightly solder the overlapped areas at a few points to insure a total shield. We also carry a 2' wide copper foil (#0028, sold separately) that is very useful for shielding. Make sure the copper foil overlaps the 1/4" of copper on the sidewalls. Check for continuity between the copper and the copper when you have finished. If you do not get a good reading, press the copper down against the copper again to make the contact complete. Bring some 1/4" wide tabs of copper foil over the top edge of the rout in control cavity areas to come into contact with the cover plate or pickguard. If the shielding is in a pickup rout, be sure to connect it with ground.
Cover plates & pickguards
Use the self-adhesive copper foil on the back of control cavity covers and pickguards. Be sure the foil on your cover plate or pickguard will come in contact with the shielding applied in the cavity it covers. When shielding pickguards, the foil only needs to be applied in the area of the control cavity.
Reassembly
Check your notes frequently so that everything gets wired correctly and use caution when soldering to pots and switches. It is easy to get them too hot which would cause a malfunction. Be sure that no hot connections come in contact with your shielding as this would cause a short circuit and there would be no output. Heat-shrink tubing or black tape will protect hot connections from touching the shielding.
Rout and solder the hookup wires neatly as this will aid in replacing pickguards or tracing faults. Do not make the wires too short. A little slack aids in making other connections and troubleshooting. Run a string ground unless you are using active pickups.
Notes on pickup adjustments
Pickups shouldn't be adjusted too close to the strings. For single-coils, there should be about a 3,2mm gap between the top of the low E pole piece and the bottom of the low E string fretted at the highest (21st or 22nd) fret, and 2.4mm for the high E. Humbuckers can be adjusted closer (2.4mm-1.6mm), since they don't have as much focused magnetic pull as single-coils.
Adjusting pickups any closer (especially with single-coils) can cause false notes or "wolf-tones." If you've ever played a Strat that sounded like you were getting two notes from one string (usually the wound strings) in the upper registers, you have witnessed this anomaly. It is most often referred to as "Strat-itis" and can cause a lot of head scratching unless you know what is happening. To cure the problem, simply back the bass-side of the neck and middle pickups further away from the strings.
We acknowledge the contribution of one of our past Forum members in this post.
Perhaps the most important part of building your Pit Bull guitar kit is getting the neck centred and correctly aligned. It can seem to be a daunting task; with the right knowledge, some patience, and a bit of string, it is a snap.
As with all aspects of building a guitar, attention to detail is essential. The more attention to detail, the better the guitar will be.
Many people dont realise that the neck has to be right in three dimensions- back and forward to get the right scale length, side to side to get the right alignment, and up and down to get the inclination to give the right action, and bridge and pickup relationships.
:P The steps:
TIP: You dont need to use a tape measure to measure- a piece of fishing line or wool or string is all you need (except maybe for Step 1, but thats up to you). You are comparing one measurement against another.
Well discuss the steps to getting your neck pointed- literally- in the right direction. I would suggest that you do this, or at least do a dry run, before any painting on the body or neck. That way that way, if you put a scrape on the guitar it can be fixed when finishing. Scraping an already finished guitar- well, not a good thought, is it. Setting the Scale Length
Dont assume that by jamming the neck as far as it goes into the body the scale length will be correct.
Measure the distance from the edge of the nut to the high point (the crown) of the 12th fret. Wind all the saddles as far forward (towards the pickups) as they will go. The distance from the edge of the pickup side of the saddles (on the bridge) to the crown of the 12th fret should be the same distance. Most times though, you may find that the second measurement from the saddles to the crown of the 12th fret is approximately 3mm longer. This s called compensation and is quite normal.
String Compensation
If measuring the full scale length (i.e. the full length not just to the 12th fret as mentioned in the shortcut-tip above) we usually measure at the top-E string. Thats because this string is the thinnest and requires the least amount of string compensation. This string is, therefore, closer to the actual scale length of the instrument. The other strings are generally compensated which means theyre actually slightly longer than the scale length.
What is compensation?
When you fret a string somewhere along the fretboard, you actually sharpen that strings pitch by a tiny amount. To compensate for this, each string is made a little bit longer than the instruments actual scale length, thereby flattening its pitch. The amount that each string is made longer (flattened) depends on that strings size thin strings not much and getting progressively more as the strings get thicker. Clever, eh?
To nicely illustrate it, this is why acoustic saddles are angled the sounding length of the thicker, wound strings is actually longer than that of the thinner strings.
Many guitars have adjustable bridges and/or string saddles to allow each strings compensation be accurately set. Setting the compensation is referred to as intonating the instrument and the compensation overall can be called intonation. .
How you work out the measuring point on the saddles will be different, depending on what sort of bridge you are using. You may have to move the bridge or neck slightly to get it right. Be wary of any gaps in the neck/body join, though. You need a tight fit for a good transfer.
Square the Neck
The first step to having a square neck is to identify some points of reference on the neck and body of the guitar. You are looking for a couple of points that are square to the centreline of the body, and equally on either side of the centreline. It might be the nust slot on the neck; it might be a pickup rout on the body; it might be the string through-body holes on a Tele, or pivot screws on a Strat or Floyd. They must be square- for example, the bridge on a LP style body wont be any good because its at an angle.
This is crucial. Again, attention to detail is paramount!
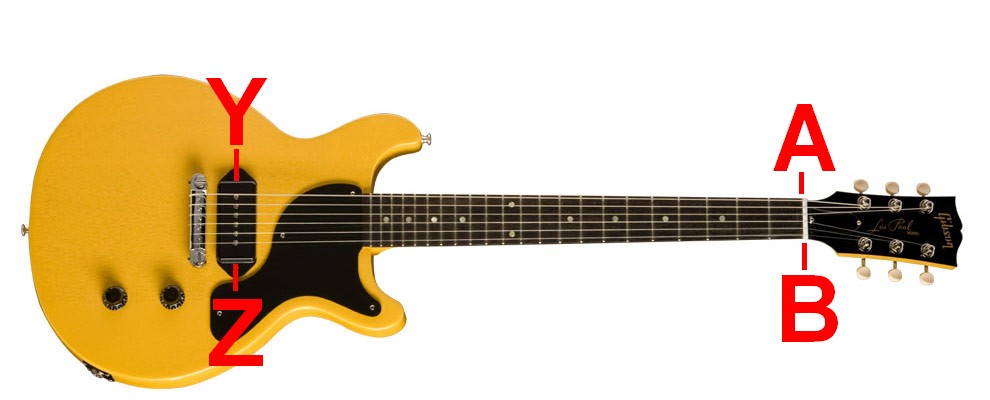
Heres one I prepared earlier Ignore that this guitar is finished.
There are four points we will refer to. Let's call them A and B on either side of the nut, and Y and Z on either side of the pickup rout in this case- maybe a corner of the rout. It has to be a small point because you are trying to be precise, as you will see. I stick in pins at the points I want to use to measure.
The first measurement we take is A to Y, and B to Z. If they are the same, the neck is at the correct angle compared to the body. If they are not, then the neck is pointed towards the measured shorter side.
The next measurements taken are A to Z and B to Y. If these are the same, then the neck is on the body centreline. If they are not, then the neck is straight out from the body, but not on centre. The neck needs to be moved- if A to Z is shorter, the neck needs to be moved to the A-Y side. The other reason that these measurements might be out is that the neck is twisted, but that is not going to happen with a Pit Bull kit.
Setting the Neck Angle (or Inclination)
There is nothing worse than playing a guitar with the wrong inclination- the angle that the neck meets the body, when that angle suits the bridge that is being used. In this case, close enough is good enough because you have a few adjustments that can be made after the guitar is finished. These adjustments include the truss rod, the bridge and the nut.
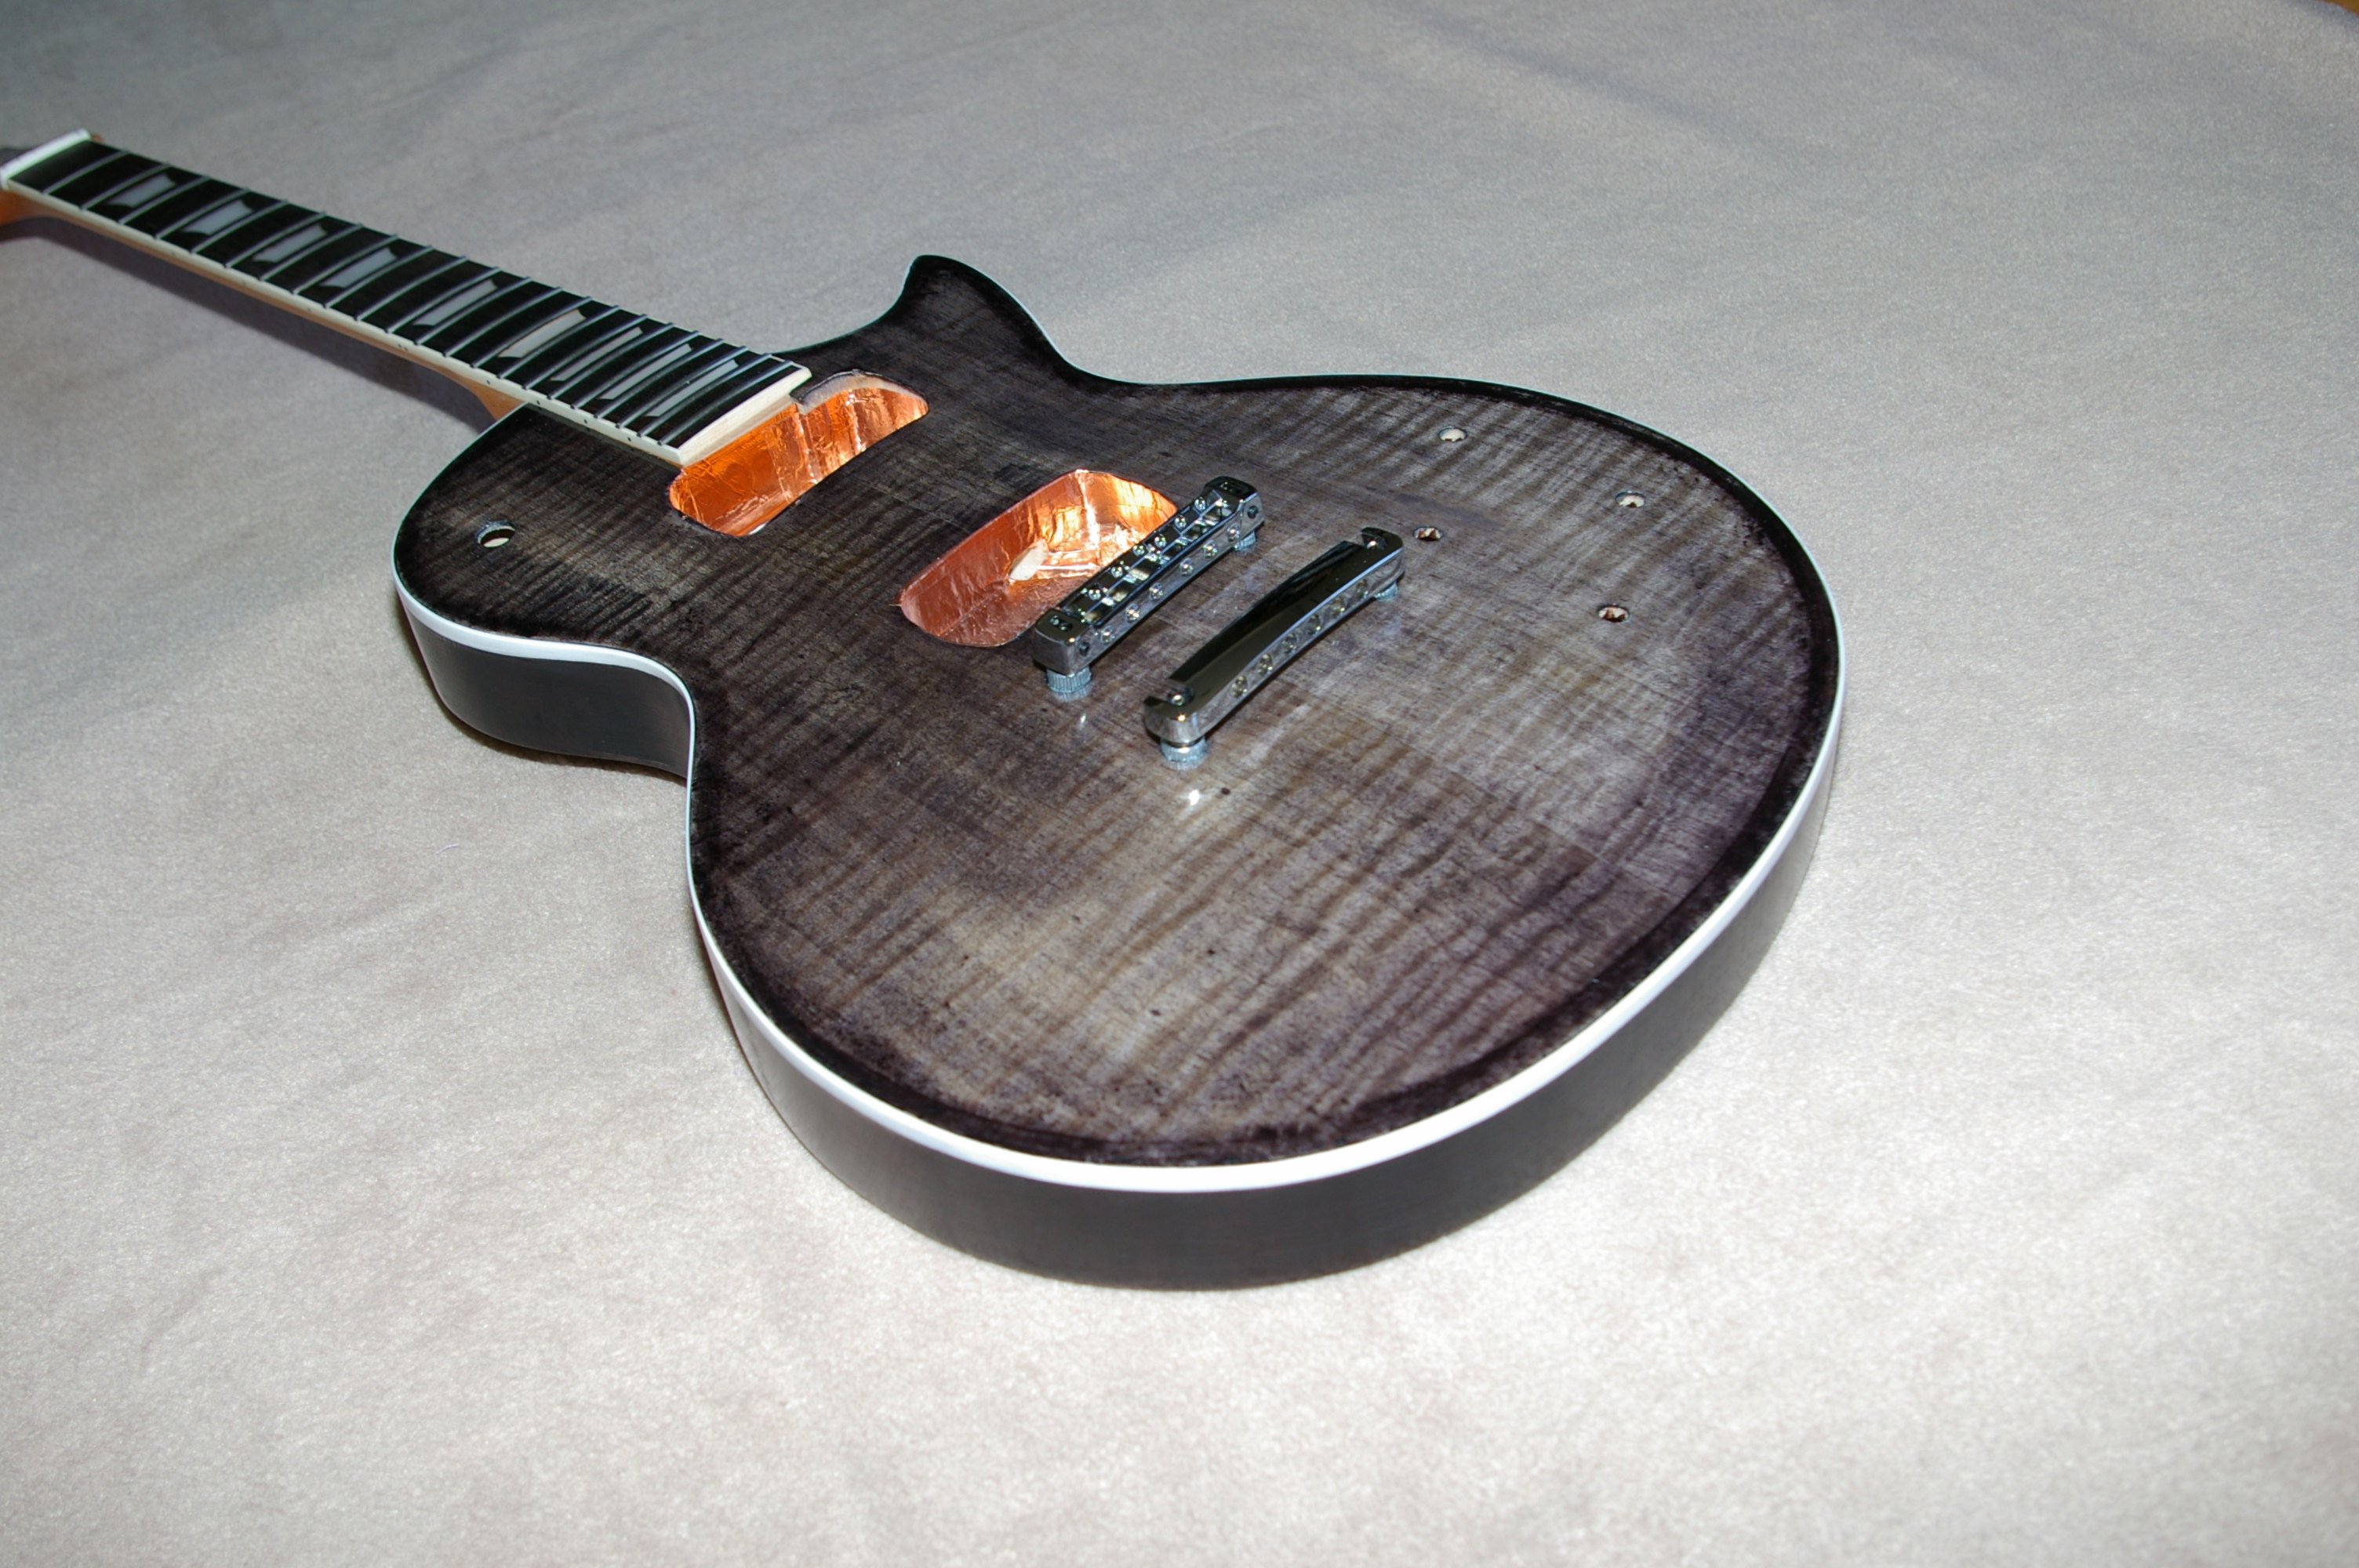
So, how to do it? It is as simple as the other steps. Set the neck in the body, install the bridge with the saddles about half height, and the pickups (or pickguard if the pickups are mounted in it).
Run your now favourite piece of string from both e-string slots on the nut to the saddles on the bridge. Check out the gaps between string and fretboard at the 12th fret and at the last fret. There should be a reasonable gap. Remember though that the string tension and truss rod will affect the finished neck. Remember, this is one of the rare cases a case where near enough is good enough.
If the inclination is too shallow, the action will be too high; if it is too steep, the strings will be rubbing across the frets. In both cases, it is worthwhile taking time to get a reasonably good angle set up now, to reduce the adjustment required later.
IMPORTANT!!! This goes for most things in life- do not use up all your adjustment during the initial setup! To do so means you have a really, REALLY bad setup.
EVEN MORE IMPORTANT!!! Dont go hacking at your new guitar to get everything right. If the neck angle seems wrong, it probably isnt. Stop, have your favourite non-alcoholic beverage, watch the football, and come back later.
If it turns out that the neck is not sitting right, DO NOT GO HACKING AT THE GUITAR! A small amount of hack will have a huge change at the business end of the guitar. If you are convinced that there needs to be a physical change, use a shim to make the change. To make the shim, I recommend a sheet of paper and some spray-on epoxy. Spray the paper until it is wet through, LET IT DRY COMPLETELY so it doesnt stick to the neck and is as hard as it can be so you dont squash it. Squashing it sort of defeats the point of it.
Cut a piece or two as wide as the neck pocket and 12-20mm long. If the neck is too shallow, put it at the body end of the neck pocket. If it is too steep, put it at the nut end. If that is not enough to fix it, then you have bad or mismatched components. Of course, one of the advantages to a Pitbull guitar is that it is made to fit together well!
In summary, every time you move the neck, you need to redo all three measurements. Youll find, however, that youll quickly pick up the groove, and it will only take three or four processes to get the neck right. And lastly, dont be afraid to pencil the neck to give some guidance to get it back into the same spot after the body is finished.
Video: Attaching a Bolt-on neck
[embed]http://www.youtube.com/watch?v=-azQ5FMzeXA[/embed]
Video: Glueing a set-neck
[embed]http://www.youtube.com/watch?v=eCj2AaLIa-E[/embed]
Youll want to install all of the tuners in the holes and align them to be as straight as possible
Hand-tighten all the nuts on the top of the headstock so the tuners hold in place.
Now well need to pre-drill a hold for the tuner screws. This is important as screws typically break at just the wrong moment and can be really difficult to remove without the right tools and know-how.
Now all the screws can be installed. Do this carefully and remember that slow and solid does the trick. Id recommend a manual screwdriver over a drill you dont want anything stripped out at this point.
With a lot of tuners you will now be ready to check all the nuts and screws and make sure theyre tight. Once youre done with this and have the bridge on, you can put your strings on.


 Reply With Quote
 What you can get away with tools
 Really nice to have
 Gavmeister
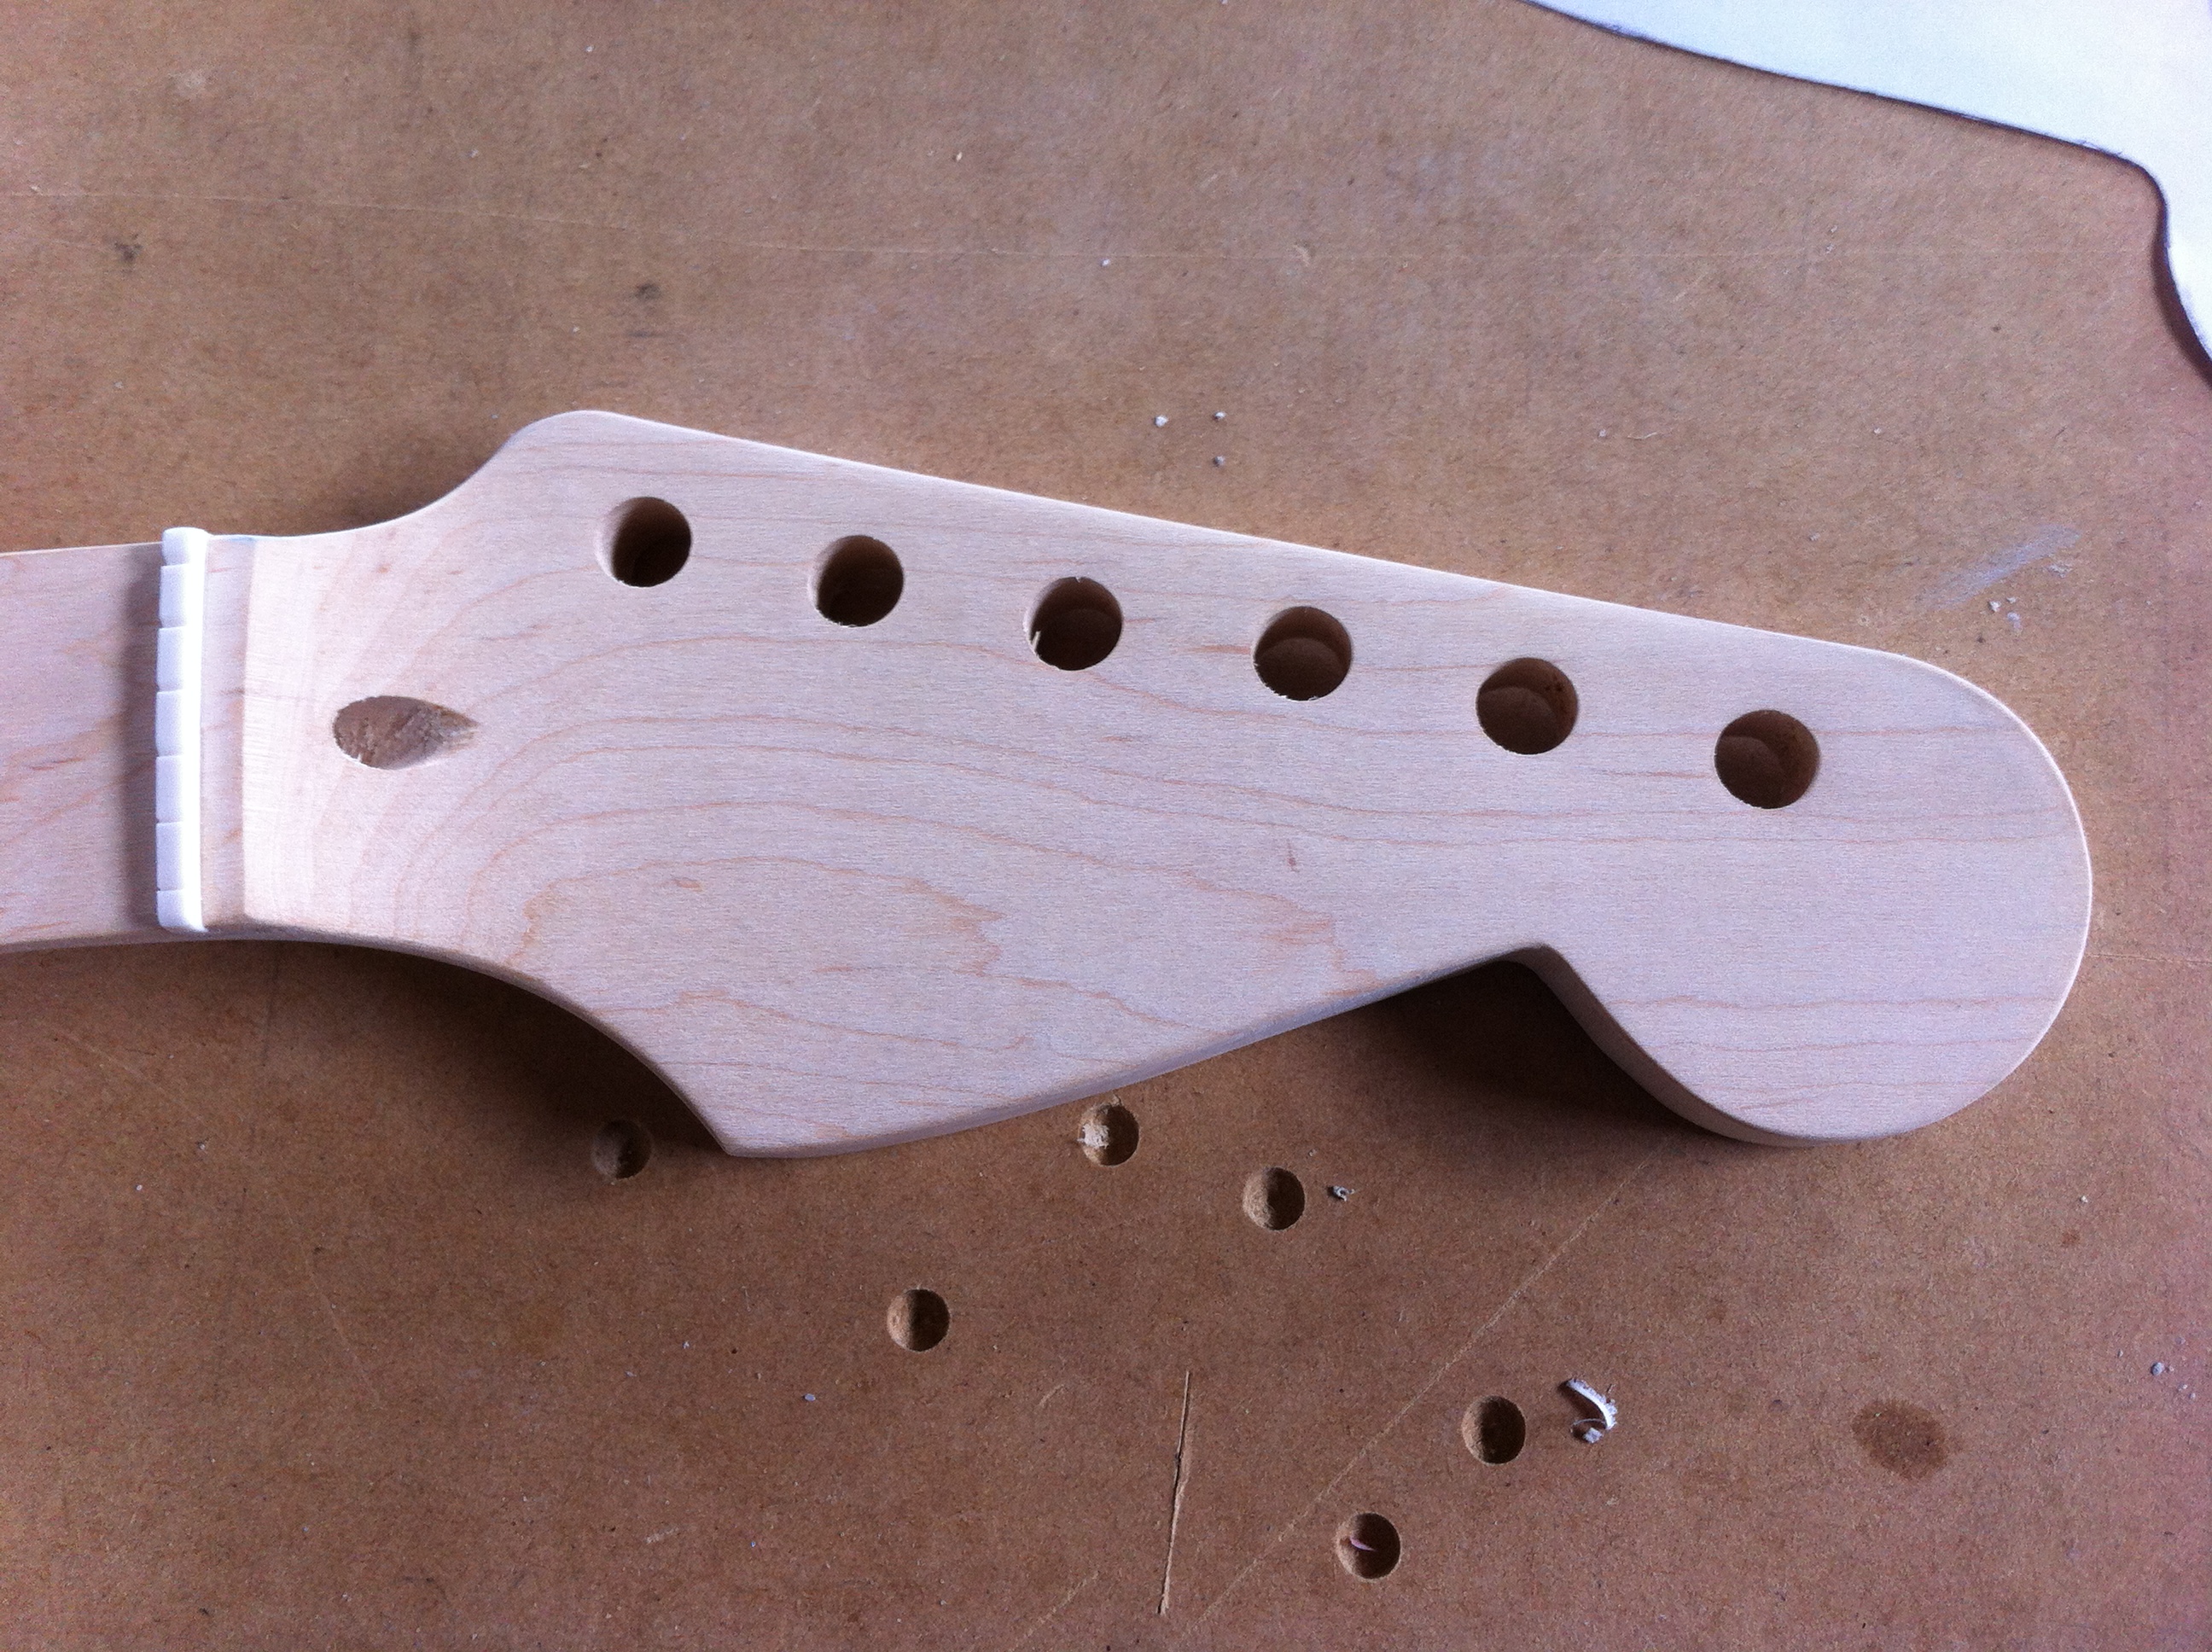


 Setting the Neck Angle (or Inclination)