Aren't you finished yet?


Aren't you finished yet?
Gavmeister

Thanks for that DB. Figured I'd get it all lined up and drilled before any sanding (oops too late - some 180 grit action tonight).
Couple of questions:
1. In trying to get the neck angle right, it looks like I'm going to need a shim at the nut end of the cavity. Is the card that comes with the bridge too thick? I end up with a little distance between the frets and the fretboard with the bridge at half mast. To get the full 20c experience it looks like two card shims.
2. Perennial one - how much sanding - i.e., when do you shift from 180 - 220 grit? Feels like I'm taking a lot of wood off - at least there's a lot of dust... Understand the need for a facemask of sorts.
Couple of glue spots on the back, but they seem to have gone pretty quickly with a brass brush and some 180 grit. Small filler spot on the back as well - may pop into Bunnings in the next few for some timbermate to replace it - alternatively, I could keep sanding..... so... anyone for the best timbermate for the basswood?
DB as for setup, I think I get the idea - (if everything lines up with the centre of the neck, it doesn't matter too much if that is marginally out from the centre of the body) but if you've got the time - I am a visual thinker so it wouldn't hurt.
Current builds:
GPB-4B: https://www.buildyourownguitar.com.a...548#post184548
Just had a thought (I know they do happen). Planning on giving a bone nut a go (was getting some stuff from Stewmac anyway so a piece of bone isn't much more)... Should I work on sanding the body / neck until I have a new nut in place?
Current builds:
GPB-4B: https://www.buildyourownguitar.com.a...548#post184548

if you are replacing the nut, you might even want to level the frets! make sure the neck is dead straight first, by lightly clamping a length of wood on the fretboard (make sure the neck is padded to prevent damage!), and it can give you a guide as to how straight the neck is!
Just waiting on the 12" radiussing block. That gave me the option of a bone nut... Just will need to make myself one of those radius guides in the meantime.
Current builds:
GPB-4B: https://www.buildyourownguitar.com.a...548#post184548

No probs Brendan,Quote from Brendan on May 6, 2013, 23:59
Thanks for that DB. Figured I'd get it all lined up and drilled before any sanding
Now to answer your questions.
1. There is no neck angle as such, you will find with these kits that the string height is quite good once you have the truss rod fine tuned (after stringing up and tuning) so no need to worry about this just yet.
2. With the sanding it is all visual! So keep going until you can see no more scratch marks, dents or gremlins deeper than the grade you are using.
Then go up a grade and do it all again.
Repeat until you have got to 240 grit.
3. I would go for the natural Timbermate as this will take the colour of the stain used quite nicely.
For checking the straightness of the neck, I would not use a piece of timber.
A good steel rule or even a long spirit level is more accurate as timber is never dead straight!
There is always a workaround for glitches, mistakes and other Guitar building gremlins.....
OK. I found that spare 10 minutes so here it is.
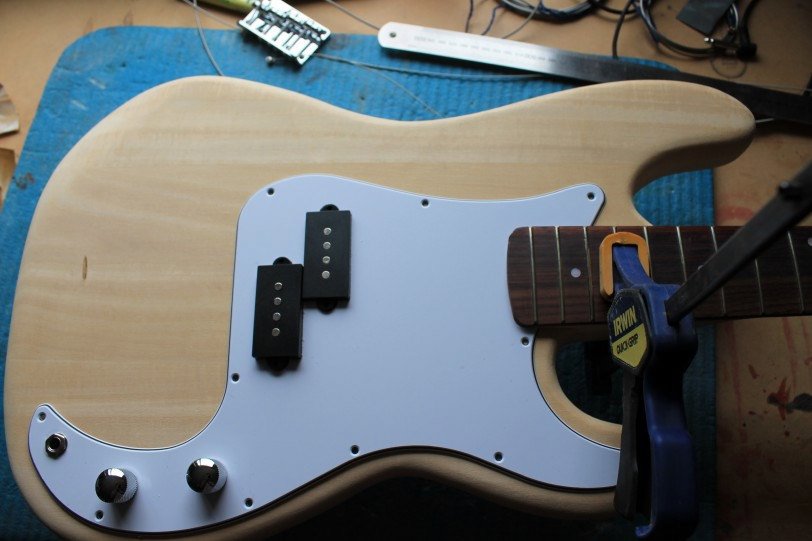
First, jam the neck in as far as it will go, clamp it and then drop the scratch plate on.(make sure your clamp is clear of the holes, as you may as well drill these when everything is set up)
This should have a fairly tight fit around the neck heel, mine did.
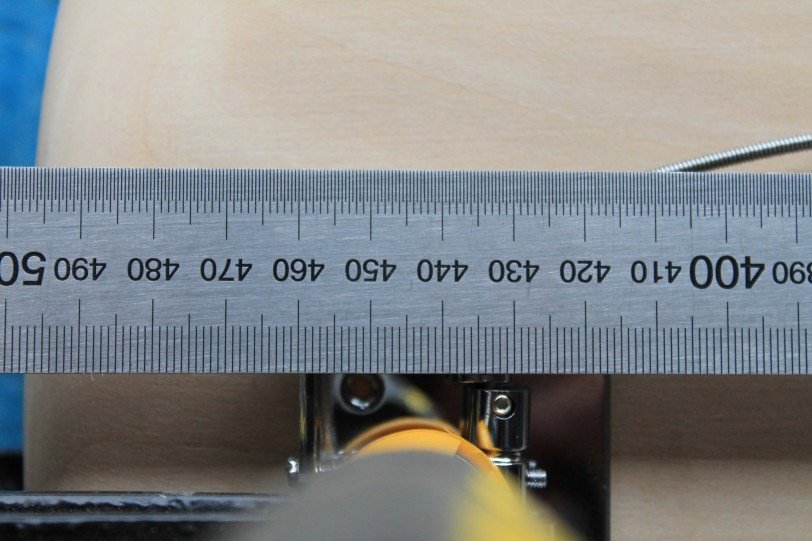
Then grab your bridge and trusty rule or tape measure, you will notice that I have got a measurement of 460mm to the out side edge of the bridge plate (measuring from the middle of the 12th fret wire). This gives you a good scale length with plenty of wiggle room and adjustment for intonation.
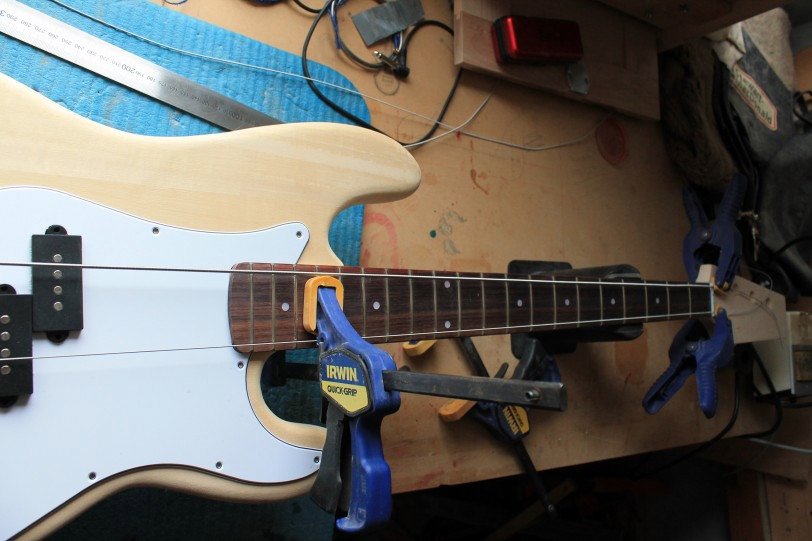
Clamp the bridge lightly and run the E and G strings through and clamp them on the headstock

There is always a workaround for glitches, mistakes and other Guitar building gremlins.....
When you have got this sorted, you will be able to move the bridge side to side until you have the strings equally spaced along the neck.
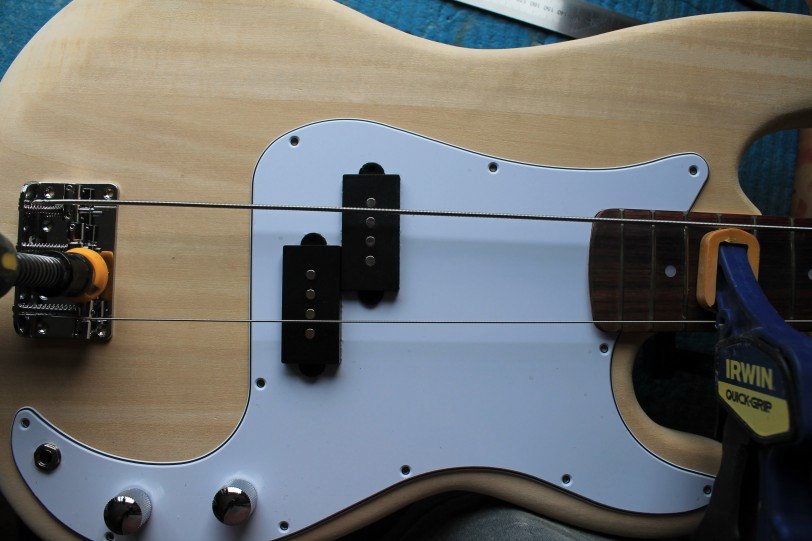
Now have a look to see how well the strings are placed over the pups. You will be able to move the scratch plate enough to get these lined up perfectly.
If you have problems getting the strings and pup alignment right, you will notice that with some careful work with a half round file at the neck you will be able to rectify this.
Once you are satisfied, check everything again and then once more!
Drill the bridge mount holes, pick guard holes and finally the neck holes.
Now it is time to go fully sick with sanding and finishing!
There is always a workaround for glitches, mistakes and other Guitar building gremlins.....
Thanks DB - gave it a go tonight - not happy with the outcome - was farting around with the wrong tools - trying to keep the strings in place with tape, etc. Figured I'd get a night's sleep, then head out to Bunnings and get the right tools and try again tomorrow - worked on the headstock and cut out a design I'm pretty happy with - scored a neck with some nice grain in the headstock that I can leverage and come up with something I think I'll love.
Thanks DB for the photos - make all kind of sense - if anything they seemed easier (too easy?) than I expected (until I pfaffed around with the wrong tools :x )...
Anyway - time wasn't wasted - I'm getting to know the guitar more and more - and being able to focus on the headstock now is good as it will help with the tone of the rest of the guitar. (photos tomorrow? - wet outside and I'm wussing out).
Current builds:
GPB-4B: https://www.buildyourownguitar.com.a...548#post184548
Nice mini-article DB, I see the SM Guitar Tech Screwdriver Set you own, I got a mate who has one and it makes everything so much easier, I have one in my order that is waiting to get here!

 Reply With Quote
![[url=https://www.facebook.com/kellysgutiars]](image.php?s=340b859b7892a9868252087b131d7fed&u=1285&type=sigpic&dateline=1444110346)